
When life gets hectic—and let’s face it, when isn’t it hectic?—I always crave something satisfying that doesn’t demand hours at the stove. That’s when Japanese comfort food saves the day! Honestly, my go-to answer for a perfect, portable snack or a genuinely satisfying Quick Japanese Lunch is the humble yet mighty tuna onigiri. Forget complicated rolls; these rice balls are your shortcut to deliciousness. Here at MDLATDMM, my goal, just like when I was finally mastering my grandmother’s pot pie, is to take timeless traditions and turn them into recipes that actually work in your real life. Trust me, this recipe for creamy, flavor-packed tuna onigiri proves that world-class flavor can be ready faster than you can decide what to order out!
- Why This Spicy Tuna Onigiri Recipe Is Your New Favorite Easy Asian Snack
- Essential Ingredients for Authentic Tuna Onigiri Recipe
- How to Make Onigiri: Step-by-Step Tuna Onigiri Instructions
- Expert Tips for Perfect Tuna Onigiri Success
- Storage and Keeping Your Tuna Onigiri Fresh
- Onigiri Filling Ideas Beyond Spicy Tuna Onigiri
- Frequently Asked Questions About Tuna Onigiri
- Estimated Nutritional Data for Tuna Onigiri
- Share Your Homemade Japanese Rice Balls
Why This Spicy Tuna Onigiri Recipe Is Your New Favorite Easy Asian Snack
Look, I get it. You want something tasty, but you don’t have all afternoon. That’s why this tuna onigiri recipe became my absolute staple for meal prep. It’s designed for speed and portability without sacrificing that amazing, savory flavor that hits the spot.
Here are the game-changers for why this needs to be in your rotation:
- It qualifies as a fantastic Homemade Sushi Alternative, but it takes zero rolling skills.
- It’s one of the best Japanese lunch options for tossing into a bento box.
- It’s incredibly forgiving, which means even if you’re new to Asian Snack recipes, you’ll nail this the first time.
Quick Prep Time for Your Tuna Onigiri
Listen to this—the total time listed is just 15 minutes! Seriously, you can whip this up faster than you can decide what to watch on TV. This makes it a lifesaver when you need a last-minute Quick Weeknight Dinner or a grab-and-go lunch the next morning. You don’t even need to cook anything new since we’re using ready-made rice!
Perfecting the Creamy Tuna Mayo Onigiri Filling
The filling is where the magic happens that makes these way better than just plain tuna. Forget watery canned tuna; we drain it well and mix it up right. If you get your hands on some Kewpie mayonnaise—and trust me, you should—it brings this incredible creamy richness. For the spicy version, we balance that creaminess with a decent kick of Sriracha. That perfect balance of fat, acid, and heat is what sets this Spicy Tuna Onigiri filling apart!
Essential Ingredients for Authentic Tuna Onigiri Recipe
Okay, let’s talk ingredients! You know I’m all about making sure your recipe works every single time, and that starts with using exactly what you need. The beauty of this Tuna Onigiri Recipe is that most of this is sitting in your pantry already, which keeps our prep time lightning fast!
Precision is key here, especially with the rice. You don’t want a sticky, gummy mess; you want rice that holds its shape but is still soft when you bite into it. These simple items ensure we get that perfect flavor and texture!
For the Savory Rice Balls
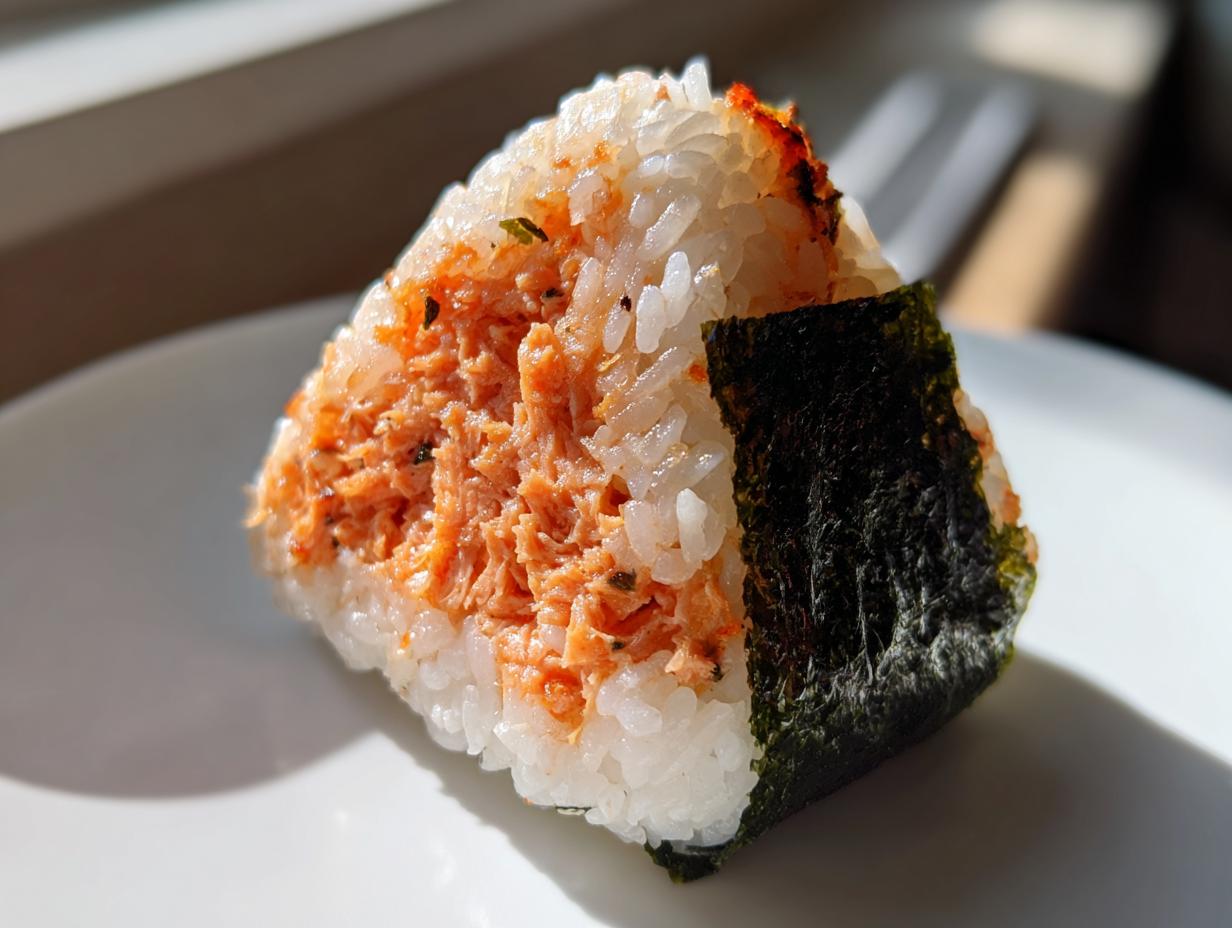
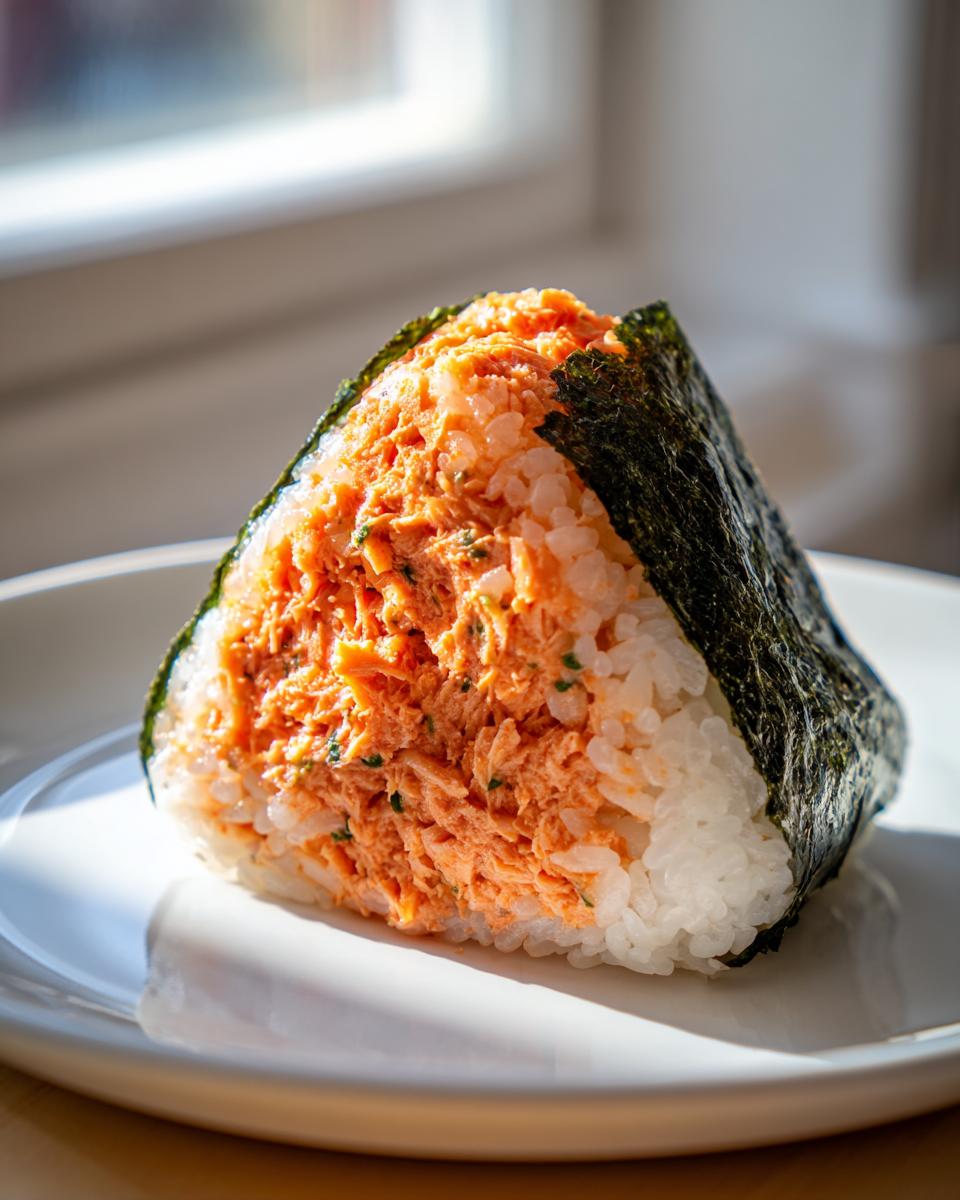
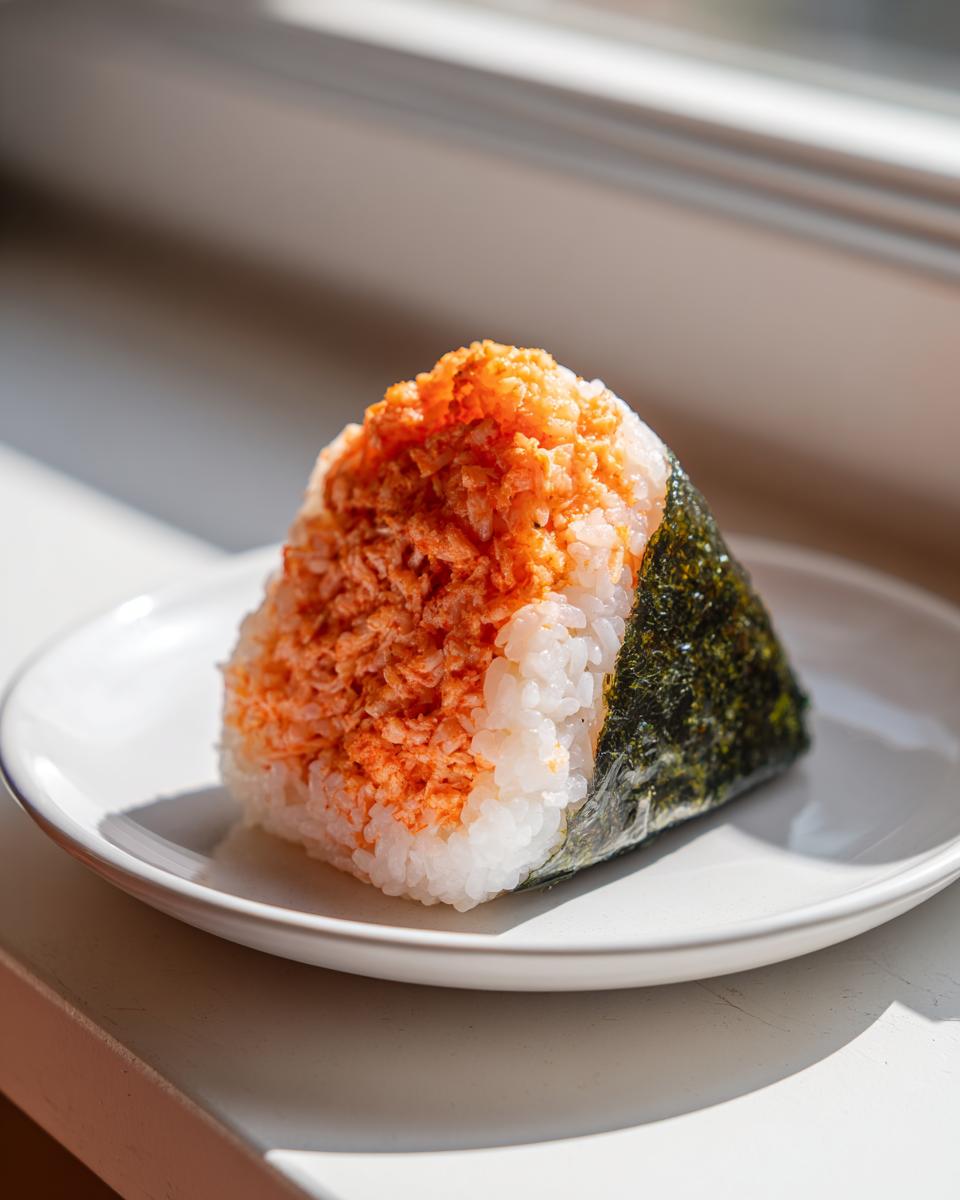
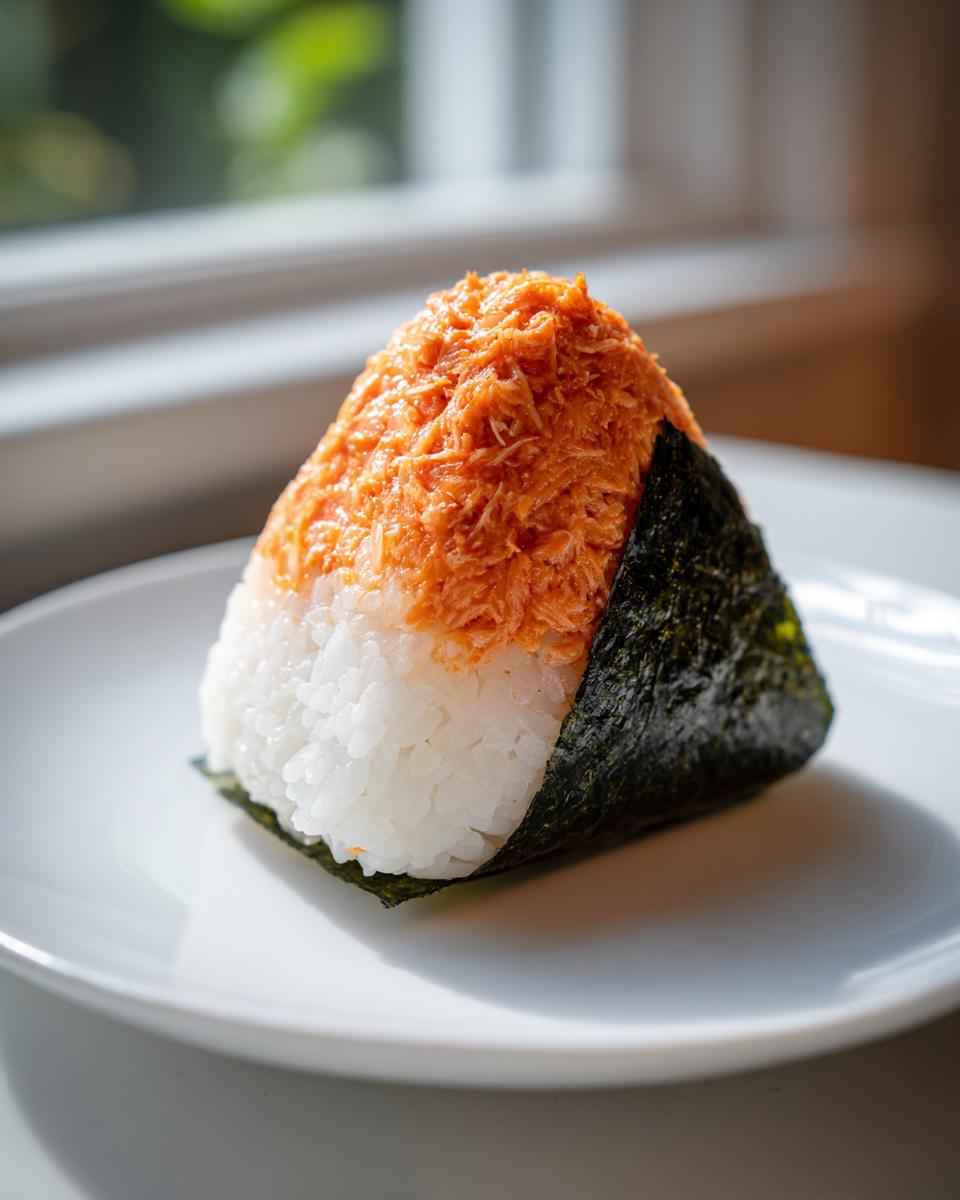
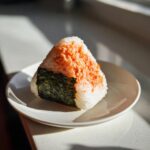
First up is the foundation: the rice. You absolutely must use short-grain Japanese rice—sushi rice works perfectly because it has the right starch level to stick together. We are only seasoning this gently with plain salt so it doesn’t fight the filling. And don’t forget the nori! It needs to be cut into strips; those are what keep your fingers clean while you’re eating this delicious Handheld Japanese Food.
- 2 cups cooked short-grain Japanese rice (must be slightly warm)
- 1 teaspoon salt (mixed into the rice)
- 4 sheets nori seaweed, cut into strips
For the Spicy Tuna Onigiri Filling
Ah, the star—the filling! This is what elevates it into that addictive Spicy Tuna Onigiri flavor profile everyone craves. Crucially, make sure your canned tuna (Canned Tuna Recipe friends, rejoice!) is drained until it’s rock hard dry. That prevents our filling from getting soupy and making the rice fall apart.
- 1 (5 ounce) can tuna, drained exceptionally well
- 3 tablespoons mayonnaise (Kewpie mayo, if you have it—it’s richer!)
- 1 to 2 teaspoons Sriracha (start with one if you’re shy about spice!)
- 1/2 teaspoon soy sauce
- Optional: A sprinkle of sesame seeds for garnish
How to Make Onigiri: Step-by-Step Tuna Onigiri Instructions
Alright, now for the fun part! This is where we turn those simple ingredients into perfect, portable Tuna Onigiri. Don’t let the shaping intimidate you; with warm rice and wet hands, it’s actually incredibly easy. Think of this as a very forgiving form of cooking. If you’re looking for other quick ideas to pack up for later, check out my guide on easy breakfast ideas, because these rice balls work morning, noon, or night!
Preparing the Rice and Filling
First things first, we need to handle the temperature. You want your cooked short-grain rice still warm, but cool enough that you can comfortably touch it without burning yourself. Right away, sprinkle that teaspoon of salt over the rice and gently fold it in. We’re seasoning the grain itself! While the rice cools just a touch, mix up that filling in a separate bowl. Make sure you combine the drained tuna, mayonnaise, Sriracha, and soy sauce until it’s completely creamy. That creamy mixture is the secret to a flavor punch right in the center of your rice ball.
Shaping Your Handheld Japanese Food
This technique is key to avoiding hard, dense lumps of rice. Grab a small bowl of water—this is vital! Wet both your hands completely, and then sprinkle a tiny pinch of salt into the water, or rub it directly onto your palms. The wet, salted hands stop the rice from sticking like glue.
Now, take about half a cup of that seasoned rice and gently press it into a rough patty in one palm. Spoon just a dollop (about a tablespoon) of that spicy filling right in the middle. Here’s the crucial part: fold the rice up and around the filling, using light pressure to seal it in. You want a firm hold, but *never* squeeze hard! We are aiming for a gentle hug, not a death grip, which ensures a fluffy interior. Shape it into your preferred form—triangle, ball, or cylinder—wrap a strip of nori around the bottom to hold it tidy, and you’ve mastered the art of How to Make Onigiri! If you want more tips on creating these perfect savory rice balls, I love this guide on Tuna Onigiri Recipe.
Expert Tips for Perfect Tuna Onigiri Success
You’ve successfully shaped a few Tuna Onigiri, and they are perfect! But what if you want a different flavor profile, or maybe you want to turn those leftovers into something warm and crispy? Over the years, I’ve learned a few tricks that take these rice balls from good to absolutely amazing. These aren’t just steps; they’re little adjustments that really boost the overall quality, which is important when you’re trying to add reliability to your quick weeknight dinners!
Making Classic Tuna Mayo Rice Balls (Non-Spicy)
Not everyone loves the heat, and that’s totally fine! The classic convenience store style, the original Tuna Mayo Rice Balls, is pure creamy gold. If you want to skip the Sriracha for a kid-friendly snack or just prefer that traditional flavor, it’s a super simple swap. You just need to go heavy on the mayonnaise.
Instead of using only 3 tablespoons of mayo plus Sriracha, use a full 4 tablespoons of mayo. If you really want that authentic, deeply savory note, use Kewpie mayo exclusively here. That slightly sweet and tangy profile is what made those Japanese convenience store snacks so famous. It’s still going to be creamy, satisfying, and perfect for those easy Asian snack cravings!
Transforming into Yaki Onigiri Recipe
This is one of my absolute favorite things to serve when I have leftover rice balls that are starting to get a little stiff—it magically revives them! We’re turning our soft Tuna Onigiri into a crispy, savory toasted snack known as the Yaki Onigiri Recipe. It’s honestly addictive.
You need to prep a simple glaze first. Just whisk together a splash of soy sauce with a tiny bit of water and maybe a half teaspoon of sugar if you like a sweeter crunch. Lightly brush the outside surfaces of your finished rice balls with this mixture. Then, heat just a little oil in a non-stick pan over medium heat. Place the onigiri in the pan and let them sit for about 3 to 4 minutes per side. You’re looking for that beautiful golden-brown, slightly crusted exterior. The glaze caramelizes, creating this incredible textural contrast with the still-creamy center. It’s heavenly!
Storage and Keeping Your Tuna Onigiri Fresh
So, you made a huge batch of these incredible Spicy Tuna Onigiri, and now you have leftovers! That happens to me constantly because they are just too satisfying to stop eating. But we have to be smart about storage, especially because of the nori wrapper.
The main enemy of a great Japanese Rice Ball is moisture migration. If you wrap your onigiri tightly in plastic wrap or foil for later, that crisp nori sheet you lovingly placed on the rice starts to get soft and almost chewy within a few hours. It’s just not the same delicate crunch, right?
If you are making these for a Meal Prep Snacks session, here is what I do:
- The Nori Dilemma: Don’t wrap the nori until you are ready to eat it! If you’re packing them for a lunchbox tomorrow, leave the nori off entirely. Keep the rice ball wrapped tightly in plastic wrap (this helps keep the shape tight), and then just wrap your nori strips separately in a small zip-top bag. You wrap the nori around the rice ball right before you eat it. That way, you get that perfect crisp snap every single time.
- Refrigeration: Rice gets hard when it’s cold, plain and simple. You can store the rice balls (unwrapped or lightly plastic-wrapped) in the fridge for about two days, but I promise they are best eaten the day they are made.
- The Reheat Trick: If they feel stiff the next day, don’t worry! You can bring them back to life easily. Just dampen a paper towel slightly, wrap the rice ball loosely in it, and microwave it for about 10 to 15 seconds. This reapplies just enough moisture to soften the rice back up. If you made the Yaki Onigiri Recipe version, pan-frying them again works even better than microwaving!
Honestly, they are so quick to make, prepping them fresh in the morning is always worth the minimal effort for the best handheld experience!
Onigiri Filling Ideas Beyond Spicy Tuna Onigiri
Now, I know the Spicy Tuna Onigiri is probably going to be your new obsession, but that’s the beauty of this whole Japanese Rice Balls concept—it’s endlessly customizable! Once you master the shaping, you owe it to yourself to explore the pantry for other great fillings. These rice balls are fantastic vehicles for all sorts of savory flavors, making them perfect for keeping your bento box ideas interesting!
When you’re thinking up new Onigiri Filling Ideas, think simple, salty, and a little bit acidic. You still want to drain whatever you use well, just like we did with the tuna, so you don’t have sogginess issues!
Here are a few quick swaps I love when I’m trying to clear out the fridge:
- Salted Salmon Flakes: This is such a classic flavor. You can use grilled or baked salmon that’s been seasoned heavily with salt, then just flake it up really small. It mixes beautifully with a tiny splash of soy sauce for extra umami depth.
- Umeboshi (Pickled Plum): If you like a sour, tangy punch, this is your way to go! These little plums are intensely salty and sour, so you only need a tiny sliver (maybe half a plum, pitted and minced) right in the center of the rice. It keeps for ages in the pantry and adds such a bright flavor contrast to the plain rice.
- Shredded Kombu (Seaweed): You can buy pre-seasoned, shredded kombu (called Tsukudani) in small jars, and it’s amazing. It’s slightly chewy, savory, and just packs such a huge flavor wallop without adding any liquid. It’s an excellent, shelf-stable option for those days you don’t have fresh ingredients on hand.
See? Once you get the hang of making those savory rice balls, it’s just about matching the filling to your craving that day!
Frequently Asked Questions About Tuna Onigiri
I always get questions once people start trying to make these at home! It’s natural; those little details make the difference between a good Tuna Onigiri and a truly great one. Let me clear up a few things so you feel totally confident making these!
Can I use regular rice instead of short-grain sushi rice?
Honestly, I wouldn’t recommend it if you want that perfect, moldable texture. Regular long-grain rice, like Basmati or Jasmine, just doesn’t have enough starch. They’ll end up falling apart when you try to shape them. You need that slightly gummy, sticky quality of short-grain rice to hold onto the filling. If you don’t have sushi rice, just make sure you use the stickiest short-grain white rice you can find. This is key for any Japanese Rice Ball!
How do I stop the rice from sticking to my hands?
This is the number one hurdle people face when learning How to Make Onigiri! The trick is moisture and salt. Before you touch the rice, get your hands wet—really wet—with plain water, and then immediately rub just a tiny pinch of salt into your wet palms. This creates a barrier. The salt also helps season the outside slightly! This small step is why my Quick Weeknight Dinner rice balls always look so clean and neat.
Are Tuna Mayo Rice Balls the same as sushi?
Nope! That’s a great question, because they use similar ingredients. The biggest difference is that Tuna Mayo Rice Balls use seasoned, cooked rice and are meant to be eaten at room temperature or slightly warm—there’s no raw fish involved here, which makes it a super easy Asian snack! Sushi rice is usually seasoned with vinegar, sugar, and salt, and it’s typically served cold or room temp, but the rice *in* onigiri is usually just lightly salted. Plus, traditional sushi involves rolling, which we are happily skipping!
Can I make the filling ahead for my Bento Box Ideas?
Yes, you absolutely can! You can make the Spicy Tuna Onigiri filling up to two days ahead of time and keep it covered tightly in the fridge. Just remember to drain off any liquid that pools on top before you mix it into your rice later. Having the filling ready is the real secret to whipping these up in just 15 minutes!
Estimated Nutritional Data for Tuna Onigiri
Okay, let’s get real for a moment. When I created this recipe, speed and flavor were my main drivers, not counting every single little calorie. But I know many of you are prepping these little gems for lunch boxes, so you want a general idea of what you’re eating! Please keep in mind that these numbers are just estimates based on the core ingredients listed—the exact measurements of mayo or Sriracha you use will shift things around a bit.
This breakdown assumes you are eating one average-sized rice ball made with the spicy filling. Think of this as a helpful guide, not a hard-and-fast rule for your tracking app. If you use high-fat Kewpie mayo, your fat count will be higher than if you use traditional American mayo, just so you know!
Based on the recipe yield of four rice balls, here is the average breakdown per serving:
- Calories: Around 220 per rice ball. That’s fantastic for a satisfying snack!
- Protein: Roughly 7 grams, thanks to that little bit of canned tuna.
- Carbohydrates: About 32 grams, which is mainly coming from that wonderful short-grain rice.
- Fat: Generally averages around 8 grams. Remember, this is where your mayo choice really makes a difference!
They are seriously balanced for such a simple, handheld Japanese food. You get complex carbs for energy and just enough protein to keep your afternoon slump at bay. I still stand by these being one of the best easy meal prep snacks out there!
Share Your Homemade Japanese Rice Balls
Well, that’s it! You’ve officially mastered making perfect, portable Tuna Onigiri. Whether you went spicy or stuck with the classic creamy Tuna Mayo Rice Balls, I hope you found the process just as calming and rewarding as I do. For me, every time I shape one of these, I feel that connection back to my own kitchen roots, and I’m so happy you get to experience that too.
Now that you’ve made your first batch of this wonderful Handheld Japanese Food, I would absolutely love to see what you created! Did you stick with the triangle shape, or did you make little perfect spheres? Head over to Instagram or Pinterest and tag me so I can cheer you on!
If this recipe made your dinner prep easier, or if you think your family deserves this simple joy, please leave a rating right here on the page. Five stars lets others know that this Tuna Onigiri Recipe is reliable, easy, and tastes just like home. If you’re looking for more simple, honest ways to cook, you can always find my story and philosophy over on my About Page. Happy eating!
PrintEasy Spicy Tuna Onigiri (Japanese Rice Balls)
Make quick, portable Japanese rice balls filled with a creamy, spicy tuna mixture. This beginner-friendly recipe is perfect for a fast lunch or snack and uses simple pantry ingredients.
- Prep Time: 15 min
- Cook Time: 0 min
- Total Time: 15 min
- Yield: 4 servings 1x
- Category: Snack
- Method: Hand Shaping
- Cuisine: Japanese
- Diet: Vegetarian
Ingredients
- 2 cups cooked short-grain Japanese rice (sushi rice)
- 1 teaspoon salt (for rice seasoning)
- 1 (5 ounce) can tuna, drained well
- 3 tablespoons mayonnaise (Kewpie mayo recommended)
- 1 to 2 teaspoons Sriracha (adjust for spice level)
- 1/2 teaspoon soy sauce
- 4 sheets nori seaweed, cut into strips
- Optional: Sesame seeds for garnish
Instructions
- Season the warm cooked rice by sprinkling the salt over it. Mix gently with a rice paddle or spoon until the salt is distributed. Let the rice cool slightly until it is warm enough to handle.
- Prepare the spicy tuna filling: In a small bowl, combine the drained canned tuna, mayonnaise, Sriracha, and soy sauce. Mix until the filling is creamy and well combined.
- Wet your hands lightly with water and sprinkle a pinch of salt onto your palm. This prevents the rice from sticking.
- Take about 1/2 cup of seasoned rice and flatten it into a rough circle or oval shape in your palm.
- Place about 1 tablespoon of the spicy tuna filling in the center of the rice.
- Gently fold the rice around the filling, pressing lightly to seal the filling inside. Shape the rice into a triangle, ball, or cylinder shape. Do not press too hard, or the rice will become dense.
- Wrap a strip of nori seaweed around the bottom or side of the shaped rice ball.
- If desired, sprinkle sesame seeds over the rice ball.
- Repeat with the remaining rice and filling. Serve immediately or wrap individually for a portable snack or bento box lunch.
Notes
- For a classic, non-spicy Tuna Mayo Onigiri, skip the Sriracha and use 4 tablespoons of mayonnaise instead of 3.
- If you want to make Yaki Onigiri, lightly brush the outside of the finished rice balls with a mixture of soy sauce and a little water, then pan-fry them in a lightly oiled skillet until golden brown and slightly crispy on the outside.
- Use freshly cooked, slightly sticky short-grain rice for the best shaping results.
Nutrition
- Serving Size: 1 rice ball
- Calories: 220
- Sugar: 1
- Sodium: 350
- Fat: 8
- Saturated Fat: 1.5
- Unsaturated Fat: 6.5
- Trans Fat: 0
- Carbohydrates: 32
- Fiber: 1
- Protein: 7
- Cholesterol: 15