
Oh, that moment when only the perfect marriage of salty peanut butter and rich, velvety chocolate will do! I totally get it. That’s why I’m so excited to share this recipe for homemade peanut butter cups. Forget the wrapper; these are the ultimate Reese’s copycat recipe you’ve been waiting for. These are completely no-bake, which means we get that fantastic flavor faster, and they’re unbelievably easy. Here at MDLATDMM, I’m Maddie Thompson, and I promise that what you’re getting today is a tried-and-true method. We’ve tested this until it’s foolproof, making sure it works perfectly for your busy life! If you love simple dessert cups like this, check out my collection of delicious dessert recipes.
- Why You Will Love These Homemade peanut butter cups
- Gathering Ingredients for Perfect peanut butter cups
- The Simple Steps to Make peanut butter cups
- Tips for Making the Best peanut butter cups Every Time
- Variations on Classic peanut butter cups
- Storage and Serving Suggestions for Homemade Candy Recipes
- Frequently Asked Questions about peanut butter cups
- Estimated Nutritional Information for peanut butter cups
- Share Your Homemade Candy Tutorial
Why You Will Love These Homemade peanut butter cups
If you’re hesitating, thinking homemade candy is too fiddly or complicated, stop right there! I developed this recipe because I wanted that exact, perfect bite we all crave, but without standing over a hot stove trying to temper chocolate or fighting with weird silicone molds. Seriously, these are the real deal.
- It’s Absolutely No-Bake: You mix the filling, melt the chocolate—that’s it! This is one of the best quick sweet treats you can whip up when a craving hits hard.
- Better Than Store-Bought: I truly believe these taste even better than the name-brand stuff. The filling is creamier, and you control the quality of the chocolate. It’s a genuine Reese’s copycat recipe that shines!
- Uses Your Standard Muffin Tin: No need to rush out and buy specialized molds! We use simple paper liners in a regular muffin tin cooking with karli. It makes cleanup a breeze, too.
- Speedy Prep Time: Between the mixing (20 minutes!) and the quick chill, these are ready to go fast. They are the perfect 5 ingredient peanut butter dessert for when you need results quickly.
Gathering Ingredients for Perfect peanut butter cups
Okay, before we get messy, let’s talk ingredients. Because these peanut butter cups are so simple—honestly, just six core items—the quality really matters here! I always lay everything out on the counter first, like a little mise en place station, so the mixing goes smoothly and quickly. I really recommend using creamy peanut butter for that authentic, silky-smooth texture that makes this a top-tier homemade peanut butter cups experience.

For the Creamy peanut butter cups Filling
For the filling, we need 1 cup of creamy peanut butter, half a cup of butter that is completely softened, 2 whole cups of powdered sugar because we don’t want any graininess, and just a half teaspoon of vanilla extract. Pro-tip: make sure your butter is truly room temperature—soft enough that your finger leaves an easy dent, but it shouldn’t be oily or greasy. That’s the secret to a non-crumbly filling!
For the Chocolate Coating
For the coating, you’ll need 12 ounces of semi-sweet chocolate chips. I also always toss in a tablespoon of coconut oil, and trust me on this one! It doesn’t change the flavor much, but it helps the chocolate melt down into that gorgeous, shiny liquid that coats perfectly. It stops the chocolate from setting up too hard or cracking, giving you that satisfying snap.
The Simple Steps to Make peanut butter cups
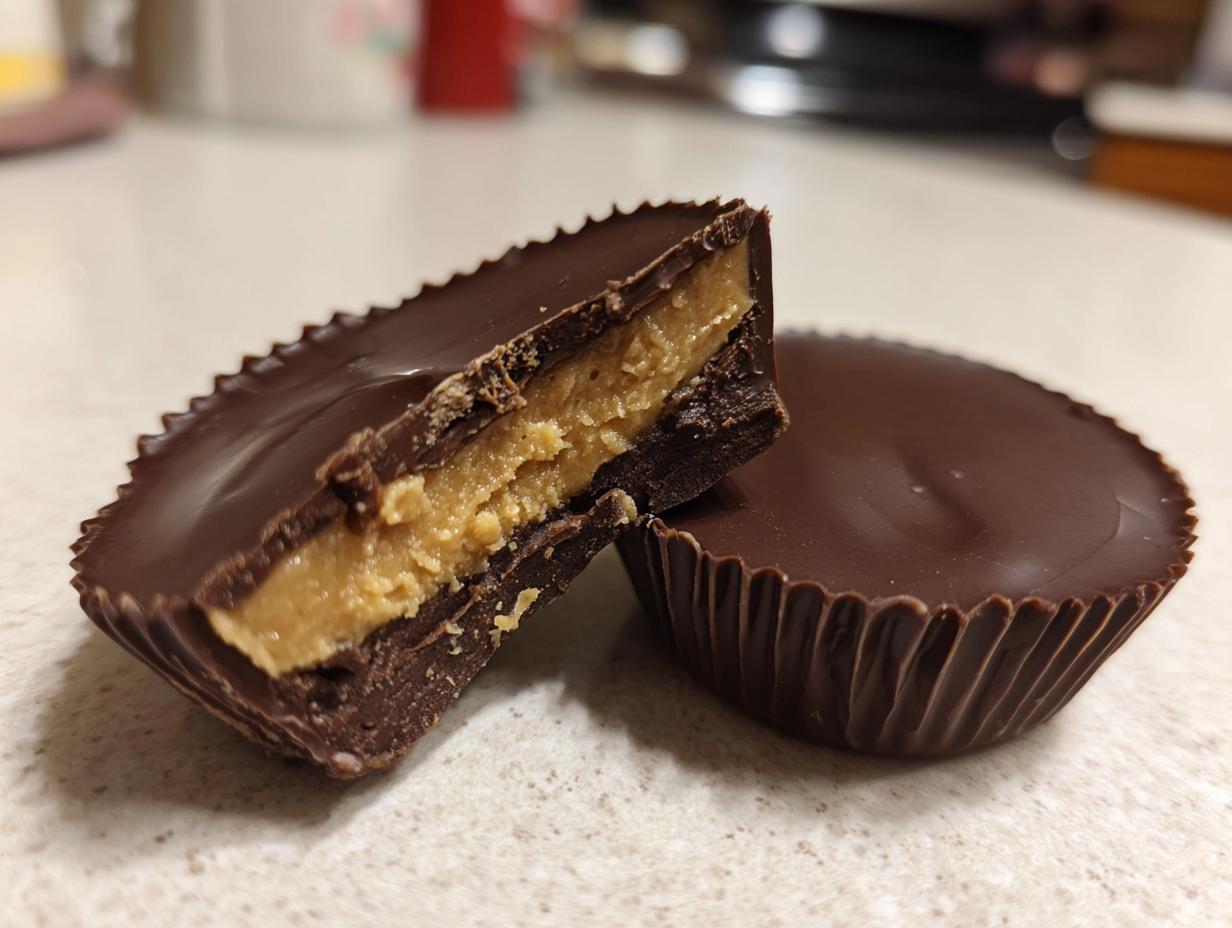
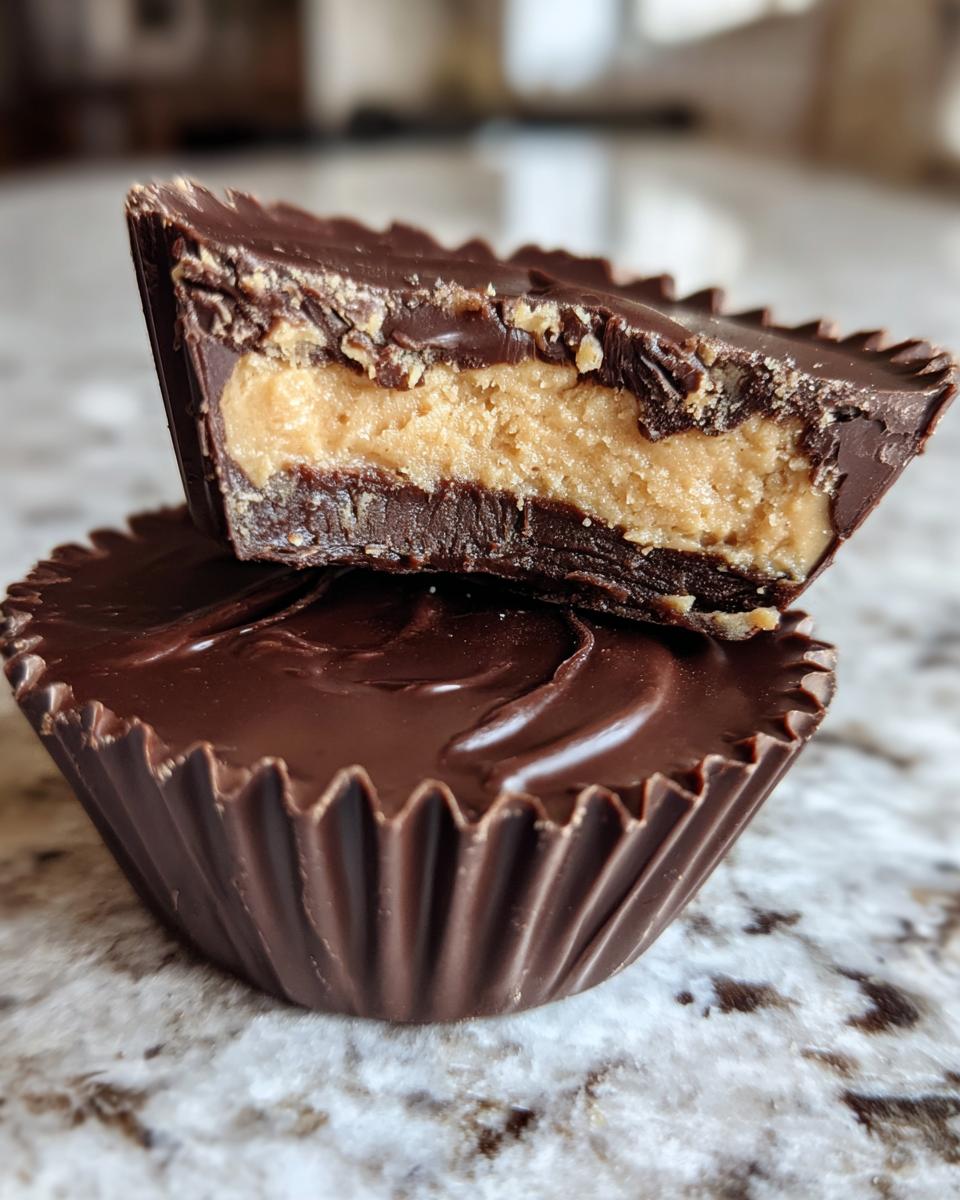
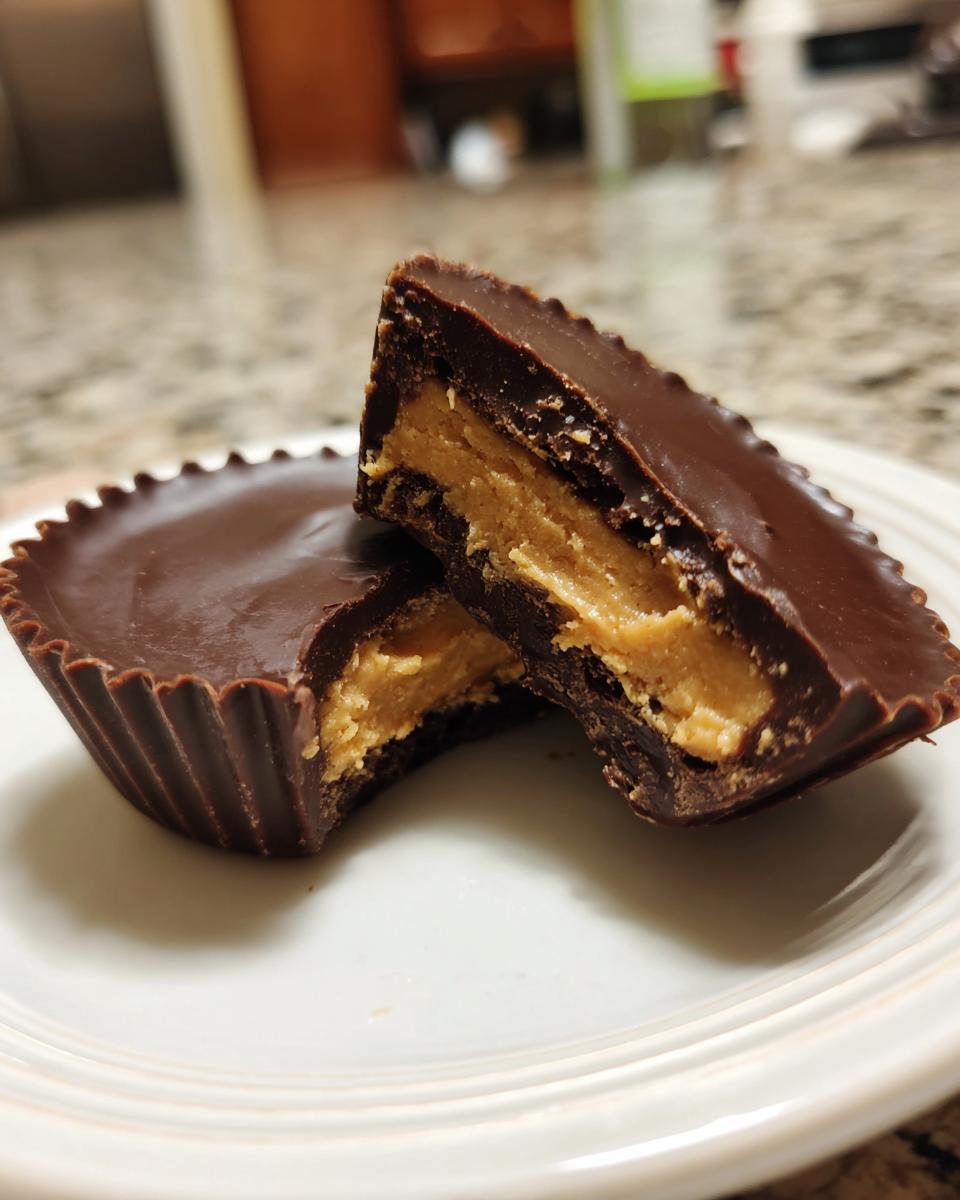
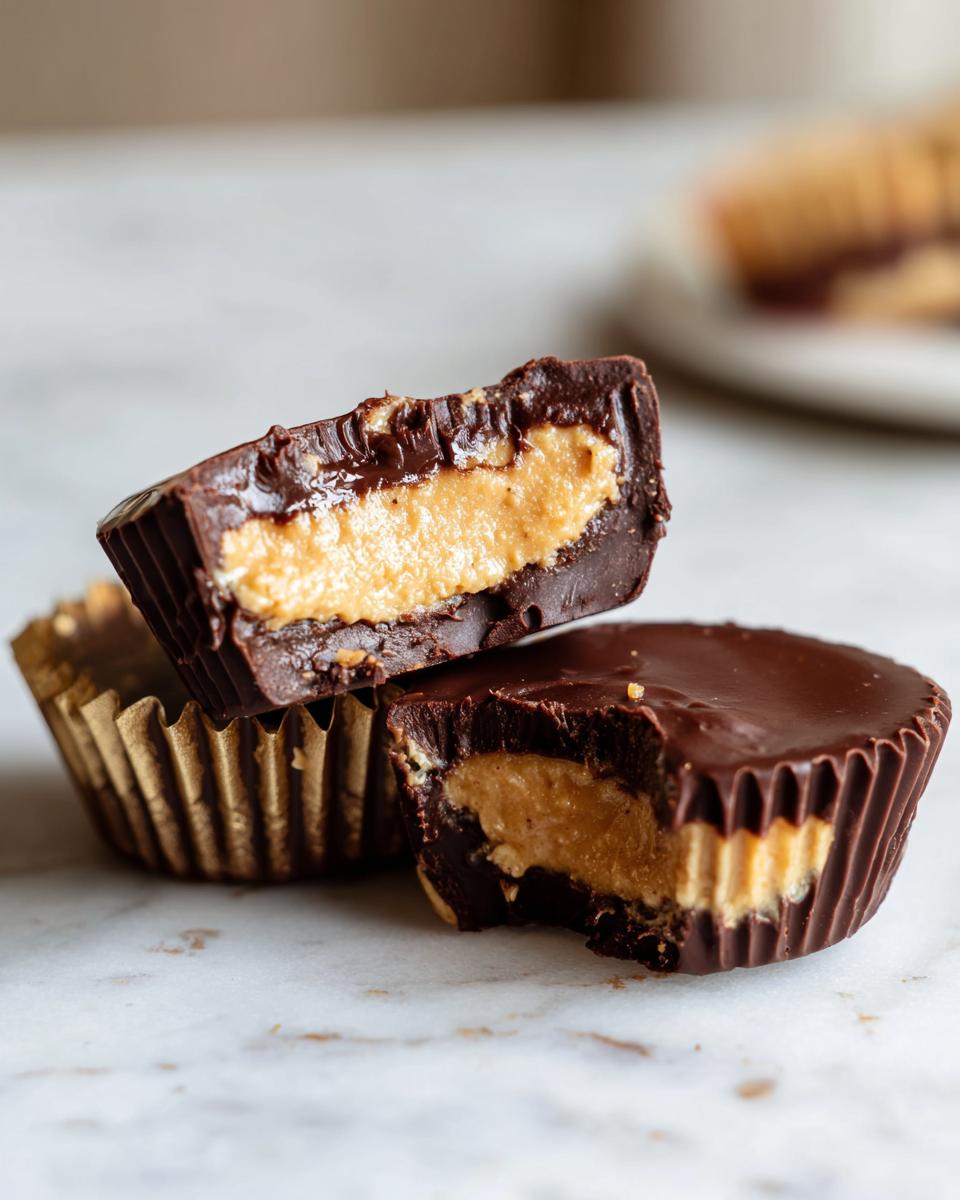
Alright, here’s where the magic happens! Because this is a no bake candy recipe, we spend all our time layering and chilling, which is honestly the easiest part of the whole process. Don’t worry about making these look factory-perfect right away; they’ll smooth out when they chill. We are going to use standard paper liners right in our muffin tin, just like we do for cupcakes. Trust me, following these steps in order is key to getting that structure right, just like the famous ones we’re copying! If you’re looking for more easy sweets, don’t forget to check out my other delicious dessert recipes.
Preparing the Base Layer of peanut butter cups
First things first, line up your 12-cup muffin tin with the paper liners—this is non-negotiable for easy removal! Next, take that dreamy filling you just mixed up. We are going to use about two-thirds of that peanut butter mixture for the base layer. Press it firmly and evenly into the bottom of each liner. You want a nice, solid foundation before the chocolate goes on. Once you’ve got the bases set, pop that whole tin into the freezer for just 15 minutes. This little chill stops the peanut butter from oozing up into our chocolate layer later on. It’s a tiny step that makes a huge difference for layering!
Melting Chocolate and Layering
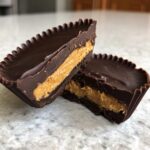
While that base is hardening up its little foundation, melt your chocolate chips along with that tablespoon of coconut oil if you’re using it. Do this in short bursts—30 seconds at a time in the microwave—stirring well between each one until it’s totally smooth and glossy. Pull the tin out of the freezer. Spoon enough melted chocolate over the base layer to cover it completely. Now, take the remaining peanut butter filling and place just a small spoonful right in the center of that chocolate layer. Now, cover that peanut butter dollop completely with the rest of your luscious melted chocolate. Make sure no peanut butter peeks out! This layering technique is what makes them look just like the Reese’s copycat recipe we all love.
Chilling and Finishing Your Homemade peanut butter cups
Once everything is perfectly sealed up with the top layer of chocolate, they need a good rest. Pop the entire muffin tin back into the refrigerator—no freezer this time—and let them chill untouched for at least one hour. You want the chocolate to be completely firm so they hold their shape. When you’re ready to serve these incredible homemade peanut butter cups, just peel that paper liner right off. That’s it! You’ve nailed one of the best homemade candy tutorials!
Tips for Making the Best peanut butter cups Every Time
I’ve made these probably a million times since my first batch, and I’ve picked up a few tricks to make sure your peanut butter cups turn out exactly how you want them—creamy filling, snappy chocolate. We aren’t going to worry about full tempering here; that’s too fussy for a quick easy chocolate chip cookies style treat! We’re aiming for that satisfying snap, not fussy candy making.
Achieving Smooth Chocolate Coating for peanut butter cups
When you melt your chocolate chips, temperature control is everything, even in the microwave. Stir it gently and thoroughly between every single 30-second burst. If you see any pockets of unmelted chocolate remaining, keep stirring until the residual heat melts those bits away instead of microwaving them longer. That coconut oil I mentioned? It keeps the chocolate fluid longer so you can get a nice, even coat over the filling, which is crucial for that pretty, professional look in your homemade Reese’s cups.
Troubleshooting Grainy peanut butter filling
The absolute most important moment for texture happens when you mix that filling—peanut butter, butter, sugar, vanilla. You have to beat it until it is silk! If you stop mixing too soon, you’ll end up with slightly grainy peanut butter cups after they chill. If your mixture seems too stiff to smooth out while mixing it, don’t panic and add more sugar; that will just make it grainy later. Instead, stir in just a teaspoon of extra melted butter or a tiny splash of milk until it becomes perfectly smooth and almost fluffy before chilling.
Variations on Classic peanut butter cups
While this classic recipe for peanut butter cups is perfection in my book, I know we all have different needs or maybe just want to mix things up a bit! Whether you’re watching sugar content or need something that fits a specific diet, we can adjust this base recipe to make it work for you. It’s so versatile, which is why it stays in heavy rotation in my kitchen. If you like sneaking in nutrition, you might also love my little recipe for pumpkin protein cups!
Making Healthy peanut butter cups
If you want to turn these into true protein packed snacks without losing that rich flavor, I have a simple trick! Just whisk about a quarter cup of unflavored or vanilla protein powder right into the peanut butter filling when you mix it with the butter and sugar. It thickens it up a touch, but it’s fantastic for a quick boost! Also, swapping out the semi-sweet chips for a high-quality dark chocolate automatically brings down the sugar content. It adds a lovely deep background flavor to your homemade candy, too.
Gluten Free peanut butter treats and Vegan Candy Recipes
The great news is that these peanut butter cups are naturally gluten free, provided you check your chocolate chips! Most high-quality chips don’t contain wheat, but it’s always good to double-check the package if you’re making these as gluten free peanut butter treats for a friend. To make these into actual vegan candy recipes, just swap out the standard butter for a high-quality substitute like Miyoko’s Kitchen plant-based butter, and ensure your chocolate is marked as dairy-free. You can explore some great ideas for healthier peanut butter cups online if you want to go the vegan route!
Storage and Serving Suggestions for Homemade Candy Recipes
Now that you have a beautiful tray of perfect peanut butter cups, you have to decide how to keep them and when to serve them. Since these are loaded with real butter and peanut butter, they firm up beautifully in the cold. I definitely recommend keeping any leftovers handy in the refrigerator, not hiding them away in a cupboard. If you try to store them at room temperature, especially if your kitchen gets warm, that dreamy filling will start to get too soft and they’ll lose their structure.
Store these amazing homemade candy recipes in an airtight container. Honestly, they last fantastically well in the fridge for up to two weeks! I know they won’t last that long, but it’s good to know they’re stable. They taste absolutely heavenly taken straight from the fridge—that slightly firmer chocolate coating gives them a nicer snap when you bite in. If you’re looking for quick sweet treats to pack up for later, these are perfect!
When it comes to serving, they are delicious all on their own, of course. But if you’re setting out a dessert platter after dinner, try arranging them with a bowl of fresh raspberries or maybe even beside a strong cup of coffee. That slight bitterness from the coffee echoes the dark chocolate notes beautifully. They also make an incredible, easy addition to any holiday bake box. If you’re prepping for the week, you can even sneak one into your lunch bag as one of your easy breakfast ideas if you need an afternoon boost. Seriously, these simple dessert cups travel well!
Frequently Asked Questions about peanut butter cups
I get so many great questions about these little guys! It’s completely normal when you’re trying out a new homemade candy tutorial, especially when you’re aiming for that perfect copycat texture. I’ve listed the most common things folks ask, so hopefully, this saves you a step!
Can I use crunchy peanut butter in these peanut butter cups?
Absolutely, you can! If you prefer a little texture to your filling, crunchy peanut butter works totally fine in the mixture. Just know that it will change the overall feel away from that super smooth experience you get with creamy. If you’re trying to nail the smooth, melt-in-your-mouth vibe of our favorite store-bought versions, I highly recommend sticking to creamy for this specific Reese’s Copycat Recipe. But hey, if you like the crunch, go for it!
What is the best way to make these No Bake Candy Recipes without paper liners?
That is such a great question for anyone grabbing their favorite muffin tin desserts! If you’re out of paper liners, you can use a mini-muffin tin directly, but you must grease it really well first with a non-stick spray or butter. Make sure you get into all the nooks and crannies. Be warned, though: removing them without the paper helps means they won’t look quite as neat and tidy as the ones with liners. They’ll still taste amazing, but they might be a little messier to handle. They’re still fantastic simple dessert cups, just less formal!
How long do these Homemade peanut butter cups last?
Since these no bake candy recipes rely on real butter and peanut butter rather than preservatives, they really prefer the cold. Store any leftovers in an airtight container right in the refrigerator. I’ve found they stay perfectly delicious for up to two full weeks! My personal advice? Pull them out about five minutes before you are going to eat them. That little bit of warmth takes the chill off the chocolate coating just enough so it snaps perfectly when you bite in.
Estimated Nutritional Information for peanut butter cups
We all want to enjoy our peanut butter cups guilt-free, or at least know what we’re getting into while we devour these amazing homemade peanut butter cups! Since I’m not a licensed nutritionist—just a home cook who loves making things delicious—these numbers are just an estimate based on the standard ingredients listed in the recipe.
This is for one single cup, because truly, who stops at one? These values are calculated based on standard substitutions for the listed ingredients like creamy peanut butter and semi-sweet chips.
- Serving Size: 1 cup
- Calories: 250
- Sugar: 20g
- Fat: 18g (A good amount from that creamy peanut butter!)
- Protein: 6g (Especially if you try adding the protein powder variation!)
- Carbohydrates: 22g
- Sodium: 110mg
A quick note that these are just estimates! If you swap out the semi-sweet chips for milk chocolate, or if you use natural peanut butter, the numbers will shift a little. But honestly, if you’re making these decadent little chocolate candy recipes, stick with what tastes best! Enjoy!
Share Your Homemade Candy Tutorial
Now that you’ve made your batch of the best peanut butter cups—and I truly hope you loved them!—I would be so thrilled if you came back and shared your success. I read every comment and review that comes through, and knowing that this recipe brought some homemade joy to your kitchen really means the world to me. It’s how we build this community, sharing what works and what doesn’t!
If you made these No Bake Candy Recipes, please take a moment to click those little stars and leave a rating. Five stars means the world to a person running a small food blog like mine! If you made any tweaks, even small ones—maybe trying sea salt on top or using dark chocolate—tell us all about it in the comments below. Hearing how you adapted this Simple Dessert Cup idea helps others!
And please, please tag me when you share photos on social media! I absolutely love seeing your wonderful creations. Tagging us helps others find these simple, reliable recipes, and seeing your beautifully lined muffin tin desserts always makes my day brighter. Remember, the greatest lesson I learned in my kitchen was that care is the secret ingredient, and seeing your care shine through in your photos makes all the testing worth it. You can learn more about how we test every recipe over on my About page. Happy baking, my friend!
PrintEasy Homemade Peanut Butter Cups (Reese’s Copycat)
Make these easy, no-bake peanut butter cups at home using simple ingredients. This recipe mimics the classic candy flavor and uses a standard muffin tin for shaping.
- Prep Time: 20 min
- Cook Time: 5 min
- Total Time: 25 min
- Yield: 12 servings 1x
- Category: Dessert
- Method: No Bake
- Cuisine: American
- Diet: Vegetarian
Ingredients
- 1 cup creamy peanut butter
- 1/2 cup unsalted butter, softened
- 2 cups powdered sugar
- 1/2 teaspoon vanilla extract
- 12 ounces semi-sweet chocolate chips
- 1 tablespoon coconut oil (optional, for smoother melting)
Instructions
- Line a 12-cup muffin tin with paper liners.
- In a medium bowl, combine the peanut butter, softened butter, powdered sugar, and vanilla extract. Mix until the filling is smooth and well combined.
- Press about two-thirds of the peanut butter mixture evenly into the bottom of each paper liner, forming the base layer.
- Place the muffin tin in the freezer for 15 minutes to set the base.
- While the bases chill, melt the chocolate chips and coconut oil (if using) in a microwave-safe bowl in 30-second intervals, stirring until completely smooth.
- Remove the tin from the freezer. Spoon the melted chocolate over the peanut butter layer in each cup, spreading it to cover completely.
- Place a small spoonful of the remaining peanut butter mixture on top of the chocolate layer in the center of each cup. Gently press it down slightly.
- Top with the remaining melted chocolate, ensuring the peanut butter filling is fully covered.
- Return the muffin tin to the refrigerator and chill for at least 1 hour, or until the chocolate is firm.
- Remove the paper liners before serving your homemade peanut butter cups.
Notes
- For a gluten free peanut butter treats version, confirm your chocolate chips do not contain gluten.
- If you want a protein packed snacks version, you can mix 1/4 cup of unflavored protein powder into the peanut butter filling.
- Store leftover candy in an airtight container in the refrigerator for up to two weeks.
Nutrition
- Serving Size: 1 cup
- Calories: 250
- Sugar: 20
- Sodium: 110
- Fat: 18
- Saturated Fat: 7
- Unsaturated Fat: 11
- Trans Fat: 0
- Carbohydrates: 22
- Fiber: 1
- Protein: 6
- Cholesterol: 10