
When you’re trying to recreate those classic, comforting holiday treats without dairy or eggs, finding a cut-out cookie that actually *works* can feel impossible. So many recipes either puff up into little clouds or completely collapse the second they hit the cooling rack. Trust me, I’ve been there!
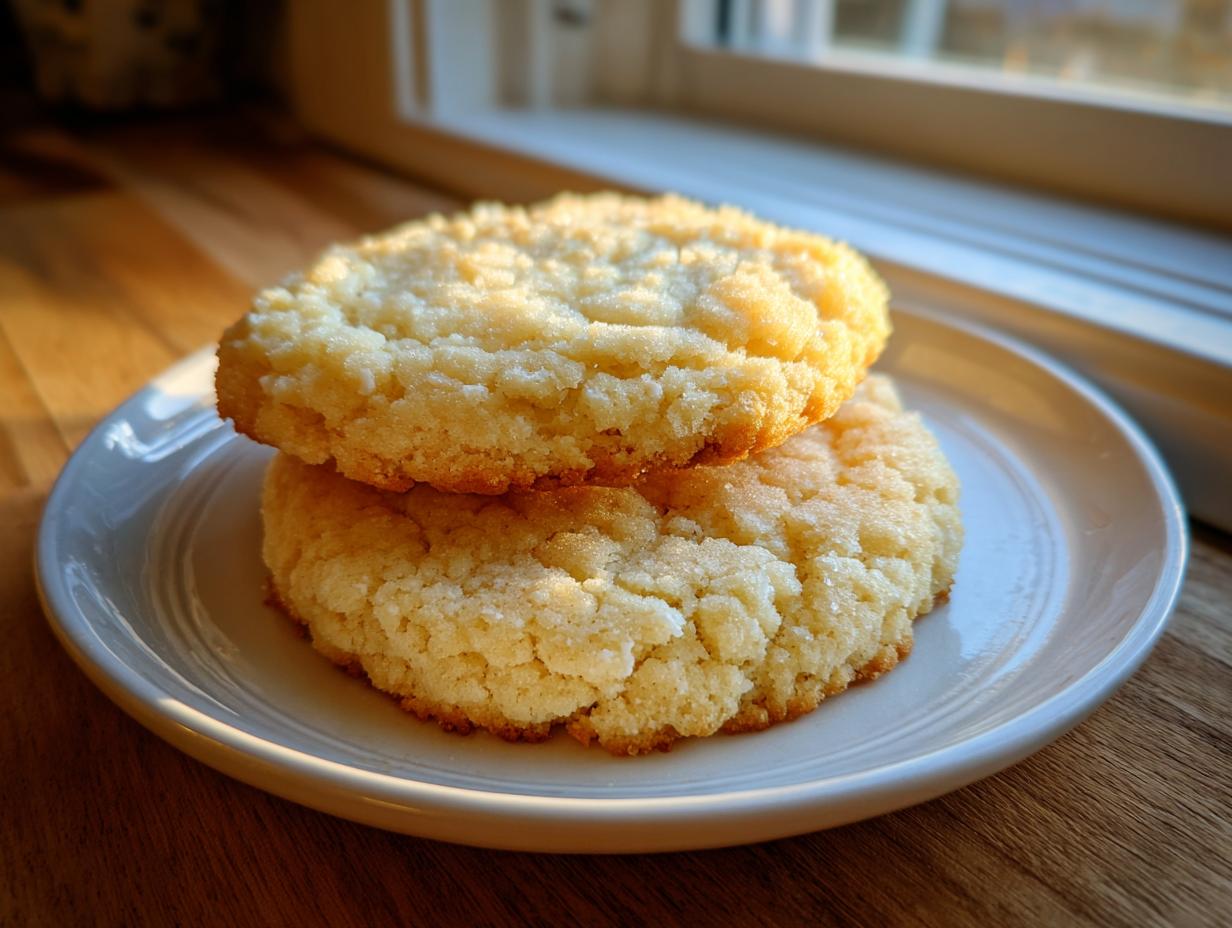
That’s why I spent so much time developing these incredible **vegan sugar cookies**. This recipe is my answer to bringing those reliable, nostalgic classics to the modern table, no compromises needed. You get that perfect combination: bakery-soft, wonderfully chewy, and sturdy enough to cut into any shape you can dream up for decorating. They taste just like the cookies we grew up with, just totally plant-based. You’re going to love how simple this recipe is, even for your first time tackling **egg free baking**.
- Why These Are the Best Vegan Sugar Cookies You Will Ever Bake
- Gathering Ingredients for Perfect Vegan Sugar Cookies
- Step-by-Step Instructions for Amazing Vegan Sugar Cookies
- Baking Tips for Perfectly Soft Vegan Cookies
- How to Make Simple Vegan Icing Recipes
- Variations: Creating Lofthouse Style Vegan Cookies
- Storage and Freezing Tips for Your Vegan Sugar Cookies
- Frequently Asked Questions About Egg Free Baking
- Share Your Homemade Vegan Sugar Cookies
Why These Are the Best Vegan Sugar Cookies You Will Ever Bake
Honestly, I tested recipe after recipe trying to nail that perfect balance. So many **vegan cookies** end up too crumbly or, worse, spreading out like puddles on the baking sheet. Not these! These are my go-to recipe for the **best vegan sugar cookie recipe** because they are reliably soft, beautifully chewy, and absolutely hold their shape when you cut them out. It took me weeks to get the fat-to-flour ratio just right so the dough wouldn’t stick or melt.
My goal was always to create something that felt completely indulgent, proving that **dairy free cookies** can truly rival the classics. I’m so proud of how tender these **soft vegan cookies** turn out.
Perfect Texture: Soft Vegan Cookies That Hold Their Shape
The magic behind their sturdy nature isn’t some secret commercial ingredient; it’s actually that crucial chilling step. When the dough rests, the flour hydrates properly, and the vegan butter firms up nice and cold. This means when you roll it out—even thin! Check out my chocolate chip cookie chilling tips, they work here too—the shapes stay crisp at the edges until they bake. It’s the structure you need for beautiful holiday decorating, but they bake up with the softest middle imaginable. You get the best of both worlds!
Gathering Ingredients for Perfect Vegan Sugar Cookies
Okay, let’s talk ingredients! I know sometimes buying all the special vegan substitutes can feel overwhelming, but this recipe keeps things beautifully straightforward. We lean on accessibility so you can make these **vegan sugar cookies** anytime the craving strikes. The absolute most critical thing you need to get right before you even turn on the mixer is the vegan butter.
Please, please use a good quality stick-style vegan butter, not the soft tub stuff you spread on toast! And it *must* be properly softened—room temperature, yielding just slightly when you press it gently. If it’s too cold, it won’t cream properly, and if it melts, well, we are back to cookie puddles. Trust me on this one; the proper butter temperature is your first step to **wholesome vegan sweets**.
Ingredient Notes and Smart Substitutions
Because we are intentionally steering clear of tricky commercial egg replacers, our recipe relies on simple chemistry for structure. You’ll notice I call for both vanilla and almond extract. A lot of my non-vegan friends swear by that little hint of almond extract in their sugar cookies, and honestly, it really helps bring out that classic, rich flavor profile we are aiming for in these **dairy free cookies**.
When it comes to the liquids, any unsweetened plant milk works fine. I usually stick to soy or almond milk because they are neutral. If you’re looking for a shortcut that keeps this firmly in the “easy vegan dessert” category, you won’t need flaxseed meal or commercial binders. We’ve balanced the flour and fat perfectly for sturdy **egg free baking**!
Step-by-Step Instructions for Amazing Vegan Sugar Cookies
This is where the fun really starts, but pay attention to the timing here because getting the right dough consistency is everything for these **soft vegan cookies**. We’re going to build this dough slowly to make sure everything blends without getting tough. Remember, the goal isn’t speed; it’s consistency so that every batch turns out perfect for your next **simple vegan dessert recipe**.
Mixing the Dough for Soft Vegan Cookies
First up, the creaming step. Grab your electric mixer and beat that softened vegan butter and the granulated sugar together on medium-high speed. You want this mixture to get genuinely light and fluffy—it actually turns a pale yellow color. This takes a good few minutes, maybe 4 or 5, and those tiny air pockets you’re whipping in are what guarantee those soft centers later. Don’t rush it!
Next, gently beat in your wet flavors—the plant milk, vanilla, and that secret weapon, the almond extract. Once that’s just combined and smooth, it’s time for the dry ingredients. This is crucial: add the flour mixture in three batches, mixing on the absolute lowest speed. As soon as you see the last streaks of flour disappear, STOP MIXING. Overmixing the flour develops too much gluten, and that is the enemy of a soft cookie!
Chilling and Rolling Out Your Vegan Cut Out Cookies
Once the dough comes together, we need a little nap time. Divide it easily in half, flatten each half into a disk—make sure they are smooth! Wrap them tight in plastic wrap. These disks absolutely need at least one hour in the fridge. I know, I know, waiting is the hardest part of **holiday vegan baking**, but this chilling process is non-negotiable for successful **vegan cut out cookies** that don’t spread.
Once chilled, preheat your oven to 350°F (175°C) and get those sheets lined with parchment paper. On a lightly floured surface, roll out one disk to about 1/4-inch thickness. That’s the sweet spot! Use your favorite cookie cutters and transfer them gently to the prepared sheets. You can even use scraps from your last batch of banana bread to press scraps together if you run out of dough.
Baking Tips for Perfectly Soft Vegan Cookies
Now that your dough is perfectly chilled and cut, we move onto the fire element—the oven! Since we’re aiming for those incredibly soft vegan cookies, we can’t just bake them until they look rock hard and golden brown. That’s the secret to a dry cookie, and we are definitely not making dry cookies here!
Make sure your oven is fully preheated to 350°F (175°C) before the sheets go in. If the oven isn’t hot enough, the butter will start melting before the structure sets, which causes spreading. Nobody wants spreading!
When checking for doneness, use your eyes first. You want the edges to look *just* set—meaning they aren’t shiny anymore and look firm enough to handle. The centers should still look slightly pale, honestly. That pale center is your sign that you’ve captured that perfect, tender texture.
If you are looking for a bit more chew or if those cookies need to be stacked high for a big party, you can certainly give them another minute or two until the edges develop the tiniest hint of pale gold. But for the dreamiest, melt-in-your-mouth experience, pull them just before you think they are ready. Watch them closely, especially if you are using different cutters, because smaller shapes cook faster! Cooling them on the tray for a solid five minutes before moving them to the rack is also key to letting that soft structure stabilize.
How to Make Simple Vegan Icing Recipes
You can’t have incredible **vegan sugar cookies** without equally incredible frosting, right? I feel like the cookie is the canvas, and the icing finishes the masterpiece! Since this recipe is designed for decorating, I want to give you two really reliable **vegan icing recipes**—one super simple glaze and a thicker, pipeable version perfect for those detailed holiday shapes.
For a quick, glossy finish, you can’t beat a simple glaze. You just need powdered sugar, a tiny splash of plant milk, and a drop of vanilla. Mix it lightly until it’s pourable but still opaque. I call this the ‘drizzle and done’ method. But if you want that slightly thick, soft, almost-like-a-Lofthouse look, you’ll want a vegan buttercream. Think of it like my classic cream cheese frosting, but tailored for sugar cookies; it uses softened vegan butter, plenty of powdered sugar, a little vanilla, and just enough plant milk to keep it fluffy and spreadable.
Tips for Decorating Vegan Cookies Like a Pro
Decorating vegan sweets during the holidays is such a joy, but it requires a little patience, especially when you’re dealing with icing that relies on powdered sugar for structure instead of egg whites.
If you are doing a full flood coat, remember to do a ‘dam’ outline first using a slightly thicker icing consistency. Let that dam dry for about 15 minutes before you fill (or ‘flood’) the center with a thinner consistency icing. This little trick stops your icing from bleeding right over your crisp cookie edges. It’s a game-changer for neatness!
Also, be aware of air bubbles when mixing your icing—if you see them, you can tap the bowl gently on the counter or use a toothpick to pop them before you put the icing in a piping bag. This tiny step makes a huge difference for clean lines when you’re doing detailed **holiday vegan baking**.
Finally, drying time is crucial. If you are stacking these or packing them into tins for a party, you must let the icing set completely. If you’re using a simple glaze, it might only take an hour or two in a dry room. But for a thicker buttercream, I tend to just leave mine out overnight to ensure they are fully firm before wrapping or stacking them up next to your other decorated treats!
Variations: Creating Lofthouse Style Vegan Cookies
If you followed me this far, you know I love a classic cut-out, but sometimes you just want that pillow-soft, almost cakey cookie that’s swimming in sweet frosting. That is the magic of the **Lofthouse Style Vegan Cookies** trend, and yes, we can absolutely make them work beautifully in a vegan recipe!
The beauty of these **vegan sugar cookies** is their versatility. When you want that signature pillowy look, the cookie itself needs to stay super soft, almost underbaked. To achieve that iconic Lofthouse texture, you need to adjust your baking time slightly. Pull them out of the oven about a minute or even two minutes sooner than you would for a standard cut-out cookie.
When they come out, the edges should look barely set—they’ll look soft, maybe even a little underdone, but don’t panic! That’s what you want. Seriously, trust the process. Because they are so soft right out of the oven, this is the exact moment you need to act fast if you want that thick frosting layer to set perfectly in the center. You can press a small marshmallow into the top center, or spoon a generous dollop of thick frosting onto it right away. As the cookie cools slightly, the frosting will settle beautifully into that soft pocket.
For the best result overall, I highly recommend sticking to the classic, thicker vegan buttercream I mentioned earlier over the thin glaze when attempting this style. The thick frosting pairs perfectly with the extra-soft crumb. It’s like a little slice of vegan birthday cake in cookie form! If you’re curious about other soft, pillowy options, you definitely need to check out how I get that classic texture in my pumpkin snickerdoodles as well. It uses similar principles!
If you want a slightly firmer cookie—maybe you just prefer the texture or you’re shipping them—just add that extra minute or two to the bake time, and they will firm up nicely without compromising too much of that lovely vanilla flavor. For more inspiration on incredibly soft vegan treats, check out what others are doing over at Chocolate Covered Katie!
Storage and Freezing Tips for Your Vegan Sugar Cookies
Since these are the **best vegan sugar cookies** around, you’ll want to make sure you can enjoy them for days—or even months—after you whip up a batch! Especially when you do big **holiday vegan baking** sessions, it’s a lifesaver to know you can freeze some dough or even the finished cookies ahead of time.
The great news is that because we made these so sturdy and moisture-rich, they freeze beautifully! Keeping them fresh mostly comes down to keeping air away from them. Nobody wants stale cookies, especially when you’ve put this much love into making them **plant based sweets**.
For baked cookies that already have icing on them, make sure the icing is completely, totally dry—I mean hard to the touch. Then, layer them between pieces of parchment paper inside an airtight container. Don’t stack them too high, just one or two layers max, as you don’t want the frosting to smoosh. They store wonderfully at room temperature for about four days, or you can pop them in the fridge for a week.
However, the real genius move, especially if you are planning for a holiday cookie exchange, is freezing the dough! Remember when we wrapped those dough disks? You can actually toss those disks right into the freezer just like that. They stay perfect for up to three months. That means you can have fresh, warm **vegan sugar cookies** ready to bake anytime!
When you are ready to bake from frozen, you don’t even need to fully thaw them out. Just take the wrapped disk out, place it on your parchment-lined sheet, and add about 2 to 3 extra minutes to the standard baking time. That little buffer is usually enough to get them through that initial frozen stage. Isn’t that the easiest **easy vegan dessert** prep ever?
Frequently Asked Questions About Egg Free Baking
Whenever I share a recipe that is intentionally **egg free baking**, I always get a flood of questions about structure and texture. That’s fair! Eggs play a big role, so when you take them out, you have to know how to compensate to keep those delicious **vegan sugar cookies** soft and chewy.
I know some of you might be nervous about rolling or stacking, fearing the results will be different from what you remember. Not to worry! We’ve covered the key techniques right here, but let’s tackle a few more specific questions I hear all the time about these **plant based sweets**.
Can I make these vegan sugar cookies without chilling the dough?
If speed is your absolute priority, you *can* skip the chilling, but I have to give you a major warning first: you will not get a great cut-out cookie. If you are planning on using cookie cutters, the dough has to chill for at least an hour. If you try to cut shapes from warm dough, they will definitely spread into sad, flat circles once they hit the hot oven. That’s just physics, honey!
However—and this is a treat!—if you decide halfway through that you just want **chewy vegan cookies** right now, you can skip the rolling and just scoop the dough like drop cookies. For those scoops, chilling isn’t necessary, and they will bake up soft and delicious in just about the same amount of time. If you’re feeling rushed, you can always look at my quick breakfast ideas for the next morning instead!
What is the best vegan butter for dairy free cookies?
This is just as important as chilling the dough, maybe even more so! You need vegan butter that acts like real butter, meaning it needs a solid fat content. I strongly recommend using those stick-style vegan butters rather than the soft, spreadable margarine that comes in a tub. The tub varieties have a lot more water in them, which can make your dough too sloppy and also lead to spreading.
Stick butter mimics the necessary fat content perfectly. When it’s softened to room temperature, it creams up beautifully with the sugar to create those essential air pockets we talked about earlier—that’s what keeps them soft! My favorite brands are usually the ones marketed as ‘baking sticks’ because they are formulated to hold up well in high heat.
How do I make these chewy vegan cookies firmer for shipping?
Oh, I love that you’re planning on sharing these **soft vegan cookies**! If you are shipping them across the country or packaging them for a large event, you do want them slightly firmer than the ultra-soft style I aim for. This is where baking time comes in again, and it’s very easy to adjust!
When you check for doneness, instead of pulling them when the center is still pale, just give them that little extra time. Bake them for an additional 1 to 2 minutes longer than the recipe says. You are looking for the edges to turn a very light, pale gold color—not brown, just kissed by the heat. This slight increase in baking time sets the structure just enough so they can be layered and stacked without sticking together or crumbling when handled. They will still be wonderfully chewy, but they’ll have the backbone you need for safe travels!
Share Your Homemade Vegan Sugar Cookies
My absolute favorite part of sharing a reliable recipe like this is seeing what you all create! These **vegan sugar cookies** are meant to be fun, colorful, and shared at gatherings, whether they are for Christmas, birthdays, or just a Tuesday afternoon treat.
I really, truly want to know how they turned out for you. Did you love the soft chewiness? Did your cut-out shapes hold up perfectly? Did you try the Lofthouse variation or stick to the classic royal icing? Please take a moment to leave a rating right down below the recipe card. It helps me know which recipes are really bringing that comforting, nostalgic feeling into your modern kitchens.
And if you’re sharing photos on social media—and you absolutely should be, especially if you did some amazing decorating work—tag me! Seeing my recipes out in the world, proving that **dairy free cookies** and **egg free baking** can be utterly delicious, builds my confidence that we are keeping the spirit of honest home cooking alive. If you want to read a bit more about my own baking journey and why I created this space, I share all the details over on my About Page! Happy baking, friends!
PrintThe Best Soft and Chewy Vegan Sugar Cookies for Decorating

Make these soft, chewy, and sturdy vegan sugar cookies that hold their shape perfectly for cutting and decorating. This reliable recipe delivers classic flavor without dairy or eggs, making them ideal for holiday baking or parties.
- Prep Time: 20 min
- Cook Time: 10 min
- Total Time: 1 hour 30 min
- Yield: 24 cookies 1x
- Category: Dessert
- Method: Baking
- Cuisine: American
- Diet: Vegan
Ingredients
- 1 cup vegan butter, softened
- 1 cup granulated sugar
- 1/4 cup unsweetened plant milk (soy or almond work well)
- 2 teaspoons vanilla extract
- 1 teaspoon almond extract
- 3 1/2 cups all-purpose flour, plus more for dusting
- 1 teaspoon baking powder
- 1/2 teaspoon salt
Instructions
- In a large bowl, cream together the softened vegan butter and granulated sugar using an electric mixer until the mixture is light and fluffy.
- Beat in the plant milk, vanilla extract, and almond extract until just combined. Scrape down the sides of the bowl as needed.
- In a separate medium bowl, whisk together the flour, baking powder, and salt.
- Gradually add the dry ingredients to the wet ingredients, mixing on low speed until a soft dough forms. Do not overmix.
- Divide the dough in half, flatten each half into a disk, wrap tightly in plastic wrap, and chill in the refrigerator for at least 1 hour. This step is important for cut-out cookies.
- Preheat your oven to 350°F (175°C). Line baking sheets with parchment paper.
- On a lightly floured surface, roll out one disk of dough to about 1/4-inch thickness. Use cookie cutters to cut out desired shapes.
- Carefully transfer the cut-out cookies to the prepared baking sheets. Reroll scraps as needed.
- Bake for 8 to 10 minutes. For soft cookies, aim for the edges to be just barely set and the centers still look slightly pale.
- Let the cookies cool on the baking sheet for 5 minutes before transferring them to a wire rack to cool completely before decorating.
Notes
- For Lofthouse style cookies, bake for 1 minute less and immediately place a small marshmallow or a dollop of thick vegan frosting on the warm cookie center before it cools completely.
- If you prefer a firmer cookie that is easier to stack, bake for an additional 1-2 minutes until the edges are lightly golden.
- This dough freezes well. Wrap chilled, unbaked cut-outs tightly and freeze for up to 3 months. Bake directly from frozen, adding 2-3 minutes to the bake time.
Nutrition
- Serving Size: 1 cookie
- Calories: 180
- Sugar: 14g
- Sodium: 110mg
- Fat: 9g
- Saturated Fat: 2g
- Unsaturated Fat: 7g
- Trans Fat: 0g
- Carbohydrates: 24g
- Fiber: 0g
- Protein: 2g
- Cholesterol: 0mg