
Oh, that perfect marriage! You know the one I mean—the deep, dark richness of chocolate crashing straight into velvety, sweet peanut butter. It’s the flavor combination that just grounds you, right? For me, that perfect pairing always pulls me right back to my family’s kitchen, even when life gets hectic. I’m Maddie, and while I might not be baking pies every day anymore, I’ve found a way to make that comfort food magic happen fast. Forget complicated baking from scratch when you need that fix; these Ultimate 3-Layer Buckeye Brownies are my secret weapon. It’s true indulgence, but thanks to a little box mix hack, you get fudgy brownies, a creamy center, and a smooth chocolate top without spending all afternoon wrestling with flour! If chocolate and peanut butter bars are what you crave, you should definitely check out all my other delicious dessert recipes too.
- Why These Buckeye Brownies Are Your New Favorite Chocolate Peanut Butter Dessert
- Gathering Ingredients for Your Peanut Butter Brownies
- Step-by-Step Instructions for Ultimate Buckeye Brownies
- Tips for Perfect Homemade Buckeye Candy Brownies
- Making Your Buckeye Brownies Crowd Pleasing Desserts
- Storage and Reheating Instructions for Your Layered Brownie Bars
- Frequently Asked Questions About Buckeye Brownies
- Nutritional Estimate for One Serving of Peanut Butter Chocolate Bars
- Share Your Decadent Chocolate Desserts Creations
Why These Buckeye Brownies Are Your New Favorite Chocolate Peanut Butter Dessert
Honestly, if you’re looking for the ultimate fix for sweet cravings, stop scrolling right now. These aren’t just good bars; they’re decadent, rich, and taste like something you ordered from a fancy bakery. They hit every single craving note at once. If you love decadent chocolate desserts but need something fast, these are for you. You can check out my recipe for chewy chocolate chip cookies when you need another quick fix!
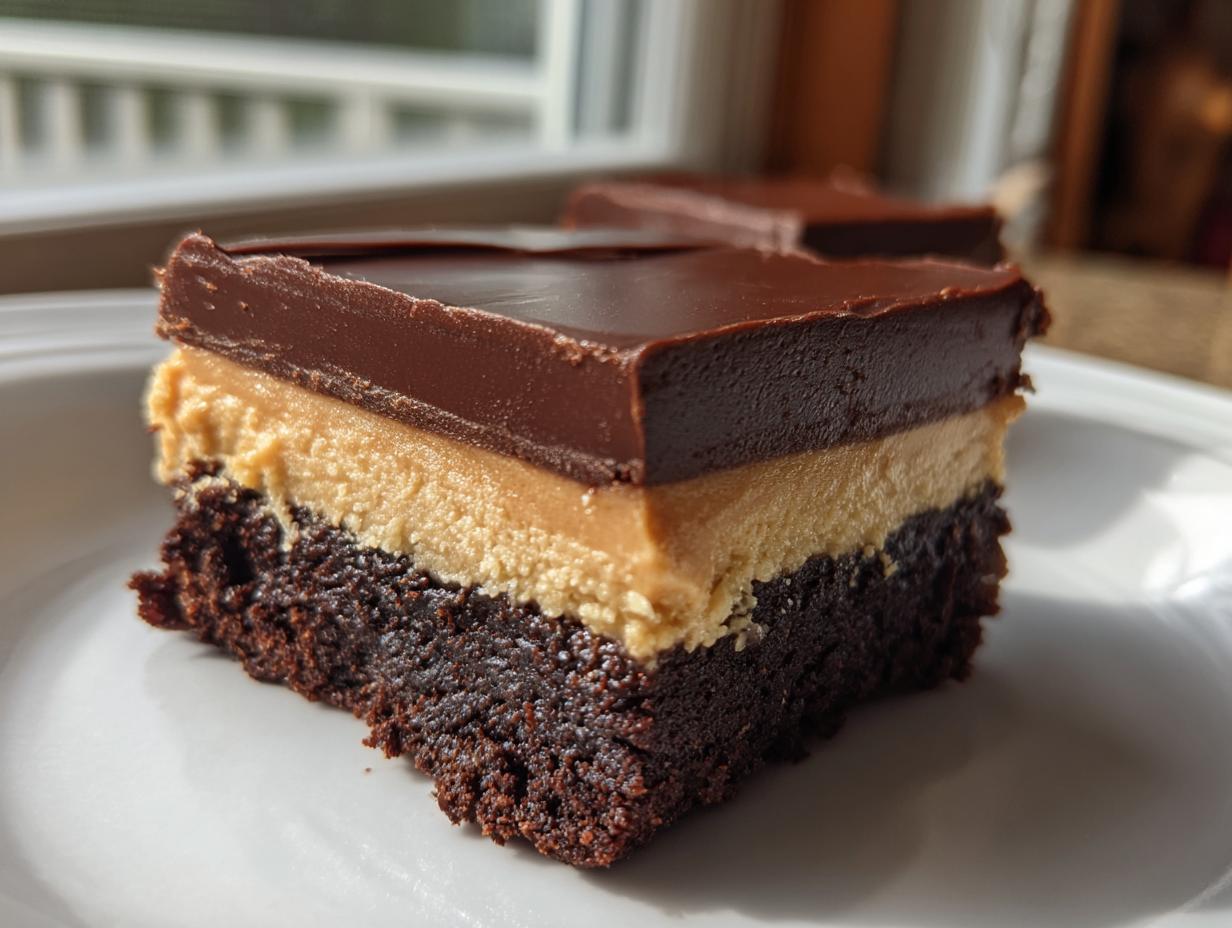
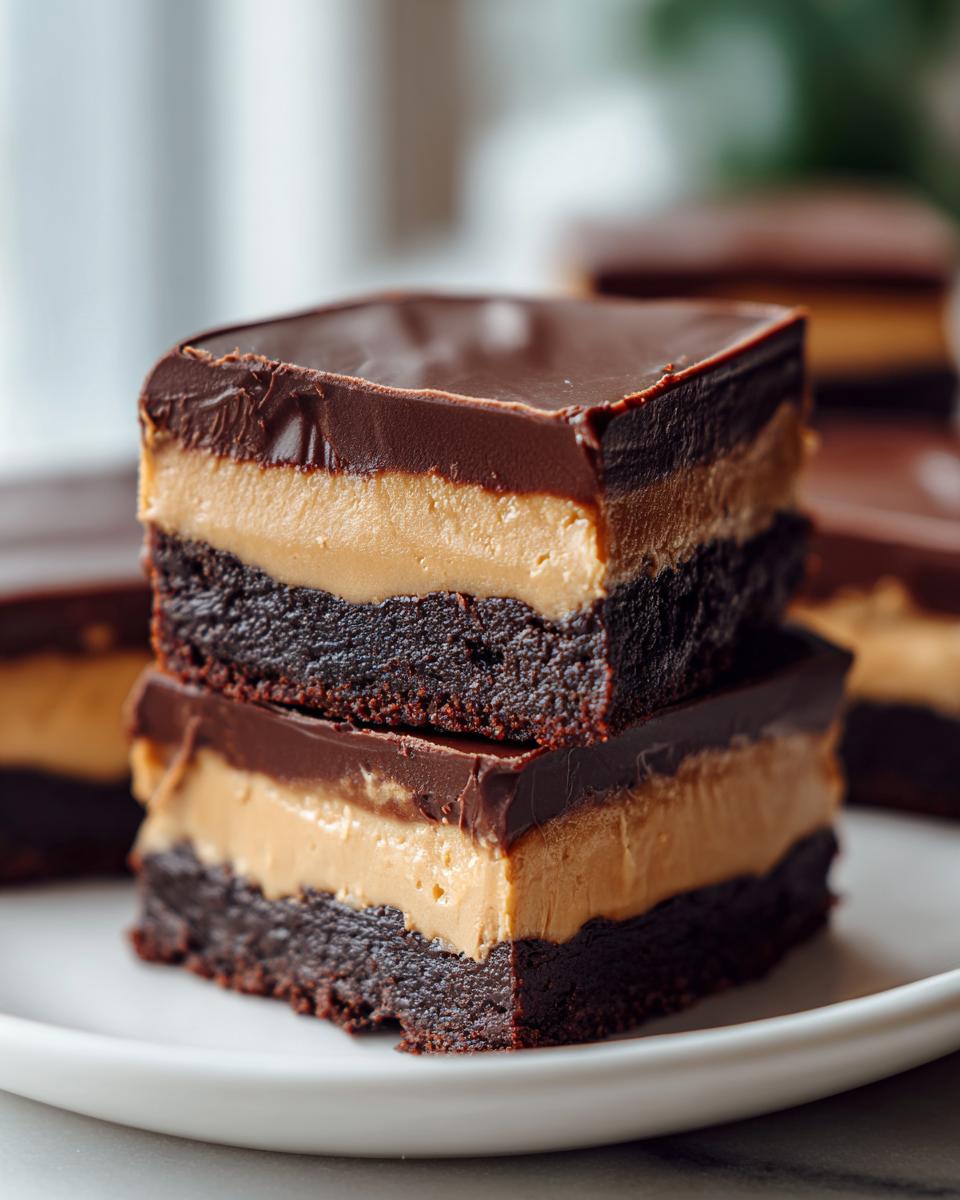
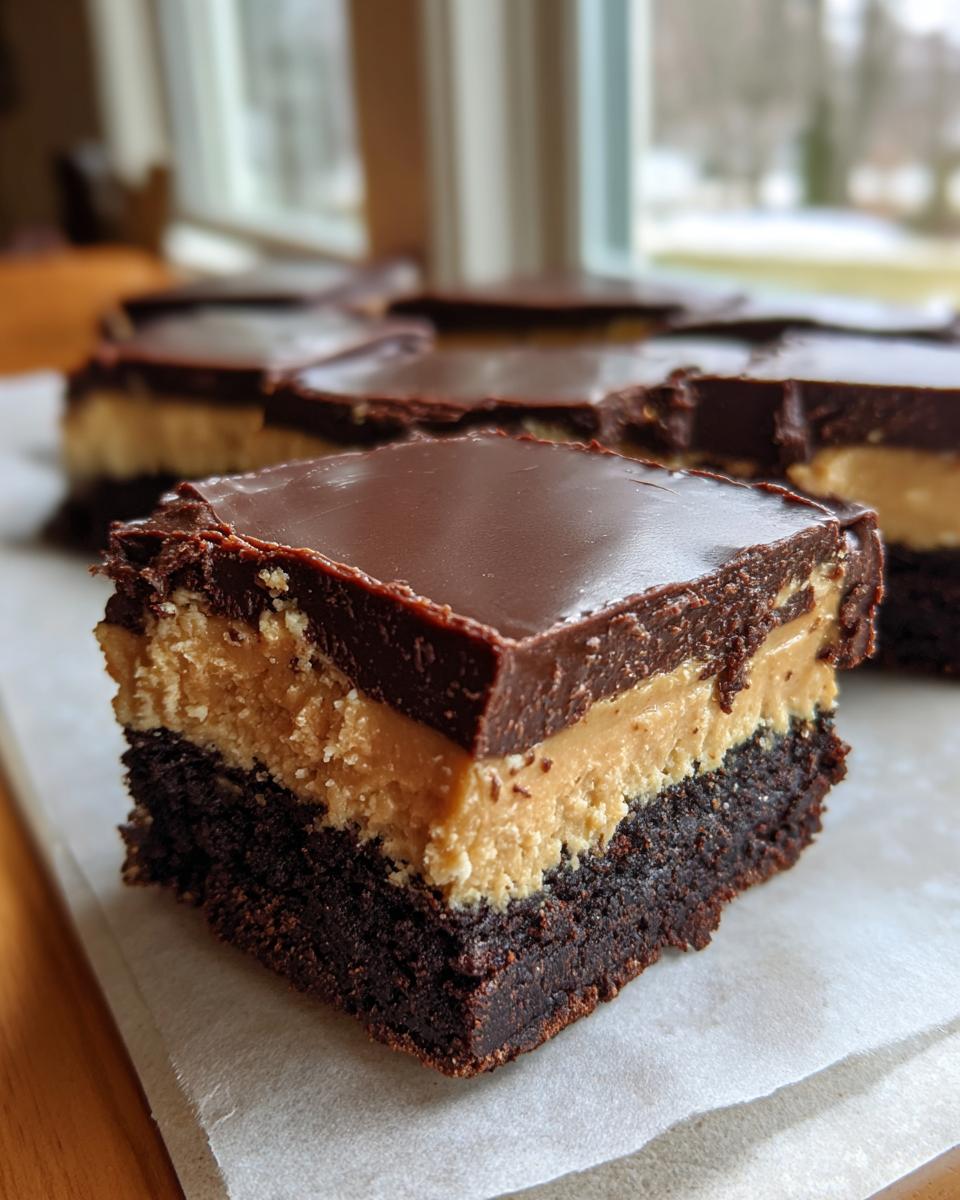
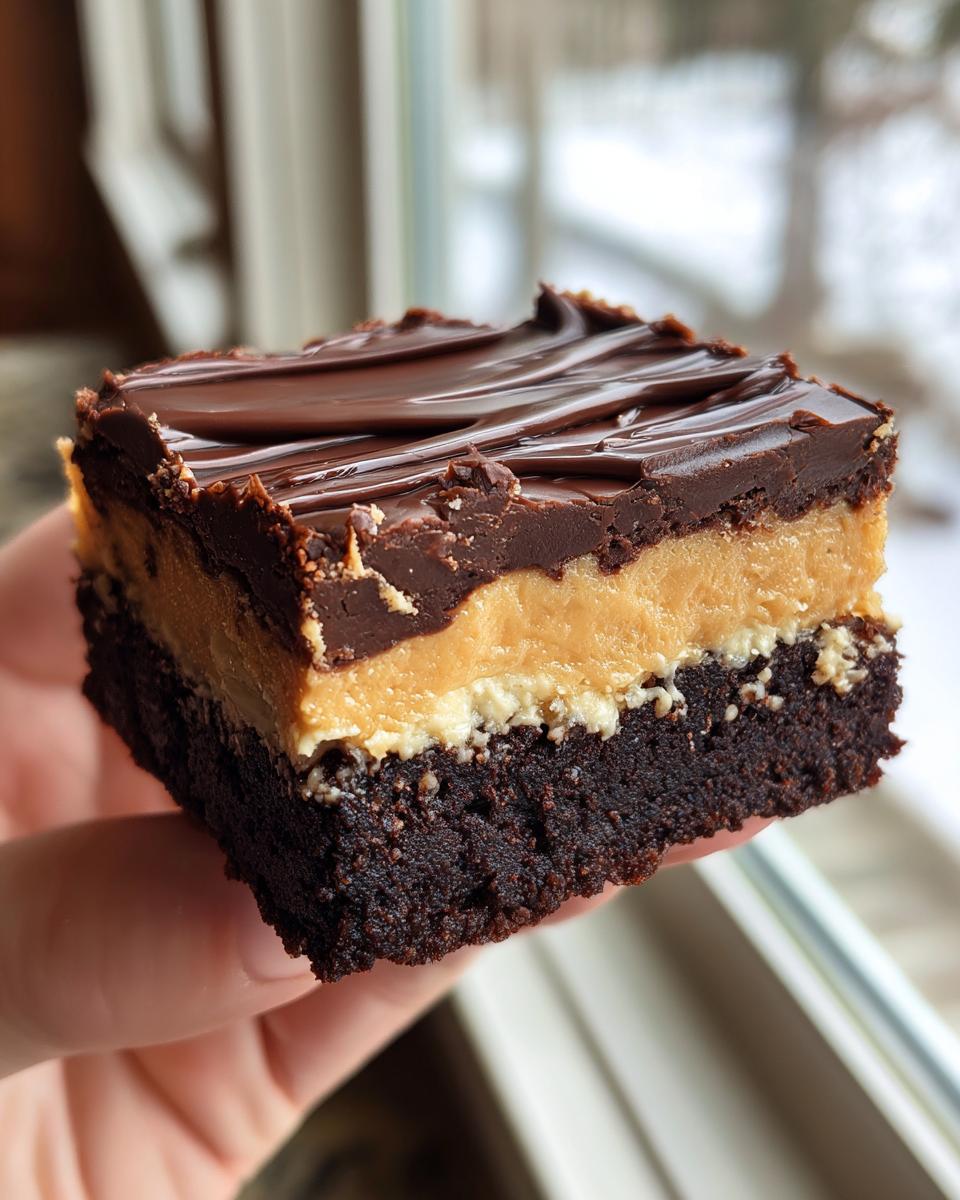
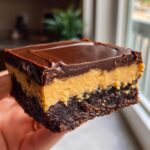
The Three Layers of Buckeye Brownies Perfection
The magic here is the structure! We build them up, layer by careful layer. First, you get that super fudgy brownie base—we’re talking seriously high-quality Fudgy Brownie Recipe texture here, not cakey at all. Then comes the generous, smooth peanut butter filling. Finally, we seal it all with a glossy, melt-in-your-mouth chocolate topping. It’s pure bliss!
Time-Saving Tips for Making Great Buckeye Brownies
I know life moves fast, so I *never* ask you to do extra work if it doesn’t improve the flavor, and using a box mix for the base is our little cheat code. It gives you a predictable, perfectly moist foundation without any mixing stress. We’re focusing our energy on making that homemade peanut butter layer sing, which keeps the quality high while keeping your hands busy for less time. It’s the best of both worlds, trust me.
Gathering Ingredients for Your Peanut Butter Brownies
Okay, grab your apron and let’s pull everything out onto the counter! Because we are building three distinct layers, we need a few distinct groups of things. Don’t panic if you need to swing by the store; almost everything here is a staple, especially if you are like me and always have a box of brownie mix tucked away for emergency dessert situations. I hope you like sweet and salty, because getting all this ready is the first step toward baking my favorite pumpkin banana bread stand-in!
Here is exactly what you’ll need to make these incredible treats:
- 1 box (about 18.25 ounces) brownie mix plus all the ingredients listed on that box (usually eggs, oil, and water).
- 1 cup (that’s two full sticks!) unsalted butter, and listen closely—it needs to be softened, not melted!
- 1 cup creamy peanut butter—the smooth kind is key here.
- 4 cups powdered sugar, and you absolutely must sift this, trust me on this one!
- 1 teaspoon vanilla extract—real vanilla makes a difference here!
- 1/4 cup milk, just regular milk is fine.
- 1 1/2 cups semi-sweet chocolate chips.
- 2 tablespoons shortening or coconut oil for that glossy chocolate top.
Ingredient Notes and Substitutions for Layered Brownie Bars
Now, let’s talk specifics, because the quality of these parts really makes these **Layered Brownie Bars** shine. For the peanut butter layer, please use creamy, standard peanut butter. If you use the natural kind that separates? Honey, your filling will get runny and won’t set up right. We need that stability!
When you get to the chocolate topping, that little bit of shortening or coconut oil is non-negotiable if you want a nice, smooth, non-streaky finish. If you skip it, the ganache sets up too quickly and can crack when you cut it. If you don’t have shortening, coconut oil works beautifully as a substitute; it melts nearly the same way. Also, for the chocolate chips, feel free to swap in milk chocolate or dark chocolate if you prefer that flavor over semi-sweet, just know it will change the overall sweetness level of the final topping.
Step-by-Step Instructions for Ultimate Buckeye Brownies
Alright, time to roll up those sleeves! We’re going to tackle this in three focused stages. Don’t rush that cooling time between layers; that’s the secret handshake for keeping these **buckeye brownies** neat and beautiful. If you need a break between stages, feel free to stop and check out my Jiffy Corn Casserole Recipe for inspiration later! Remember, patience here means perfect layers later.
Creating the Fudgy Brownie Base
First up, let’s get that bottom layer going! Preheat your oven to whatever temperature your brownie box tells you to use. Now, line that 9×13 inch pan with parchment paper, but here’s the trick: pull the paper up the sides, leaving an overhang on two sides. That’s how we lift them out later! Mix your batter exactly as the package says and spread it out evenly. Bake it just a hair less than the box recommends. When you test it, we want moist crumbs clinging to the toothpick, not completely dry. Let it cool completely—and I mean cool—in the pan before you even think about touching it again.
Mixing and Setting the Creamy Peanut Butter Ganache Brownies Layer
While that base is chilling (it can take a while!), we make the filling. Grab your big bowl and beat that softened butter and peanut butter together until they look happy and smooth. Then, slowly sprinkle in that big pile of sifted powdered sugar. Once it starts to come together, pour in the vanilla and that splash of milk. Beat it until it’s fluffy and shows no streaks. Spread this beautifully smooth peanut butter mixture right over the totally cooled brownie base. It should go on easily! Pop the whole pan back into the fridge for at least 30 minutes. We need this layer firm so the chocolate top doesn’t squish through.
Finishing the Chocolate Peanut Butter Dessert Topping
Time for the glossy finish! Put your semi-sweet chips and your shortening (or coconut oil) into a microwave-safe bowl. Microwave this in short bursts—30 seconds at a time—stirring really well after every single burst until you have a perfectly smooth, shiny liquid. Don’t overheat it or it gets grumpy! Quick, quick! Pour that melted topping over your chilled peanut butter layer. Spread it fast because it starts setting up quickly. Then, it’s back into the fridge for at least an hour until that chocolate top is nice and firm. Once it’s set, you can use those parchment handles to lift the whole slab out and slice into those incredible **Chocolate Peanut Butter Dessert** bars!
Tips for Perfect Homemade Buckeye Candy Brownies
Making these **Homemade Buckeye Candy Brownies** isn’t hard, but mastering the layers is what takes them from good to show-stopping, you know? I’ve learned a few little things over the years that just guarantee success every single time. Follow these pointers, and you won’t have any messy sides or cracked tops!
First and most importantly—and I can’t stress this enough—your bottom brownie layer must be completely, totally cooled before you even think about adding the peanut butter filling. If it’s warm at all, the warm base melts the creamy filling, and you end up with one giant, mixed-up chocolate and peanut butter swirl instead of those gorgeous distinct layers. Patience rewards you here!
Next, about that peanut butter layer: don’t overbeat it once the powdered sugar is in. Once you add the milk and vanilla, you only want to mix until it’s smooth and fluffy. If you keep beating air into it, when it chills, it can sometimes get a little grainy or stiff. We want it soft and creamy to contrast that dense brownie base.
For the final chocolate ganache topping, the goal is glossy perfection, right? That’s why that tiny bit of shortening or coconut oil is so crucial. It keeps the chocolate soft enough so that when you slice the bars later, the top doesn’t shatter everywhere. You want it smooth and clean when you cut through it. If you want to see how I handle my absolute favorite pure chocolate recipe, check out my thoughts on the best brownie recipe on the site!
Finally, when you go to cut them, use a large, sharp knife, and wipe the blade clean between every cut. This makes those clean edges pop beautifully on your plate. A warm, damp cloth works wonders for wiping off any peanut butter residue before the next slice!
Making Your Buckeye Brownies Crowd Pleasing Desserts
These **buckeye brownies** totally disappear when I bring them anywhere—seriously, they are the ultimate crowd pleaser! Because they are so rich, I find presentation makes a massive difference, especially if you’re taking them to a gathering. Don’t just hack them out! Let them set up nicely in the fridge, use that parchment overhang to lift the entire slab out, and then use a big, sharp knife to cut them into neat squares.
For potlucks or parties, cutting them into smaller squares is almost necessary because the flavor is so intense. Seriously, one square of this rich goodness is usually enough! They look fantastic arranged closely together on a white platter, making the chocolate and the peanut butter layers really pop. These are fantastic **Potluck Dessert Ideas** because they travel well when chilled.
If you’re serving them immediately after slicing, they are divine still cool from the fridge. But if you want them softer, you can let them sit on the counter at room temperature for about an hour before serving. They become unbelievably gooey then! I always pair these with a simple cup of black coffee; the slightly bitter warmth cuts through the sweetness perfectly.
If you are looking for savory appetizers that go great alongside rich desserts like these, I have a fantastic recipe for crockpot buffalo chicken dip that is always a huge hit!
These bars are also great for prepping ahead. When I know I have a crazy week coming up, I bake them, cool them completely, slice them, and store them airtight in the fridge. Having **crowd pleasing desserts** ready to go is such a lifesaver!
Storage and Reheating Instructions for Your Layered Brownie Bars
Since these **Layered Brownie Bars** have that fantastic creamy peanut butter center, we have to treat them a little differently than a regular cookie or brownie left on the counter. If you leave them out too long, especially on a warm day, that middle layer gets soft, and we lose those beautiful, clean lines we worked so hard to create!
The absolute best way to store these is in an airtight container in the refrigerator. Yes, you have to keep them chilled! When they are refrigerated, they stay perfectly solid and sliceable. I’ve found they keep wonderfully for about a week this way. If you smell them after about day five, they still smell amazing, but they might get a little firmer than when they were fresh.
When I know I’ve made a huge batch—which is often, because they disappear too fast!—I’ll cut them first, then layer them in the container with small squares of parchment paper between the layers. This stops the chocolate tops from sticking to the peanut butter bottom of the layer above it. It sounds fussy, but trust me, future you will thank you when you’re digging into a perfect bar on day four!
Reheating? Honestly, I rarely reheat these because they are dynamite straight from the fridge or slightly tempered on the counter for 20 minutes. But if you *must* warm one up slightly—maybe you want that fudgy center just a touch gooey—use the microwave sparingly. A quick 10-second blast is usually plenty to soften the chocolate just a little bit without melting that precious peanut butter layer into soup. If you’re storing them longer, they freeze beautifully too! Wrap individual bars tightly in plastic wrap, then tuck them into a freezer bag. They last about two months frozen, and you can thaw them right in the fridge overnight.
If you are looking for something that doesn’t need refrigeration, you should absolutely check out my recipe for pecan cream pie next week—it holds up well on the counter!
Frequently Asked Questions About Buckeye Brownies
I know you’ll have questions once you dive into making these spectacular **buckeye brownies**! They are layered, after all, and layers sometimes bring up technical worries. I’ve collected a few things folks always ask me about to make sure your baking experience is smooth sailing. Feel free to check out my recipe for the lemon cream cheese dump cake if you need an even simpler dessert later!
Can I skip chilling the peanut butter layer?
Oh, I really, truly hope you don’t! That chilling period is vital. If you try to pour the warm chocolate topping over a soft peanut butter layer, the two will just mix together, and you won’t get those distinct, gorgeous layers defining your **Peanut Butter Chocolate Bars**. Chilling is non-negotiable for clean slices!
What if I want an extra-thick peanut butter layer? I love that filling!
That’s speaking my language! If you want thicker **Peanut Butter Brownies**, you can easily double the peanut butter layer ingredients—the butter, peanut butter, sugar, milk—but keep the chocolate ganache topping recipe the same. Just be sure to increase the chilling time for that middle layer significantly, maybe an hour and a half, before topping it with the chocolate. It needs to be very firm!

Can I use a different kind of chocolate chip on top?
Absolutely! While I prefer semi-sweet for the right balance against the sweet filling, feel free to use milk chocolate chips for a sweeter bar, or dark chocolate chips if you want a more intense chocolate punch. Just remember the darker the chocolate, the firmer that top layer might set up, so use that shortening/coconut oil mix wisely for smoothness!
What is the best way to store these Peanut Butter Chocolate Bars?
Because they have that dairy-based filling, these **chocolate peanut butter dessert** bars must be stored in an airtight container in the refrigerator. They stay perfect for about seven days when kept cool. They are just as good cold as they are at room temperature, so chilling is your safest bet!
Nutritional Estimate for One Serving of Peanut Butter Chocolate Bars
Now, I always believe in being upfront about what we’re putting into our bodies, especially when we’re diving headfirst into something as decadent as these **Peanut Butter Chocolate Bars**! Because this recipe uses both a box mix and a ton of homemade elements, the exact numbers can jump around a little depending on the exact brand of mix you grab. But I pulled together a good estimate for you based on the ingredients list we used.
Keep in mind these are just estimates to help guide you. We aren’t aiming for health food here, obviously; we are aiming for pure, unadulterated comfort! Here is the breakdown per bar:
- Serving Size: 1 bar
- Calories: 350
- Sugar: 35 grams
- Sodium: 150 mg
- Fat: 20 grams
- Saturated Fat: 9 grams
- Unsaturated Fat: 11 grams
- Trans Fat: 0.5 grams (Please use shortening/oil as directed to keep this number low!)
- Carbohydrates: 42 grams
- Fiber: 1 gram
- Protein: 4 grams
- Cholesterol: 30 mg
I want to be super clear: these figures are based on cutting the recipe into 24 even squares, which is how mine usually turn out. If you cut them bigger—and trust me, I *totally* get the temptation!—the numbers for each serving will definitely be higher. This is a rich treat, designed for savoring, not counting every single gram. Enjoy the joy of this **Decadent Chocolate Dessert**!
Share Your Decadent Chocolate Desserts Creations
Well, that’s it! You’ve gone from a box mix and some peanut butter to having the most ridiculous, over-the-top, three-layer **decadent chocolate desserts** ready to serve. I really hope you enjoyed the process as much as I do—it’s amazing what a little layering can do!
But here’s where the fun really begins for me. I poured my heart into making sure these **buckeye brownies** worked perfectly for *you* in your own kitchen. Now I genuinely want to hear all about them! Did your peanut butter layer set up like a dream? Did you slice them into huge squares or manage to keep them restrained as small, dangerous bites?
Please, please, please leave a rating right here on the page and drop me a comment below. Tell me what you loved most about that first bite of chocolate and peanut butter bliss. Hearing your successes is what keeps me coming back to the kitchen every single morning to test the next batch of recipes.
If you’re already dreaming up your next baking adventure, maybe you need the perfect frosting next? I’ve got my favorite carrot cake cream cheese frosting recipe coming up soon that would be amazing on almost anything!
Go ahead, share your kitchen victories! I can’t wait to read all about your amazing **buckeye brownies**!
PrintUltimate 3-Layer Buckeye Brownies: Fudgy Base, Creamy Peanut Butter Center, and Glossy Chocolate Ganache
Make these rich Buckeye Brownies featuring a fudgy chocolate base, a thick, creamy peanut butter layer, and a smooth chocolate ganache topping. This recipe delivers the classic peanut butter and chocolate combination in a decadent bar form.
- Prep Time: 25 min
- Cook Time: 30 min
- Total Time: 1 hour 55 min
- Yield: 24 servings 1x
- Category: Dessert
- Method: Baking
- Cuisine: American
- Diet: Vegetarian
Ingredients
- 1 box (about 18.25 ounces) brownie mix plus ingredients listed on box (eggs, oil, water)
- 1 cup (2 sticks) unsalted butter, softened
- 1 cup creamy peanut butter
- 4 cups powdered sugar, sifted
- 1 teaspoon vanilla extract
- 1/4 cup milk
- 1 1/2 cups semi-sweet chocolate chips
- 2 tablespoons shortening or coconut oil
Instructions
- Prepare the brownie layer: Preheat your oven to the temperature specified on the brownie mix box. Grease and line a 9×13 inch baking pan with parchment paper, leaving an overhang on the sides for easy removal.
- Prepare the brownie batter according to the package directions. Spread the batter evenly into the prepared pan.
- Bake the brownie layer according to the package directions for a 9×13 pan, or until a toothpick inserted near the center comes out with moist crumbs attached. Let the brownies cool completely in the pan.
- Prepare the peanut butter layer: In a large bowl, beat the softened butter and peanut butter together until smooth.
- Gradually add the sifted powdered sugar, mixing on low speed until combined, then increase speed to medium and beat until fluffy.
- Add the vanilla extract and milk. Beat until the mixture is smooth and creamy.
- Spread the peanut butter mixture evenly over the cooled brownie layer. Place the pan in the refrigerator for at least 30 minutes to allow the peanut butter layer to set.
- Prepare the chocolate ganache topping: In a microwave-safe bowl, combine the chocolate chips and shortening (or coconut oil). Microwave in 30-second intervals, stirring well after each interval, until the chocolate is completely melted and smooth.
- Pour the melted chocolate mixture over the chilled peanut butter layer. Spread quickly and evenly to cover the entire surface.
- Return the pan to the refrigerator and chill for at least 1 hour, or until the chocolate topping is firm.
- Lift the brownies out of the pan using the parchment paper overhang. Cut into squares. Store leftovers in an airtight container in the refrigerator.
Notes
- For a fudgier brownie, reduce the baking time by 2-3 minutes from what the box suggests.
- If you prefer a slightly firmer peanut butter layer, reduce the milk added to the peanut butter mixture by half.
- Use high-quality creamy peanut butter for the best texture in the middle layer.
Nutrition
- Serving Size: 1 bar
- Calories: 350
- Sugar: 35
- Sodium: 150
- Fat: 20
- Saturated Fat: 9
- Unsaturated Fat: 11
- Trans Fat: 0.5
- Carbohydrates: 42
- Fiber: 1
- Protein: 4
- Cholesterol: 30