
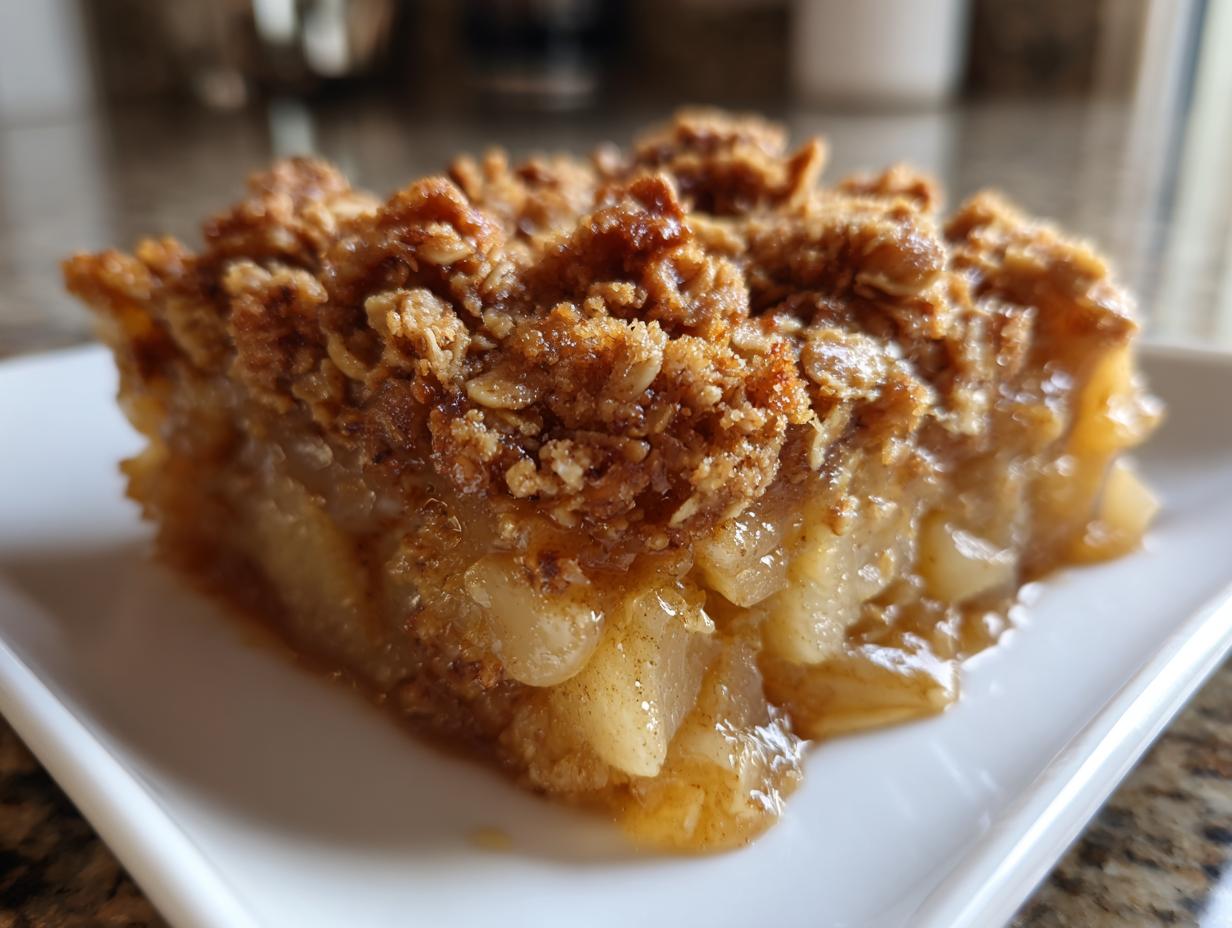
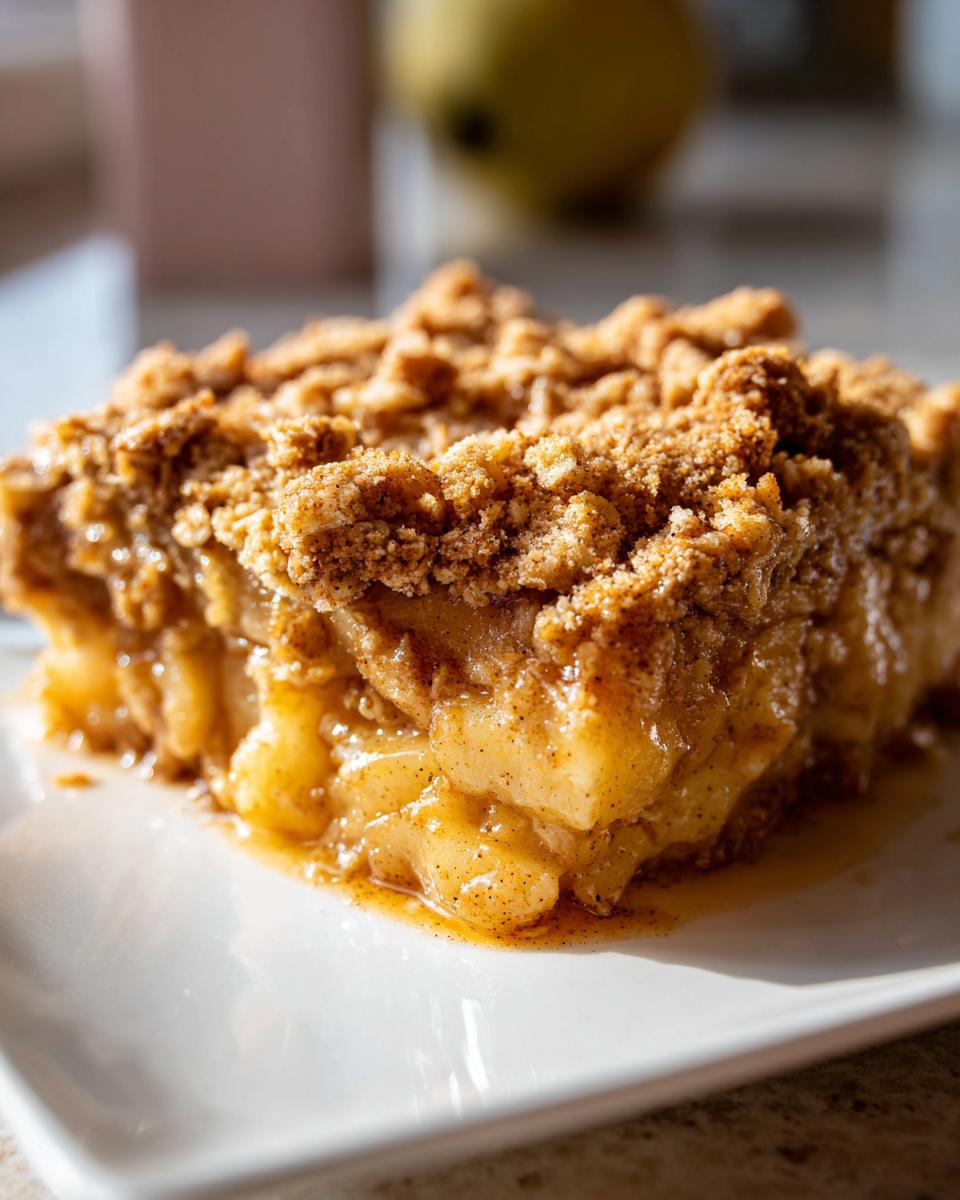
There is just nothing that says ‘cozy evening’ quite like the smell of warm spices and bubbling fruit filling your kitchen. When the air gets crisp and you need that hug-in-a-bowl kind of dessert, trust me, you need a stellar pear crisp. Forget fussy pies; this Easy Brown Sugar Cinnamon Pear Crisp is my go-to whenever I crave that rustic, homemade goodness without spending hours babysitting the oven. Here at the site, my whole philosophy, as Maddie Thompson, is taking those beloved heritage flavors—the stuff our grandmothers perfected—and making them completely doable for our busy modern lives. This recipe is exactly that: pure comfort, perfectly translated.
- Why This Easy Pear Crisp Recipe is Your New Favorite Fall Fruit Crisp
- Ingredients for the Best Ever Pear Crisp
- How to Prepare This Easy Pear Crisp Recipe Step-by-Step
- Tips for Success with Your Homemade Fruit Crisp
- Variations: Making a Nut Pear Crisp or Cranberry Pear Crisp
- Serving Suggestions for This Warm Spiced Dessert
- Storage and Reheating Instructions for Leftover Pear Crisp
- Frequently Asked Questions About This Baked Pear Dessert
- Estimated Nutritional Data for This Brown Sugar Crisp
Why This Easy Pear Crisp Recipe is Your New Favorite Fall Fruit Crisp
If you’re hunting for the ultimate comfort food dessert that doesn’t require complicated steps, you’ve landed in the right spot. This recipe is ridiculously fast. We’re talking 55 minutes total, which means you can totally make this happen on a busy Tuesday night! It’s exactly the sort of accessible recipe I love sharing from my kitchen to yours. If you’re after more wonderful treats, check out all my delicious dessert recipes!
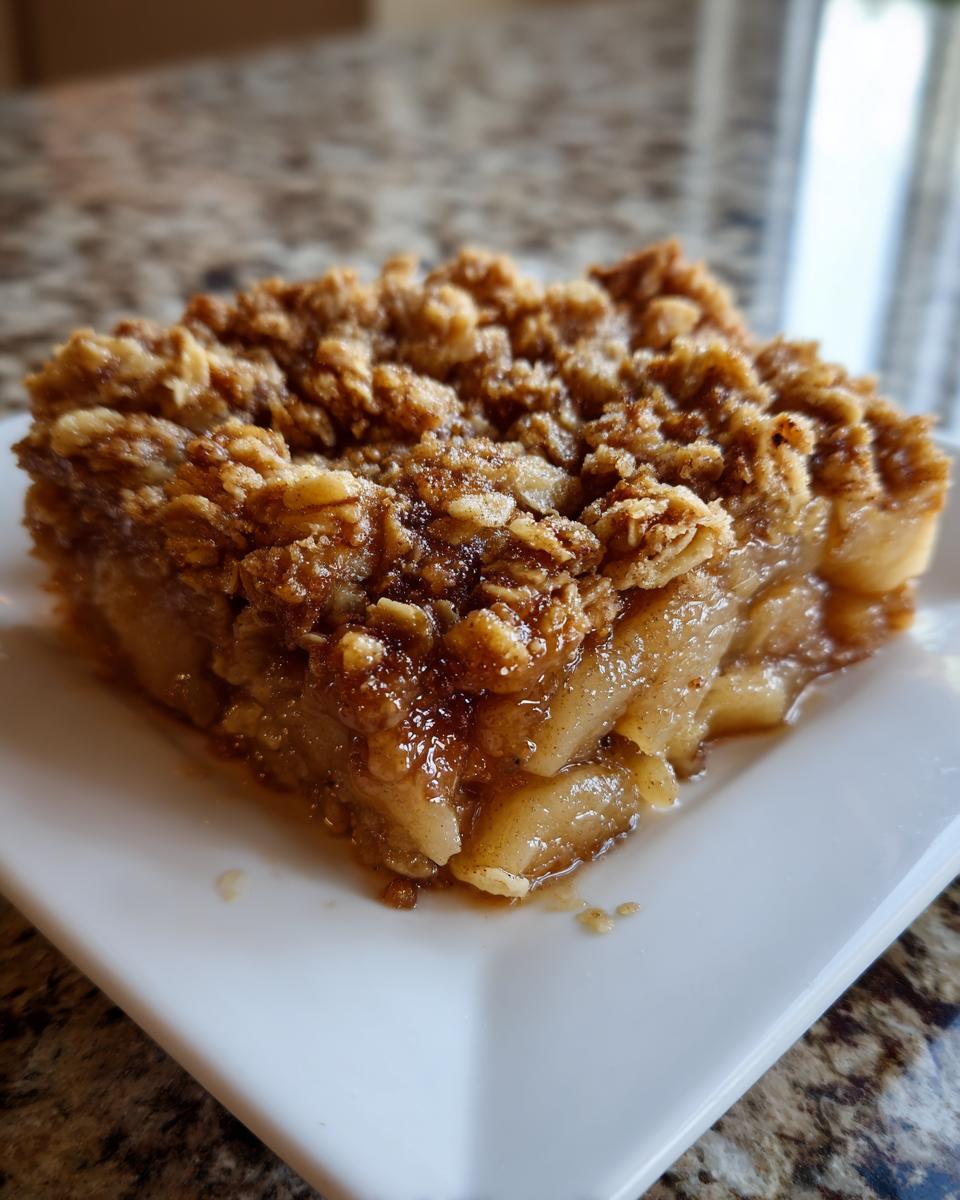
- It smells like autumn heaven thanks to the perfect balance of brown sugar and cinnamon.
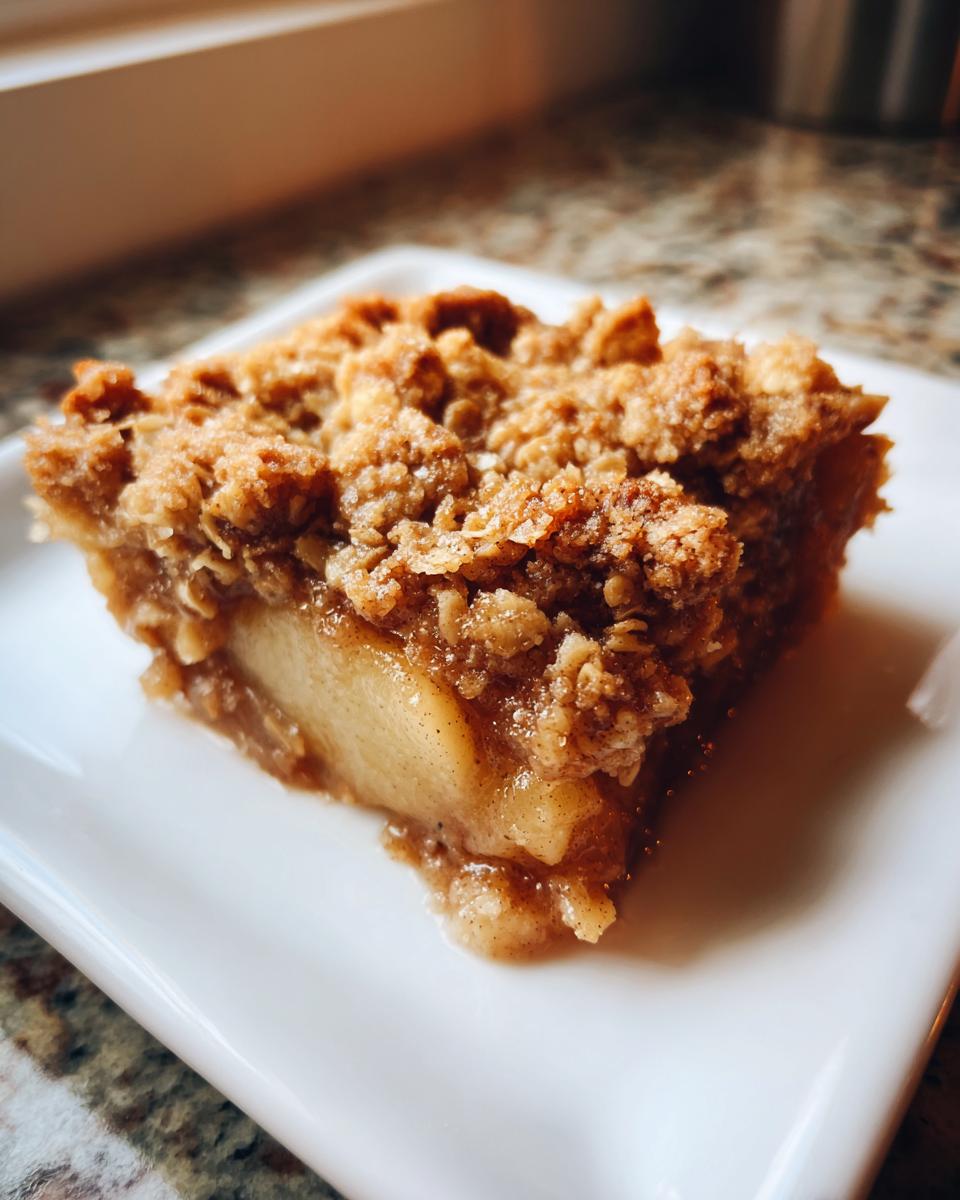
- The fruit softens beautifully but doesn’t turn to mush; it holds its own!
- It’s truly an easy pear crisp recipe—no fancy equipment needed.
This is what I turn to when I need that warm, spiced hug from a dessert without committing to a huge project. This cinnamon pear crisp is ready before dessert even feels necessary.
Quick Prep Time for a Simple Baked Fruit Dessert
Seriously, get your measuring cups ready because we only spend about 15 minutes prepping everything. That’s less time than it takes to choose a movie! It’s the ideal simple baked fruit choice when you want something rustic and wholesome without the fuss. You just slice, mix, top, and bake. That’s all there is to it!
The Perfect Brown Sugar Crisp Flavor Profile
The real star here is the pairing of those sweet, tender pears with that deep, molasses flavor from the brown sugar. We let the cinnamon do the heavy lifting regarding spice, which complements the pears perfectly without overpowering them. When it bakes, that sugar melts just enough to create these little pockets of caramel around the fruit. It makes the whole experience feel like a luxurious brown sugar crisp, but you didn’t have to try hard at all!
Ingredients for the Best Ever Pear Crisp
When I translate a recipe like this classic pear crisp, the second thing that matters after the technique is making sure you have the right stuff. Precision in ingredients builds trust, right? My grandmother always said you can’t make gold out of gravel, and the same goes for baking. Don’t worry, these are all simple pantry staples, but getting the prep right makes all the difference for that perfect topping!
If you’re looking for other ways to bring those warm fruit flavors to your morning routine, you might want to check out my apple cinnamon muffins recipe, too! But first, let’s gather what we need for this crisp.
For the Tender Pear Filling
This part is super straightforward. The key here is making sure those pears are ripe enough to be sweet, but not so soft that they just dissolve into mush when they bake. You want tender slices!
- 6 medium ripe pears, peeled, cored, and sliced
- 1/4 cup granulated sugar
- 1 tablespoon lemon juice (this keeps them bright!)
- 1 teaspoon ground cinnamon
For the Buttery Oat Topping Dessert
This is what makes it a true crisp—that crunchy, buttery texture on top of soft fruit. See how we’re using delicious dessert recipes staples here? Make sure that butter is cold; that’s going to be crucial later on for the right crumb!
- 1/2 cup all-purpose flour
- 1/2 cup packed brown sugar (the star for that deep flavor!)
- 1/2 cup rolled oats (use old-fashioned, not instant!)
- 1/4 teaspoon salt
- 1/2 cup (1 stick) cold unsalted butter, cut into small pieces
How to Prepare This Easy Pear Crisp Recipe Step-by-Step
Okay, assembling this pear crisp is incredibly satisfying because you see the delicious dessert taking shape right before your eyes! It feels like cheating how fast this comes together. Since we’re focusing on efficiency here—check out my tips for quick weeknight dinners if you’re in a rush—we need to get this dish prepped and into the oven ASAP.
Preparing the Fruit Base
First things first: get that oven heated up to 375 degrees Fahrenheit and lightly grease your 8×8 dish. Now, grab that bowl with your sliced pears, the granulated sugar, lemon juice, and that teaspoon of cinnamon. Toss everything gently—we don’t want to bruise the fruit! Then, pour that sweet, spiced pear mixture right into your prepared dish. Spread it out so it’s an even layer. That’s the bottom layer done! See? Minimal effort, maximum impact already starting.
Creating the Perfect Pear Crumble Topping
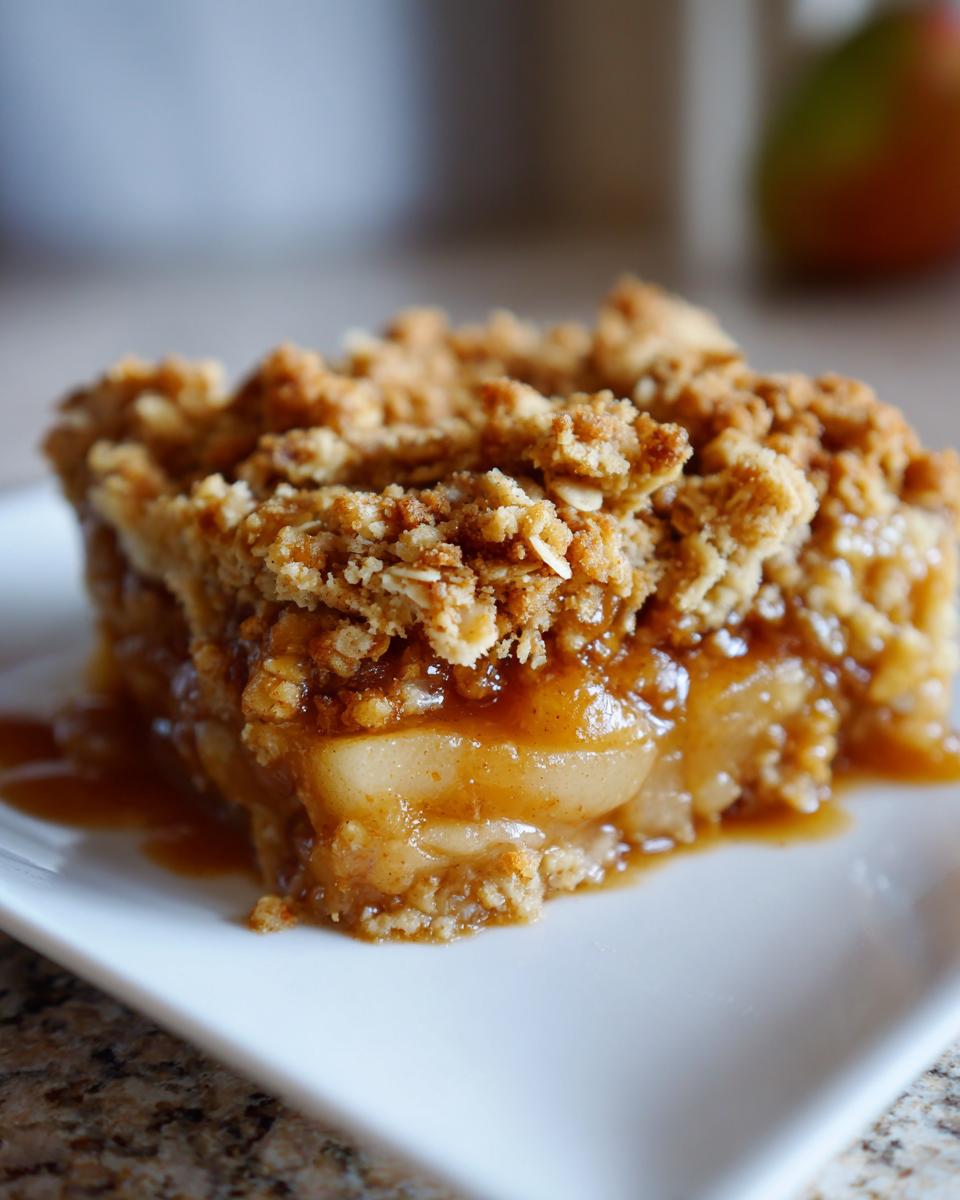
Time for the best part: the topping! In a separate bowl, whisk together your flour, brown sugar, those rolled oats, and salt. Now for the technique: you need to cut in the cold butter. I always use my fingertips for this because I can actually *feel* when it’s right. You’re looking for a coarse crumb—think tiny pebbles and little pea-sized chunks of butter still visible. Don’t over-blend it into a paste; those chunks of cold butter are going to steam in the oven and make your oat topping dessert wonderfully crunchy!
Baking and Setting the Cinnamon Pear Crisp
Once your topping is scattered evenly over the pears, pop the whole thing into that hot oven. It usually takes between 35 to 45 minutes. You’re looking for that beautiful golden-brown top and the filling bubbling vigorously around the edges. This tells you the cinnamon pear crisp is definitely done! But here’s my crucial tip for the absolute best texture: let it rest! Cooling on a wire rack for at least 15 minutes after it comes out is non-negotiable. This short rest lets the filling thicken up so you don’t get a watery mess when you scoop it out.
Tips for Success with Your Homemade Fruit Crisp
Look, I’ve been there. I have made more sad, soggy crisps in my kitchen than I care to admit when I first started adapting these old recipes. The first time I tried making a pear crisp combination, I used pears that were basically mushy, and the topping turned into this doughy blanket. It was a tragedy! But that’s how we learn, right? That failure taught me that the secret to a truly great pear crisp isn’t complicated, it’s just about paying attention to two things: the fruit quality and the topping temperature.
Getting these details right transforms a decent dessert into one of those cozy dessert recipes you’ll make over and over again. If you’re looking for something else that requires similar mindful attention to texture, check out some of my easy breakfast ideas that turn out just right every time!
Selecting the Right Pears for Your Pear Crisp
When you’re shopping for those beautiful pears, you need to use your hands a little bit. Don’t grab the ones that are already super soft at the grocery store neck. You want pears that are ripe, yes—they should yield just a little bit when you press gently near the stem—but mostly, they need to be firm enough to hold their shape when they get hot in the oven. If they are too soft before baking, you end up with fruit soup rather than distinct, tender slices.
I usually go for Bosc or Anjou pears for this baked pear dessert. They maintain their structure way better than softer varieties. Remember, we want tender fruit, not applesauce!
Achieving Maximum Crunch in the Topping
This is where most people mess up the pear crumble topping, and trust me, nobody wants a squishy topping over warm, juicy pears. The absolute number one rule for maximum crunch is keeping your butter COLD. I mean freezer-cold, cubed, ready-to-go cold.
When you’re cutting the butter into your dry topping mixture (the flour, oats, and brown sugar), you must work fast, whether you use a pastry blender or your fingers. The goal is to combine those ingredients just until the butter pieces are roughly the size of little peas. If the butter starts feeling soft or melts into the flour mixture because your hands are warm, stop! Put the bowl in the fridge for five minutes before continuing. Those untouched, cold butter pockets are what create steam bubbles when they bake, giving you that desirable golden, crunchy oat finish.
Variations: Making a Nut Pear Crisp or Cranberry Pear Crisp
While this Easy Brown Sugar Cinnamon Pear Crisp is practically perfect as is—a combination I stand by—I know some of you love to tinker! That’s the fun of homemade fruit crisp, isn’t it? We take that fantastic foundation and toss in a little something extra for a whole new layer of flavor. You absolutely can customize this recipe, and honestly, adding a little texture or tartness really elevates it, especially if you are serving it for a crowd.
If you’ve enjoyed mixing and matching fruit flavors, you have to check out my apple cranberry cobbler recipe sometime. But for this pear crisp, here are the two easiest ways I love to change things up!
Adding Nuts for a Nut Pear Crisp Texture
If you’re looking for something extra to bite into in that otherwise soft fruit base, a handful of nuts is your best friend. This is how we turn it into a proper nut pear crisp! The walnuts or pecans provide such a nice earthy contrast to the sweet cinnamon and brown sugar.
My secret here is to toast them lightly first, just for a few minutes in a dry pan until you can really smell them working their magic. Then, you just toss about half a cup of chopped walnuts or pecans right into the topping mixture along with the flour and oats. Make sure they are cut into medium-sized pieces so they don’t burn before the fruit is done baking. It adds such a satisfying crunch to that oat topping dessert!
Incorporating Tartness with Cranberry Pear Crisp
Sometimes you need a little wake-up call in a dessert, right? Pears are sweet, and sometimes they need that sharp, tart edge to really shine. That’s where cranberries come in to create a gorgeous cranberry pear crisp.
This addition is super simple! Grab about a cup of fresh or frozen cranberries—no need to thaw them if you use frozen. Just toss them straight into the bowl with the sliced pears, granulated sugar, lemon juice, and cinnamon before you pour it into the baking dish. The cranberries burst open while baking, releasing tart juices that mingle with the cinnamon-spiced pear syrup. If you use frozen ones, just know your baking time might run about five minutes longer to account for the extra cold coming into the filling.
Serving Suggestions for This Warm Spiced Dessert
Okay, the pear crisp is out of the oven, golden, bubbly, and smelling absolutely incredible. I know the temptation is to dive in right away, but trust me, letting it rest for those 15 minutes first makes serving so much cleaner! But now comes the fun part: dressing up this warm spiced dessert.
While this crisp is fantastic all on its own—seriously, it holds up great—it truly achieves peak cozy status when paired with something cold and creamy. These little additions are what turn a simple baked fruit dessert into something truly special, perfect for those nights when you just need comfort food.
If you are looking for an equally comforting, yet slightly different, baked good for another occasion, you might want to bookmark my pumpkin banana bread recipe. But for scooping time here, you have options!
- Vanilla Ice Cream: This is the classic winner, hands down. The cold, sweet cream melts into the hot, spiced fruit filling, creating a swirl of temperature and texture that is unbeatable.
- Fresh Whipped Cream: A simple dollop of homemade whipped cream—just heavy cream whipped with a tiny bit of powdered sugar and vanilla—adds lightness. It’s less intense than ice cream but still feels indulgent.
- A Crème Anglaise Drizzle: If you’re feeling fancy, a thin custard sauce is delicious, but honestly, for an easy crisp, skip the fuss!
The main thing I want you to remember is that this is a cozy dessert recipe, so serve it warm! There’s nothing better than eating it straight from the baking dish while it’s still radiating heat on a chilly evening.
Storage and Reheating Instructions for Leftover Pear Crisp
Now, I know what you’re thinking: “What if there are leftovers?” That’s a rare problem in my house, but it happens! Good news: this pear crisp holds up really well, which is a huge win for me because I love planning for leftovers. Since we focused so much on getting that gorgeous crunch in the topping, our main goal when storing and reheating this homemade fruit crisp is preserving that texture.
This recipe, being a wonderfully simple baked fruit dessert, keeps better than a pie crust does, honestly. If you’re not going to eat it all right away—which, no judgment if you do—make sure you let it cool completely before you even think about putting a lid on it. Putting a warm crisp into a container traps the steam, and steam is the sworn enemy of crunch!
If you’re looking for other make-ahead comfort foods that last well, you should definitely take a look at my old-fashioned date nut bread recipe. It’s another great one that tastes even better the next day!
- Storage Life: Store your leftover pear crisp tightly covered at room temperature for one day, or in the refrigerator for up to four days. If you refrigerate it, I always recommend covering it loosely with plastic wrap or foil to prevent it from drying out too much.
- The Reheating Dilemma: You have two choices here, and one is much better than the other for that topping.
- Microwave (The Quick Fix): If you just need a small scoop warmed up *right now* and you don’t care about the oat topping being perfectly crisp, the microwave works fine. Zap it for 30-45 seconds until warm through. It will soften the topping slightly.
- Oven (The Crisp Restorer): If you want that topping back to its golden, crunchy glory, you absolutely must use the oven! Set your oven to about 350 degrees. Place the portion you want in an oven-safe dish, cover it loosely with foil (just so the edges don’t burn before the middle heats), and bake for about 10 to 15 minutes. That gentle heat wakes up the butter and toasts the oats again. It’s worth the extra ten minutes, trust me!
Frequently Asked Questions About This Baked Pear Dessert
I get so many lovely messages about this pear crisp after people make it, and usually, the questions circle back to a few common areas. It’s totally normal, especially when you’re used to other baked fruit recipes! I want to make sure you feel completely confident giving this baked pear dessert a try, so let’s clear up any worries right here. If you need more sweet ideas after this, go check out my main delicious dessert recipes page!
Can I use different fruit in this easy pear crisp recipe?
Oh, absolutely! This is one of those magical recipes that works with almost any firm fruit you have on hand. If you have apples, you can easily turn this into an apple pear crisp. Just use half apples and half pears. Apples hold their structure even better than pears sometimes, so you might find you need just a touch more sugar or cinnamon to balance it. It’s incredibly flexible, making it a wonderful year-round easy pear crisp recipe once you get the technique down!
What is the best type of pear to use for a crisp?
This is a great question, because the wrong pear spells doom for the texture! You want something that won’t collapse into mush when it’s baking under that heat. I always steer folks toward Bosc or Anjou pears for this crisp. They are wonderfully firm when you buy them just right, and they soften up beautifully when baked without sacrificing their shape. Avoid the softer Bartlett pears unless you prefer a much looser, smoother filling. Remember, we are aiming for tender fruit, not baby food!
Can I make the topping ahead of time for this comfort food dessert?
Yes, you totally can! This is a lifesaver when you have company coming over. For this comfort food dessert, you can mix up the dry ingredients for the topping—the flour, brown sugar, oats, and salt—and store that in an airtight container on the counter for a couple of days. When you’re ready to bake, just slice your cold butter, cut it in really fast, and top the pears. If you make the full topping mixture and keep the butter cold, you can actually store the whole pear crumble topping mixture in the fridge for a day or two. If it’s chilled, just let it sit on the counter for about ten minutes before you cut the butter in, or you might lose that signature crunch!
Estimated Nutritional Data for This Brown Sugar Crisp
Now, I want to be super clear about this part! Since I’m a home cook who tests things in my own kitchen, and not a registered nutritionist, the numbers I’m sharing here are educated estimates based on the standard ingredients listed for this brown sugar crisp. This data should give you a good baseline understanding of what you are enjoying, but if you have serious dietary restrictions, you know the drill—adjustments will depend on the exact brands of butter or oats you use. If you’re tracking things closely, you might also want to check out some healthy lunch recipes for the rest of your day!
For a standard serving size (which this recipe breaks into 6 portions), here are those estimated figures for our delicious fall fruit crisp:
- Calories: About 320
- Fat: Around 16g (10g of that is saturated fat, thanks to that lovely butter in the topping!)
- Carbohydrates: Roughly 45g
- Sugar: This clocks in around 35g, but remember most of this is natural fruit sugar and the molasses notes from the brown sugar—it’s flavor territory!
- Protein: About 4g
- Cholesterol: Estimated at 40mg
It’s a satisfying treat, perfect for ending a cozy dinner. Enjoy every bite without worrying too much about the precise numbers!
PrintEasy Brown Sugar Cinnamon Pear Crisp
You can make this simple, comforting pear crisp featuring tender pears, warm cinnamon, and a buttery oat topping. It is a perfect cozy dessert for fall evenings.
- Prep Time: 15 min
- Cook Time: 40 min
- Total Time: 55 min
- Yield: 6 servings 1x
- Category: Dessert
- Method: Baking
- Cuisine: American
- Diet: Vegetarian
Ingredients
- 6 medium ripe pears, peeled, cored, and sliced
- 1/4 cup granulated sugar
- 1 tablespoon lemon juice
- 1 teaspoon ground cinnamon
- 1/2 cup all-purpose flour
- 1/2 cup packed brown sugar
- 1/2 cup rolled oats
- 1/4 teaspoon salt
- 1/2 cup (1 stick) cold unsalted butter, cut into small pieces
Instructions
- Preheat your oven to 375 degrees Fahrenheit. Lightly grease an 8×8 inch baking dish.
- In a medium bowl, combine the sliced pears, granulated sugar, lemon juice, and cinnamon. Toss gently to coat. Pour the pear mixture into the prepared baking dish and spread evenly.
- In a separate bowl, prepare the topping. Whisk together the flour, brown sugar, rolled oats, and salt.
- Cut in the cold butter using a pastry blender or your fingertips until the mixture resembles coarse crumbs. Do not overmix; some pea-sized pieces of butter are fine.
- Sprinkle the oat topping evenly over the pear mixture in the baking dish.
- Bake for 35 to 45 minutes, or until the topping is golden brown and the fruit filling is bubbly around the edges.
- Let the pear crisp cool on a wire rack for at least 15 minutes before serving. This allows the filling to set slightly.
Notes
- For a nut pear crisp variation, add 1/2 cup of chopped walnuts or pecans to the topping mixture.
- If you want a cranberry pear crisp, add 1 cup of fresh or frozen cranberries to the pear filling mixture before topping.
- Serve this warm spiced dessert with vanilla ice cream or a dollop of whipped cream for extra comfort.
Nutrition
- Serving Size: 1 serving
- Calories: 320
- Sugar: 35g
- Sodium: 110mg
- Fat: 16g
- Saturated Fat: 10g
- Unsaturated Fat: 6g
- Trans Fat: 0g
- Carbohydrates: 45g
- Fiber: 5g
- Protein: 4g
- Cholesterol: 40mg