
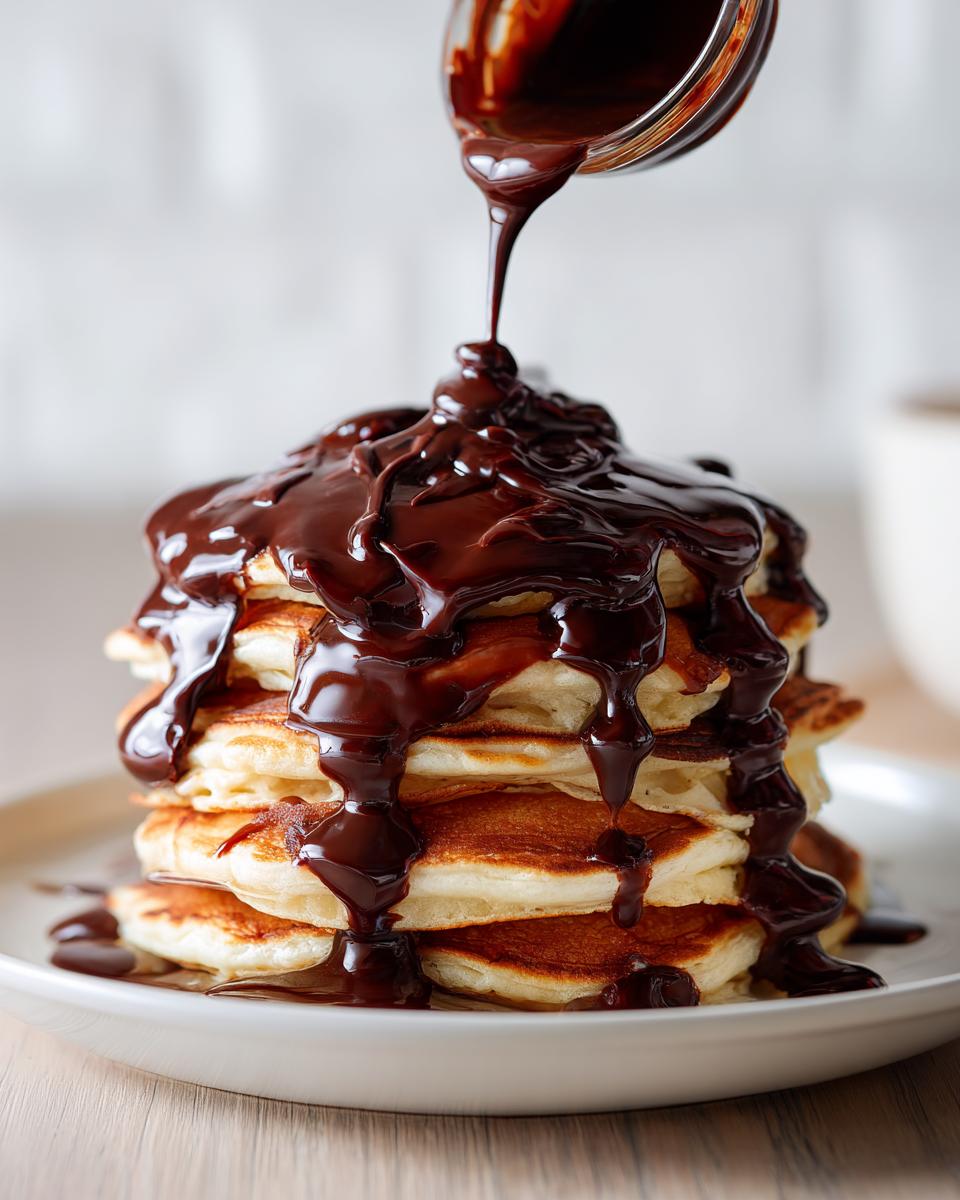
If you’re anything like me, you’ve got that jar of store-bought chocolate syrup sitting in the fridge, and honestly, it just tastes… manufactured. We’re putting a stop to that right now! I want you to ditch that bottle because I promise you, making your own **homemade chocolate syrup** is shockingly simple. It uses basic ingredients you already have—think cocoa powder and sugar—and comes together faster than you can drive to the store. This recipe is the very heart of my philosophy here at MDLATDMM: reliable, delicious food made from scratch without needing fancy equipment. Trust me, once you try this quick, rich drizzling sauce—it’s almost as good as dipping into my famous chewy chocolate chip cookies—you’ll never look back. It’s all about bringing that wholesome comfort back into your kitchen.
- Why This Homemade chocolate syrup Recipe is Your New Pantry Staple
- Gathering Ingredients for Your Cocoa Powder Syrup Recipe
- How To Make Chocolate Syrup: Step-by-Step Instructions
- Serving Suggestions for Your Rich Chocolate Drizzle
- Tips for Success Making chocolate syrup
- Variations: Making a Vegan Chocolate Syrup Option
- Frequently Asked Questions About Homemade Chocolate Syrup
- Estimated Nutritional Information for chocolate syrup
- Share Your Experience Making This Easy Chocolate Sauce
Why This Homemade chocolate syrup Recipe is Your New Pantry Staple
I’m telling you, this is the kind of recipe you memorize fast because you’ll be making it constantly. It checks every box when you need a genuine, flavorful topping, and it proves that store-bought is totally unnecessary. This **easy chocolate sauce** is ready faster than ordering delivery. It’s about building confidence in your kitchen by showing how simple real flavor can be. If you need more inspiration for using homemade toppings, check out my guides on delicious dessert recipes!
Speed: Making chocolate syrup in Under 10 Minutes
Seriously, you can’t beat the speed here. Prep time is about five minutes, and the cooking time is only five minutes. That’s right—ten minutes total! If you have a sudden craving for a sundae or need a last-minute **Quick Dessert Topping** for brownies, this is your answer. No waiting around for complicated steps; just whisk and boil!
Texture: Achieving a Rich Chocolate Drizzle
Forget that weird, slightly grainy stuff you buy off the shelf. When this cools, you get this impossibly **silky chocolate topping**. It’s smooth, it’s velvety, and it drizzles perfectly. Remember, it will be thin right after cooking, but give it time to cool down on the counter—that cooling process is what locks in that beautiful, thick consistency for your next **rich chocolate drizzle**.
Gathering Ingredients for Your Cocoa Powder Syrup Recipe
Okay, time to look at what we need! The beauty of this **cocoa powder syrup recipe** is that you probably have all of this stashed away already. There’s no corn syrup or weird stabilizers required here—just honest pantry staples making magic happen. When you see just five simple things needed, you’ll realize why this beats any store-bought bottle. This is the foundation for the **best homemade syrup**!
- 1 cup granulated sugar
- 1 cup unsweetened cocoa powder
- 1 cup water
- 1 teaspoon vanilla extract
- Pinch of salt
Ingredient Notes and Substitutions for chocolate syrup
I always like to give you a little extra trick up my sleeve, because real home cooks are resourceful, right? If you want to take this up a notch—especially if you’re making it for coffee to use as a **decadent chocolate topping** in an afternoon mocha—swap out half the water with strong, brewed coffee. Seriously, it deepens that chocolate flavor so much without tasting like coffee. That’s a little pro tip I learned from my mother!
Also, remember what I said about thickness? If you skimmed ahead and saw that little note about using it as an **ice cream drizzle recipe**, you can play around with the water. If you want it extra thick—almost like fudge topping—try knocking that water amount down by just a couple of tablespoons. But be careful! Too little water, and it might get too stiff once it cools. For my general-purpose needs, like drizzling on quick weeknight dinners (okay, maybe just dessert!), the recipe measurement is perfect.
How To Make Chocolate Syrup: Step-by-Step Instructions
This is the fun part where the magic happens, and honestly, it’s so much simpler than you think! We’re only dealing with five ingredients, and we’re going straight to the stovetop. Just make sure you’re paying attention because timing is everything, especially when we hit that boiling point. We want that perfectly smooth, rich flavor without turning it into actual candy, right? Grab a small saucepan, and let’s get started on this **simple syrup recipe homemade**!
Whisking and Boiling for the Best Homemade Syrup
First, you need to get the sugar, cocoa powder, and water into that saucepan together. Next, turn your heat to medium. Now, this part needs your full attention: you must whisk constantly until you can’t feel any grainy texture on the bottom of the pan—all that sugar needs to dissolve. Once it’s smooth, this is serious: bring it up to a gentle boil, and let it bubble for exactly 60 seconds. That’s it! One minute! If you let it go longer than that, you risk changing the texture and making it too hard when it cools down, which defeats the purpose of an **easy chocolate sauce**.
Cooling and Storing Your Silky Chocolate Topping
The second we hit that 60-second mark, pull the pan right off the heat. This is when you stir in your vanilla extract and that tiny pinch of salt—that salt is important to balance the sweetness, trust me. Now, here’s the waiting game: you have to let it cool completely. I know, I know, waiting is the hardest part! But this is crucial because that’s when the warm, thin liquid transforms into that lovely, thick drizzle you want for your easy breakfast ideas. Once it’s totally cool, pour it into an airtight container. It keeps beautifully in the fridge for up to three weeks, ready for any ice cream emergency!
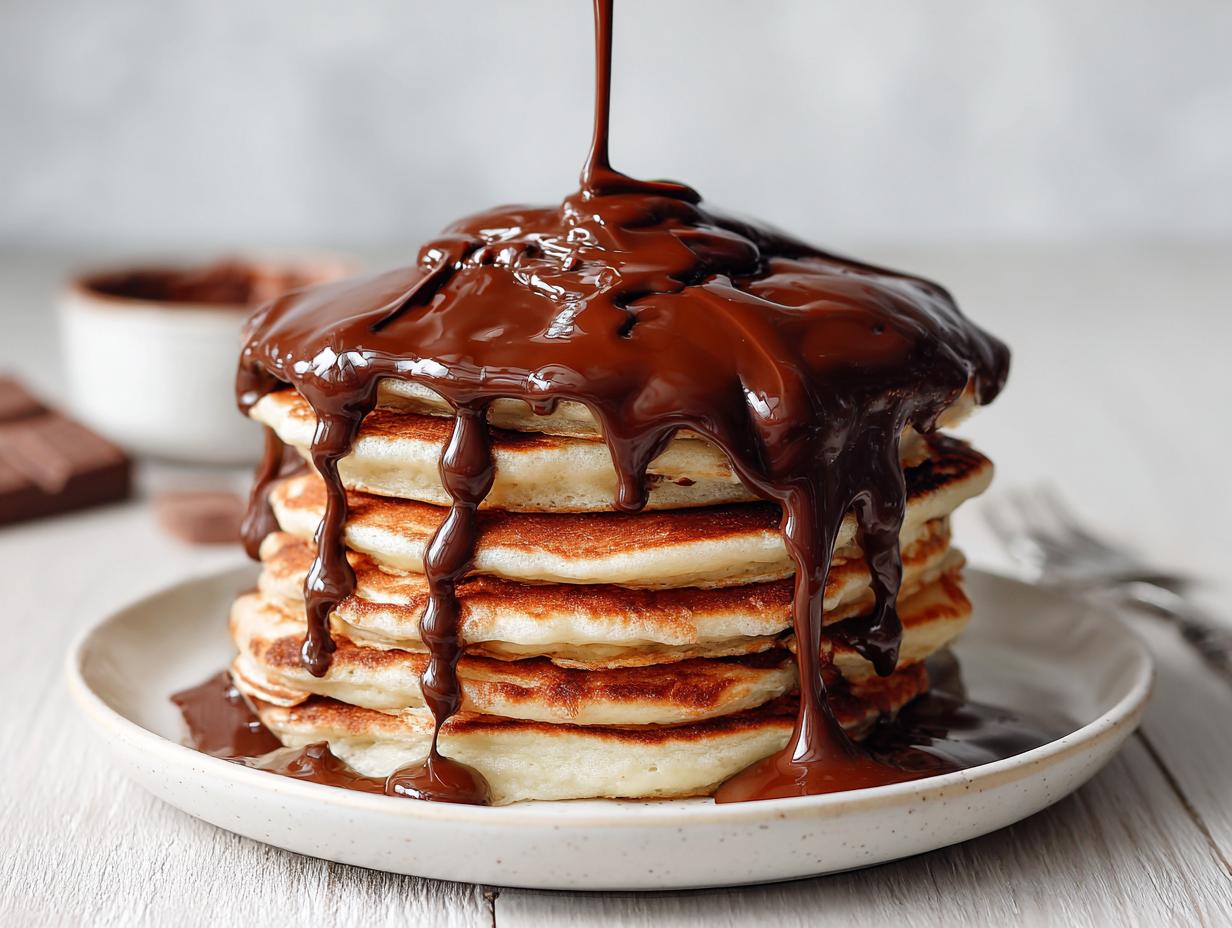
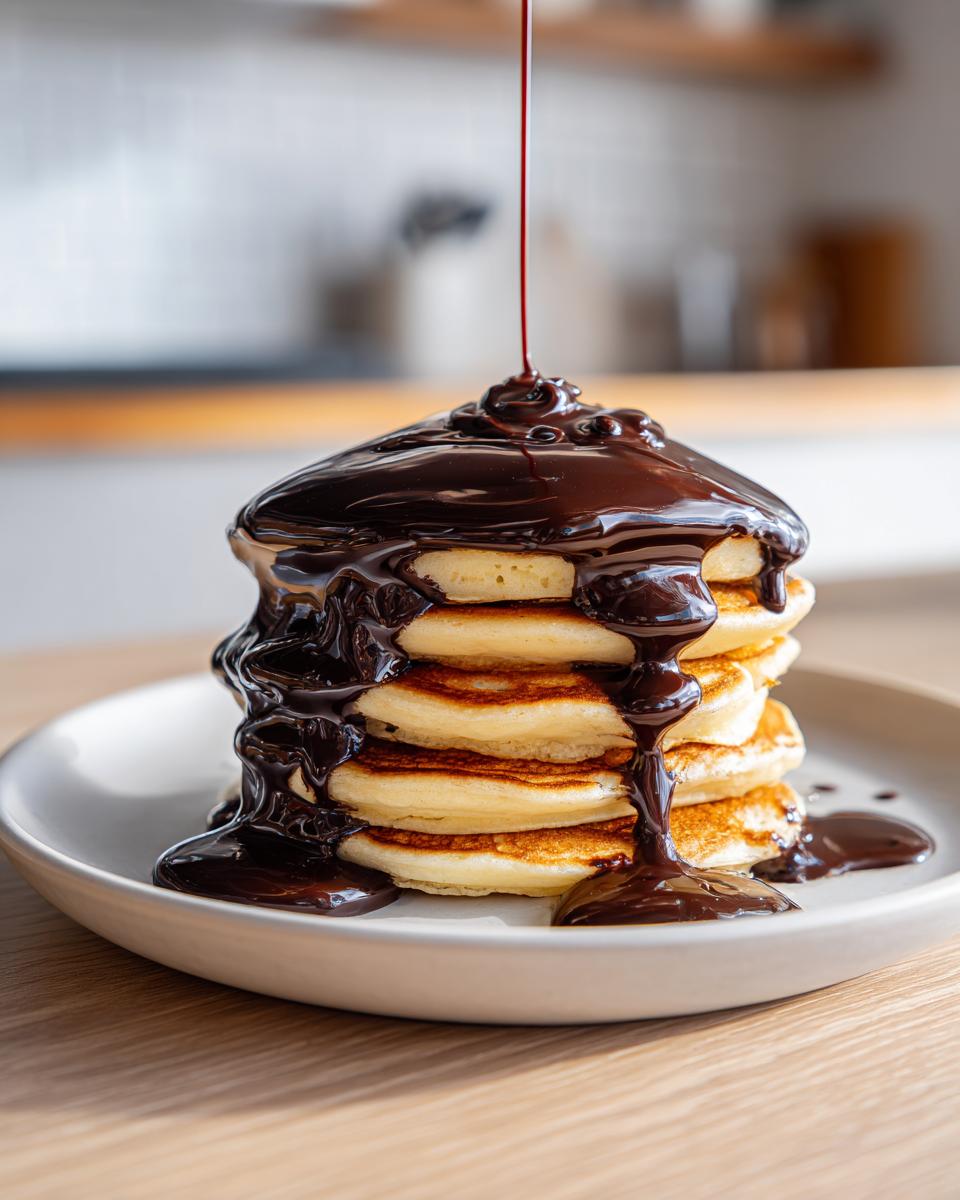
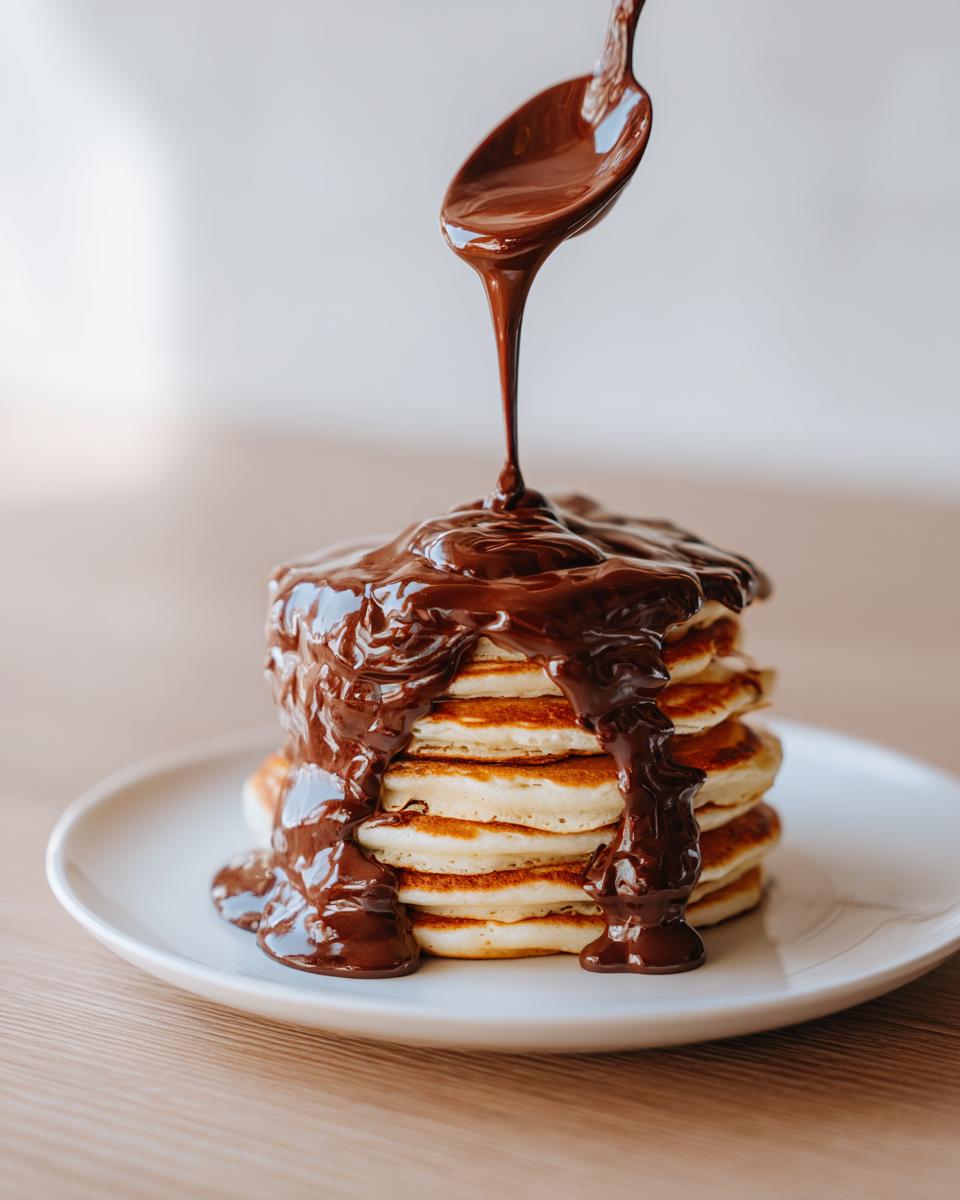
Serving Suggestions for Your Rich Chocolate Drizzle
Okay, you’ve made it! You have a jar of the **best homemade syrup** sitting on your counter, and now you’re wondering what to do with all that chocolate goodness. This is where the fun really begins, because this **rich chocolate drizzle** is unbelievably versatile. Forget about just using it on desserts; this is a pantry powerhouse!
My favorite, absolute first thing I do when I test a new batch is making the ultimate **Chocolate Milk Recipe Base**. Just take a big scoop, warm up a cup of milk (dairy or alternative, your choice!), and whisk it until it’s completely smooth. It tastes so pure, unlike those artificially flavored cartons we grew up on.
And, of course, we have to talk about breakfast! If you’re looking for something to elevate your morning stack, you have to see my tips over at my dedicated guide on pancake topping syrup secrets. But honestly, it’s incredible drizzled liberally over warm waffles or French toast.
Don’t even get me started on ice cream—it’s the perfect **ice cream drizzle recipe** that hardens just slightly on the cold surface while keeping that amazing molten texture underneath.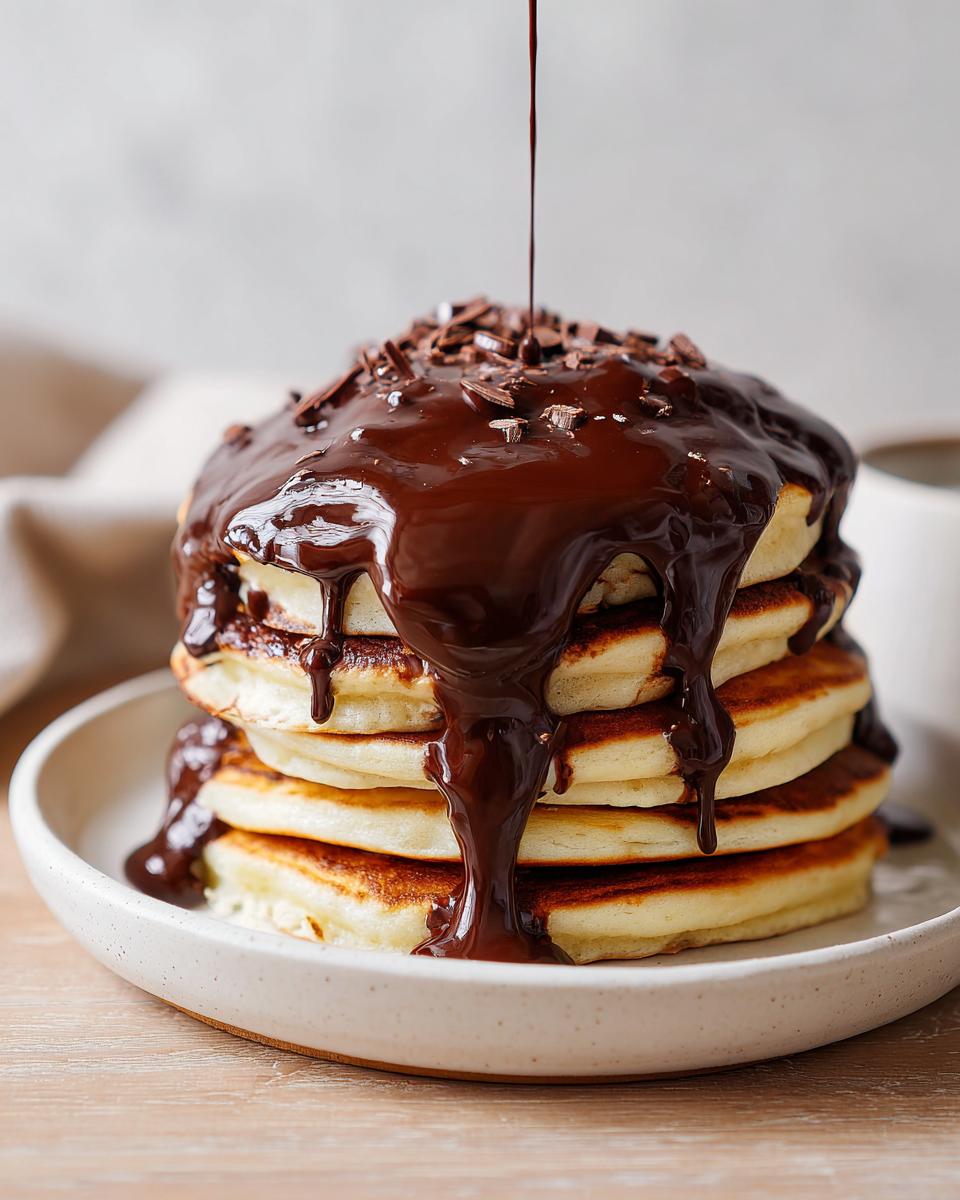
We’ve covered the basics, but feel free to get creative! Use it in your homemade mochas, drizzle it over fresh strawberries, or even use it as a quick dip for pretzels if you need that sweet-salty fix. This **Quick Dessert Topping** truly works for almost anything chocolate-related!
Tips for Success Making chocolate syrup
I’m not trying to brag, but this recipe is genuinely foolproof, especially if you follow a couple of my non-negotiable rules. We’re aiming for high quality here—that **decadent chocolate topping** feel without any store-bought compromises. Since we are making this from scratch, just like my favorite easy dessert recipes, a little bit of mindfulness goes a long way!
My absolute top tip involves preventing graininess, which is the enemy of a good, **velvety chocolate sauce**. Always whisk the cocoa powder and sugar together *before* you add the water on the stovetop. If you dump the dry stuff into the liquid too quickly, you’ll get little dry clumps that are impossible to stir out later. Mixing them dry first helps break up the cocoa clumps ahead of time. It’s a tiny step, but trust me, it’s the difference between perfection and disappointment!
Also, I want to sing the praises of what we *didn’t* use: corn syrup! Many of those commercial syrups rely on it to keep things liquid forever, but honestly, I find it messes with the pure chocolate flavor. Since we aren’t using corn syrup, the cooling step is everything. Don’t rush it! Don’t try to stick it in the freezer to speed things up, either. Let it cool on the counter, stirring occasionally. This allows the natural sugars to settle into that beautiful, thick **homemade chocolate syrup** consistency we are chasing.
Finally, the salt pinch! I know it seems small, but that pinch isn’t just there to stop your teeth from hurting; it actually makes the chocolate taste *more* chocolatey. It deepens everything that’s going on in there. It’s the silent hero that helps make this the **best homemade syrup** you’ve ever tasted!
Variations: Making a Vegan Chocolate Syrup Option
One of the things I just love about this basic formula is how incredibly adaptable it is. I’ve had so many people ask in the comments if they can make a **Vegan Chocolate Syrup Option**, and I’m thrilled to tell you that this recipe is almost naturally vegan already! If you’re sticking to the core ingredients—cocoa powder, water, vanilla, and salt—you’re golden.
The only item you ever need to check is the sugar. Most standard granulated sugar in US is processed using bone char, which isn’t vegan-friendly for some folks, so that’s something to look out for if you are deeply committed to keeping things strictly vegan. If that’s you, just swap out the regular granulated sugar for certified vegan cane sugar, or you could play around with coconut sugar if you don’t mind a slightly different color and deeper molasses tone in your finished product.
If you swap the sugar, just remember that you might need to whisk it a tiny bit longer when you start cooking to ensure it fully dissolves, as different sugars handle heat uniquely. That’s really the only modification needed to turn this amazing **homemade chocolate syrup** into a powerhouse option for everyone.
We also get questions about dairy-free topping needs, and this recipe handles that perfectly since it starts totally milk-free! It’s ready to go as an **easy chocolate sauce** over dairy-free ice cream or mixed into oat milk for a lovely chocolate drink. You can find more ways to incorporate these plant-forward treats in my guide to delicious dessert recipes!
Frequently Asked Questions About Homemade Chocolate Syrup
I know when you’re cooking from scratch, you always have little things pop up in your head that the recipe card just doesn’t cover. Don’t worry about it! That’s exactly why I put this FAQ section together. These are the questions I got most often when I first started sharing this amazing **chocolate syrup** recipe with friends. We want you to feel super confident making this **pantry staple syrup recipe**! For more about my philosophy on dependable recipes, check out my About page.
How long does homemade chocolate syrup last?
This is such an important question! Since we aren’t packing ours full of the preservatives you find in the store bottles, it doesn’t last forever, but it lasts long enough for daily use. If you keep your jar sealed tight and store it in the refrigerator, it stays perfectly delicious for up to three weeks. If you see it starting to look cloudy, it’s time to make a fresh little batch. Trust me, it comes together so fast you won’t mind whipping up a new one!
Can I use this as a Chocolate Milk Recipe Base?
Oh, you absolutely can! In fact, this is one of my favorite uses for this recipe because the flavor is so pure. When you’re making your **Chocolate Milk Recipe Base**, start by warming up about a cup of your favorite milk—dairy or non-dairy, your choice! Then, whisk in just one or two tablespoons of this syrup. Depending on how rich you like it, you might need a little more, but starting small lets you customize it perfectly. It mixes in so much better than the powdery stuff!
What is the difference between this chocolate syrup and chocolate sauce?
That’s a sneaky question because people often use those terms interchangeably, but in the kitchen, there’s a slight difference, right? Generally speaking, a **chocolate syrup** is thinner—great for stirring into coffee or drizzling lightly. A chocolate sauce tends to be thicker, almost like a very rich fudge. Because our recipe uses a straightforward sugar-to-liquid ratio and we only boil it for 60 seconds, ours leans toward that lovely, pourable syrup consistency perfect for that **quick dessert topping**. Remember what I mentioned before? If you want a thicker **rich chocolate drizzle** for sundaes, just pull back on the water a bit next time you make a batch!
Estimated Nutritional Information for chocolate syrup
I always feel like I need to give a little disclaimer when talking about nutrition, because this is homemade goodness, not a health food supplement! But I know some of you are tracking things, so here are the estimates based on the ingredients going into this wonderful **homemade chocolate syrup**. Remember, this is based on a serving size that seems just right for topping a scoop of ice cream or mixing into a glass of milk.
These numbers are based on the entire batch yielding about 1.5 cups, which means our specified serving size is about two tablespoons. Keep in mind these are estimates—my kitchen scale isn’t a lab, after all! But it gives you a great ballpark figure for this delicious **cocoa powder syrup recipe**.
- Serving Size: 2 tablespoons
- Calories: 110
- Sugar: 18g
- Sodium: 2mg
- Fat: 0.5g
- Saturated Fat: 0.3g
- Unsaturated Fat: 0.2g
- Trans Fat: 0g
- Carbohydrates: 27g
- Fiber: 1g
- Protein: 1g
- Cholesterol: 0mg
See? Simple ingredients lead to simple nutrition facts! That little bit of sugar is what gives us that perfect mouthfeel and helps it thicken up when it cools into that fantastic **decadent chocolate topping**. If you’re using this sparingly, you’re doing just fine!
Share Your Experience Making This Easy Chocolate Sauce
Now don’t just stand there admiring your jar of beautiful, **rich chocolate drizzle**! I want to hear all about it! Did you make it as a late-night treat? Did you blend it into an amazing mocha? Did you finally get to stop buying that weird store-brand stuff? Please tell me everything!
If you made this glorious **easy chocolate sauce**, hop down into the comments right below this section. I truly love hearing how you adapted things or what decadent dessert you smothered it in. Don’t be shy—letting me know how it went helps other folks feel confident trying it out too. If you can, give this recipe a high rating with those five little stars you see floating around here; it helps other home cooks find reliable recipes like this one!
And hey, if you snap a picture of your ice cream sundae looking totally next-level thanks to this homemade topping, tag me on social media! I love seeing your creations. If you’re looking for other ways I use my pantry staples, you can always head over to my contact page to send me a message!
If you’re still scrolling around needing more easy inspiration, I saw a great version of a quick easy homemade chocolate syrup recipe that’s worth checking out too, just to see different takes on this classic. Happy drizzling, friends!
PrintQuick & Easy Homemade Chocolate Syrup Recipe (Better Than Store-Bought)
Stop buying syrup. Make this rich, smooth homemade chocolate syrup in under 10 minutes using simple cocoa powder. It is the best decadent dessert topping for ice cream, pancakes, or mixing into milk.
- Prep Time: 5 min
- Cook Time: 5 min
- Total Time: 10 min
- Yield: About 1.5 cups 1x
- Category: Dessert Topping
- Method: Stovetop Cooking
- Cuisine: American
- Diet: Vegetarian
Ingredients
- 1 cup granulated sugar
- 1 cup unsweetened cocoa powder
- 1 cup water
- 1 teaspoon vanilla extract
- Pinch of salt
Instructions
- Combine the sugar, cocoa powder, and water in a small saucepan.
- Place the saucepan over medium heat. Whisk constantly until the sugar dissolves completely and the mixture is smooth.
- Bring the mixture to a gentle boil, stirring occasionally. Let it boil for exactly 60 seconds. Do not overcook.
- Remove the saucepan from the heat. Stir in the vanilla extract and salt.
- Allow the syrup to cool completely. It will thicken as it cools.
- Pour the finished chocolate syrup into an airtight container for storage.
Notes
- For a richer flavor, substitute 1/2 cup of the water with 1/2 cup of strong brewed coffee.
- If you want a thicker ice cream drizzle, slightly reduce the amount of water used in the recipe.
- This syrup keeps well in the refrigerator for up to three weeks.
Nutrition
- Serving Size: 2 tablespoons
- Calories: 110
- Sugar: 18g
- Sodium: 2mg
- Fat: 0.5g
- Saturated Fat: 0.3g
- Unsaturated Fat: 0.2g
- Trans Fat: 0g
- Carbohydrates: 27g
- Fiber: 1g
- Protein: 1g
- Cholesterol: 0mg