
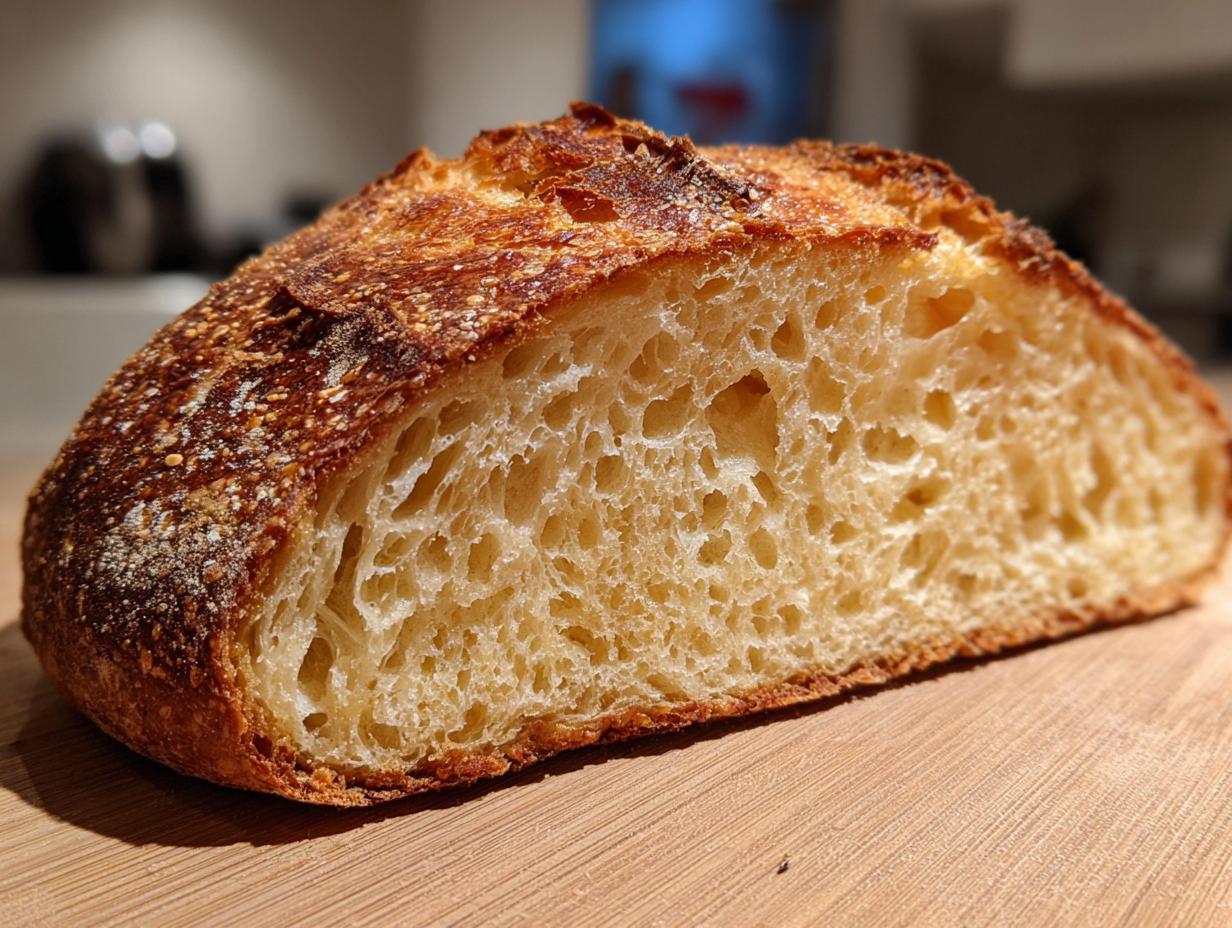
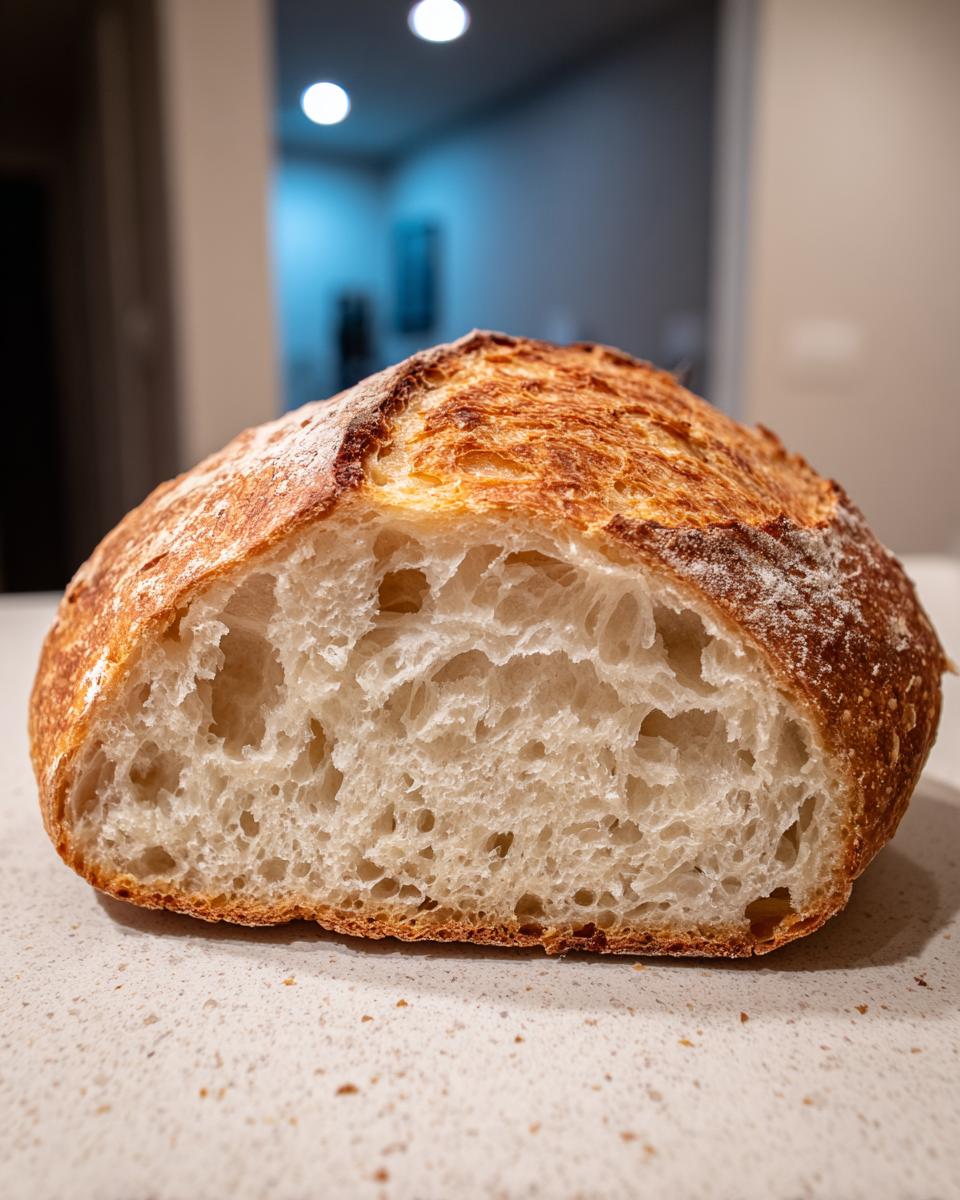
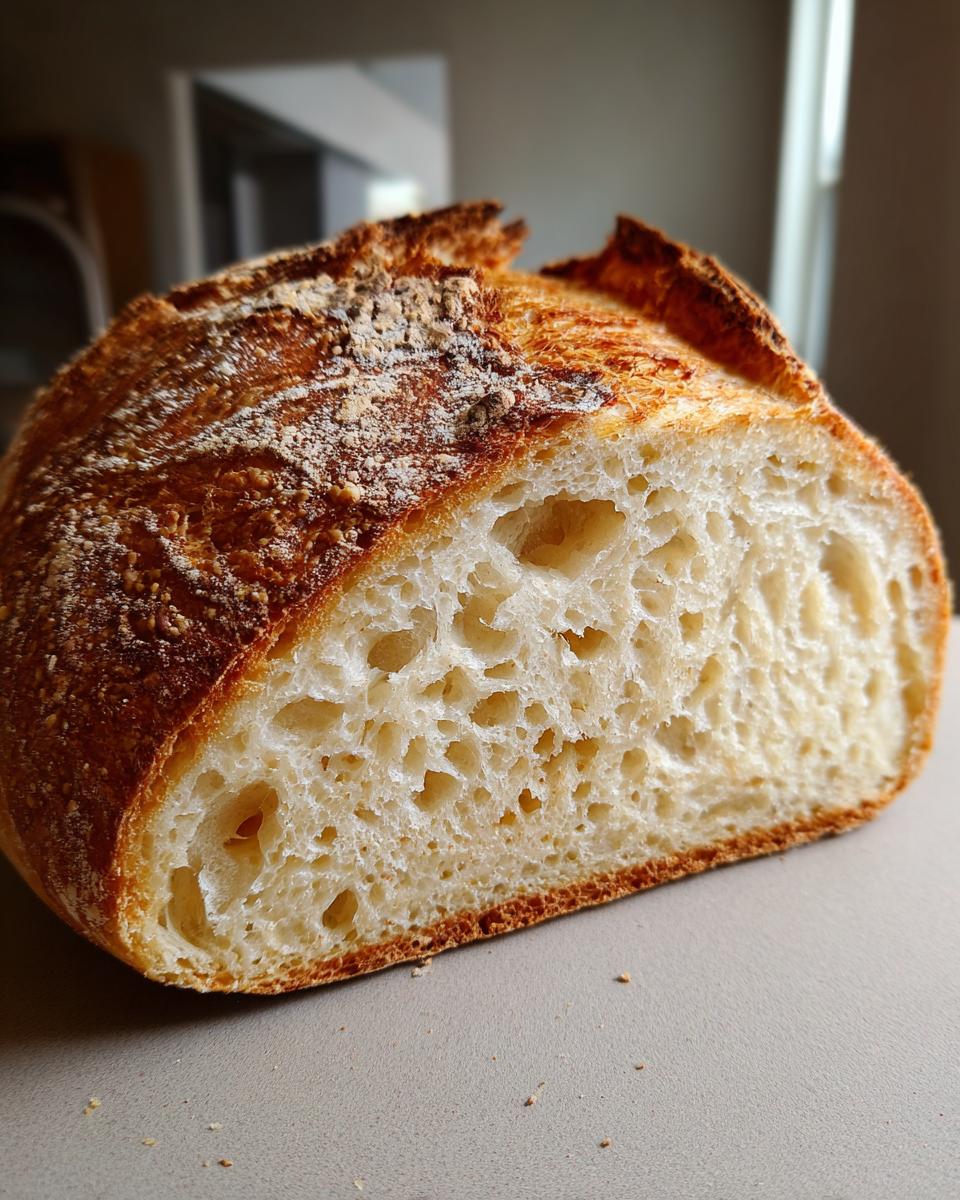
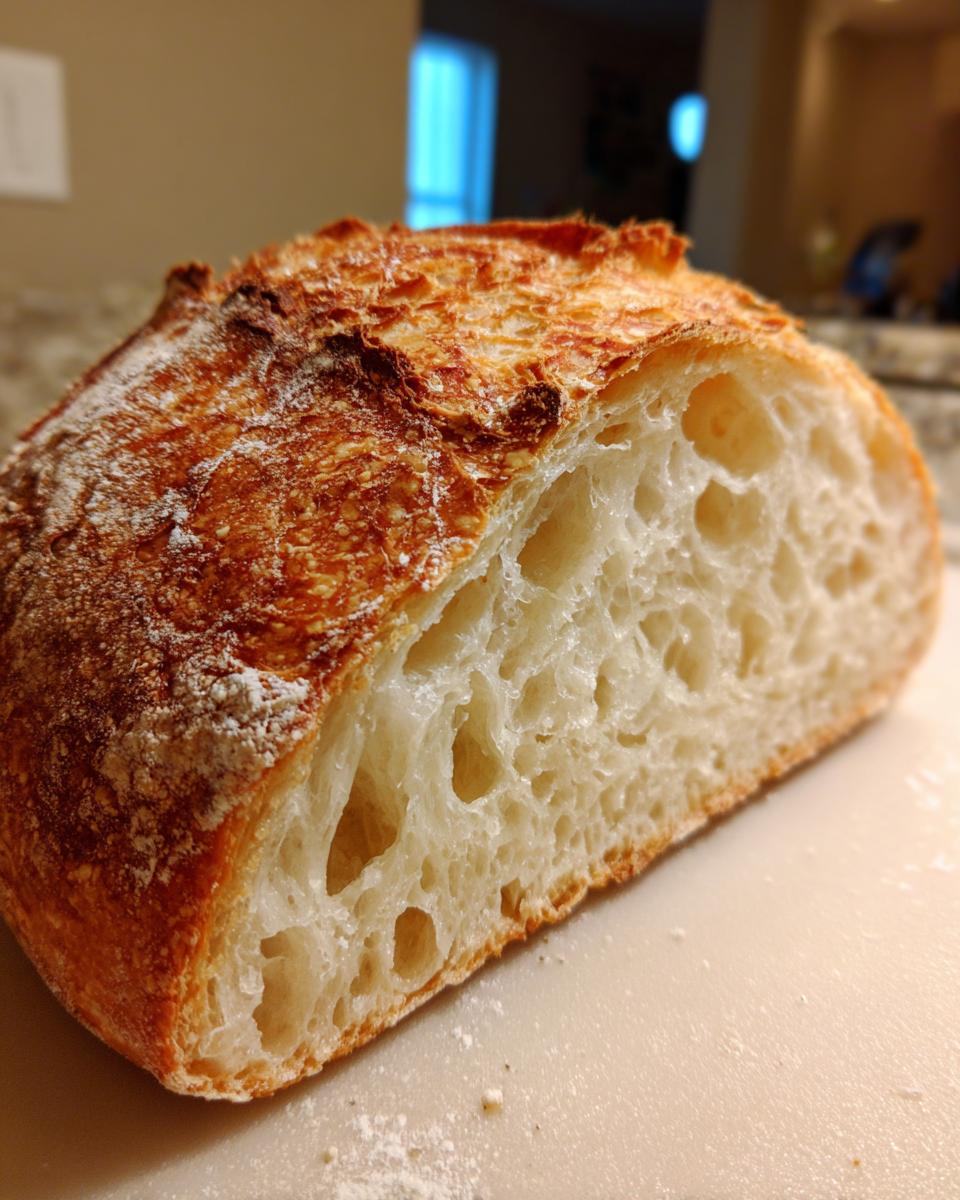
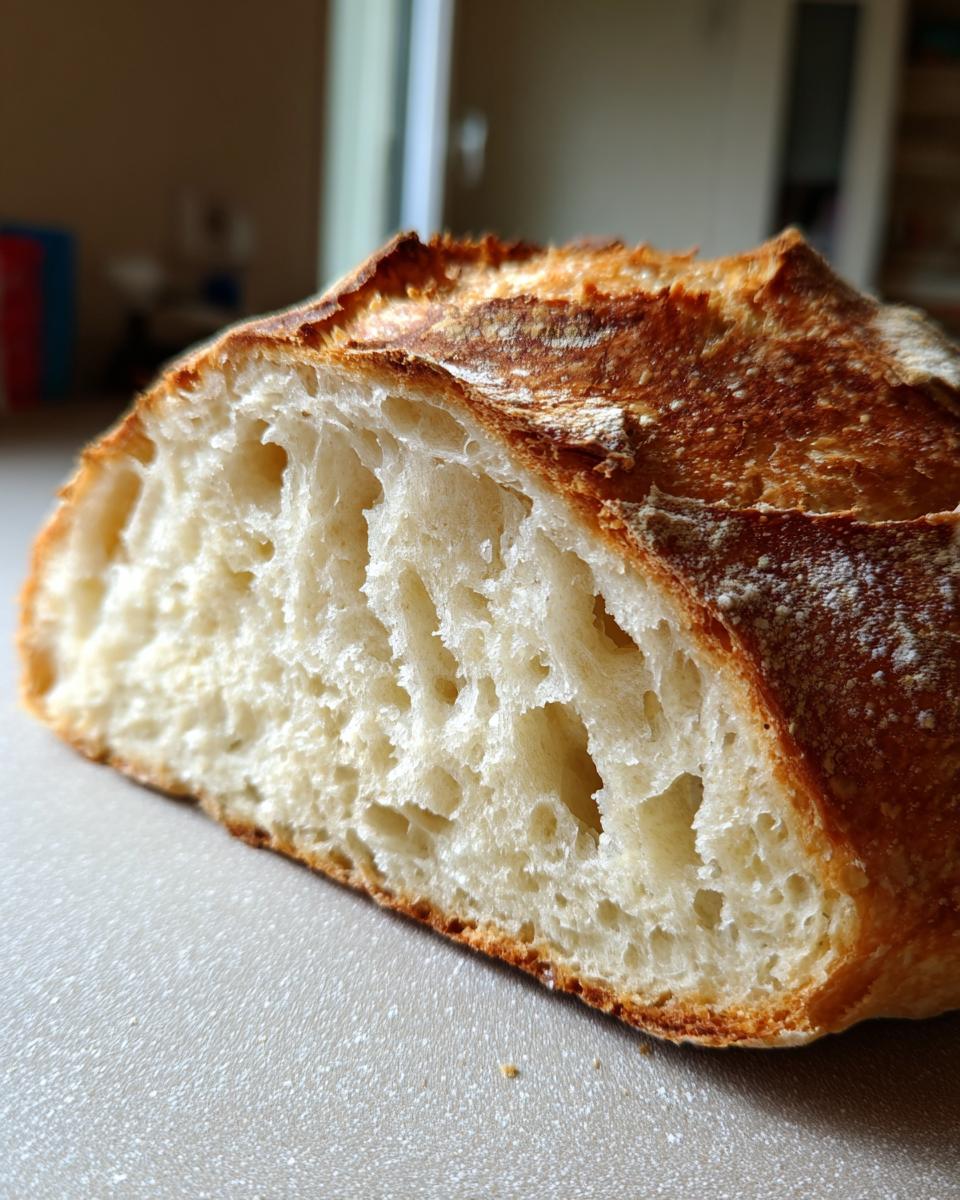
Oh, there’s nothing, absolutely nothing, that compares to pulling a golden, fragrant loaf of bread out of your own oven. That sound—the crust crackling as it cools—it’s just instant comfort, isn’t it? For me, that feeling always takes me back to my family’s kitchen, even though we weren’t strictly Italian. The love for simple, honest baking is universal, and when you nail that perfect contrast, well, you’ve unlocked something special. That’s why I’m thrilled to share this guide for my Ultimate Easy Crusty Homemade Italian Bread recipe. Forget those soft, squishy grocery store loaves; this one gives you that fantastic, crackly exterior you actually want, paired with an interior that’s light enough for dipping but solid enough to stand up to any sauce. Learning how to bake your own foundational italian bread is a rite of passage, and I really hope you enjoy the journey. You can read more about my own journey back to heritage cooking over on the About Me page.
- Why This Homemade Italian Bread Recipe Works for Everyone
- Ingredients for Your Ultimate Easy Italian Bread
- Step-by-Step Instructions for Perfect Italian Bread Baking Tips
- Tips for Success When Making Homemade Italian Bread Recipe
- Variations: Italian Herbs and Cheese Bread and Ciabatta Recipe Homemade
- Serving Suggestions: The Best Italian Bread for Dipping
- Storage & Reheating Instructions for Your Rustic Italian Bread
- Frequently Asked Questions About Making Italian Bread
- Share Your Fresh Baked Loaf Experience
Why This Homemade Italian Bread Recipe Works for Everyone
I’ve tested this recipe countless times—it’s my go-to when I need that rustic feeling without spending half a day kneading. This is a reliable method, and I promise it delivers on its name! It’s the perfect homemade Italian bread recipe because it focuses on what matters most. We aren’t aiming for anything overly fussy here; we’re aiming for incredible flavor and texture.
- It’s quick enough that you can still serve it alongside a weeknight dinner.
- The steam trick guarantees that signature crunchy exterior.
- The mixing method keeps the inside beautifully soft and airy.
Achieving the Perfect Crusty Artisan Bread Texture
Okay, this is the secret sauce for that incredible crusty artisan bread vibe. It all comes down to steam in the first half of the bake, which is why we preheat an empty pan inside the oven. When you slide your loaf in, you quickly toss a few ice cubes onto that hot pan. That burst of steam keeps the dough surface soft for the first 15 minutes, allowing the loaf to expand fully before the crust sets hard and golden. Trust me, this little bit of kitchen magic makes all the difference between a good loaf and a *gorgeous* loaf!
Ingredients for Your Ultimate Easy Italian Bread
The beauty of a truly great homemade loaf is how little you actually need! When you start with quality staples, the process for this easy Italian bread becomes almost foolproof. You just need the basics: flour, yeast, salt, warm water, and just a touch of olive oil to keep things smooth and happy during the rise. That’s it! No long grocery lists here, just simple goodness waiting to be mixed.
- 3 cups all-purpose flour
- 1 ½ teaspoons instant dry yeast
- 1 ½ teaspoons salt
- 1 ½ cups warm water (about 105-115°F)
- 1 tablespoon olive oil, plus more for the bowl
Step-by-Step Instructions for Perfect Italian Bread Baking Tips
Following these steps precisely is my promise to you that you’ll get a beautiful, professional-looking italian bread loaf without needing a fancy mixer. If you’re new to this, focus on patience, not perfection! We’re covering all the essential Italian bread baking tips right here, making sure this is a great guide for dough making for beginners. Don’t worry if your first try looks a little rustic; that’s part of the charm! If you’re interested in diving deeper into yeast science later on, check out my notes on caring for starters.
Activating Yeast and Mixing the Shaggy Dough
First things first: wake up that yeast! Mix your yeast right into the warm water, maybe 105°F to 115°F—too hot and you kill it, too cold and it sleeps forever. Wait about five minutes until it gets foamy; that’s your signal, so don’t skip it. Then, combine your flour and salt. Dump the yeast mixture and that lovely olive oil right in. Mix it with a wooden spoon until it looks like a total mess—that’s the “shaggy” dough we want. It’ll be sticky, and that’s completely normal!
The Importance of Steam for Your Fresh Baked Loaf
Once your dough has had its first big rest, it’s time to shape it gently. After that quick final rise, grab your sharpest knife or a razor blade to score the top—just a couple of shallow cuts. This controls where the bread expands. Now for the big moment: as you slide the loaf into that piping hot oven, you need to create steam on the bottom rack, usually with some ice cubes. This steam keeps the surface supple while the inside cooks, ensuring you get that deeply crunchy, beautiful crust on your fresh baked loaf.
Tips for Success When Making Homemade Italian Bread Recipe
Making an incredible homemade Italian bread recipe really comes down to just a couple of small but mighty details. If you want that perfectly soft Italian loaf interior that melts butter instantly, resist the urge to overwork the dough after the first rise. I learned this the hard way! My first attempt at any yeast bread, I basically pummeled the dough for ten minutes, worried it wasn’t developing enough structure. Well, it came out like a brick! What I learned is that the long, slow rise does the heavy lifting, developing flavor and air bubbles without your arm muscles working overtime.
Also, temperature matters more than you think, especially if you aren’t using a stand mixer. Make sure your warm water for the yeast is just warm—not hot! If you’re ever doubtful about your dough rising enough, try placing the covered bowl near a sunny window or in a slightly warm oven (make sure the oven light is on, but the heat is *off*). That gentle warmth makes all the difference in getting a great first proof. This recipe is designed to be easy, but a little environmental TLC really helps boost that soft texture we are chasing. These simple tricks make this italian bread perfect alongside any morning feast!
Variations: Italian Herbs and Cheese Bread and Ciabatta Recipe Homemade
This basic structure for our italian bread is just begging to be customized! If you want to take things up a notch, I highly recommend trying the flavor combination featured in the Italian sausage gnocchi soup around here—you know, the herbs! For an amazing Italian Herbs and Cheese Bread, just gently fold in about half a cup of shredded mozzarella and a tablespoon of dried Italian seasoning right before you shape the dough. It bakes up perfectly cheesy and fragrant.
Now, some of you might be dreaming of a super open-crumb loaf like a true sourdough. While this recipe is close, achieving that airy, squashed slipper shape of a true Ciabatta Recipe Homemade usually means increasing the hydration a bit more—adding maybe another quarter cup of water—to get a much stickier dough. But you can absolutely use this foundation to practice those slightly wetter doughs!
Serving Suggestions: The Best Italian Bread for Dipping
Honestly, once this italian bread cools down a tiny bit—I mean, don’t wait too long!—it needs to be put to work immediately. It’s almost a requirement! This isn’t just a side dish; it’s the star when it comes to soaking up flavor. This is definitely the Italian bread for dipping champion in my house. We dunk it straight into good quality olive oil with a sprinkle of pepper, of course. But it also shines when mopped up after a big bowl of Nonnas’s meatballs, or served alongside a simple, rich pasta dish like my creamy garlic tomato pasta. The crust holds up beautifully, no soggy sandwiches here!
Storage & Reheating Instructions for Your Rustic Italian Bread
Keeping the crust on your rustic Italian bread happy after it’s baked is half the battle! Don’t store it in a plastic bag; that traps moisture and turns your beautiful crisp crust gummy overnight. I use a brown paper bag or wrap it loosely in a clean kitchen towel and keep it on the counter for up to two days. If it goes a little stale, don’t fret! Slice it up and give it a quick blast in a 350°F oven for about five minutes. That quick heat brings back that satisfying crackle every time.
Frequently Asked Questions About Making Italian Bread
I totally get it. When you’re diving into making your first loaf, tons of questions pop up, especially around the yeast and the kneading. Don’t worry, those little hang-ups are totally normal when you’re aiming for that perfect loaf! I’ve tried to keep this recipe as straightforward as possible for dough making for beginners, but here are the answers to the things I hear most often about getting that excellent italian bread result.
Can I use active dry yeast instead of instant yeast for this Italian bread?
You absolutely can! That’s a super common question. Since this recipe already asks you to mix the yeast with warm water first and wait for it to foam—that five-minute waiting period—you’re basically proofing the yeast right at the start, which is exactly what you’d do with active dry yeast anyway. So, yes, just follow those first steps exactly as written, and you’ll be good to go. It means your Homemade Italian Bread Recipe works no matter which one you have in your pantry!
Is this recipe considered a No Knead Italian Bread?
That’s a great point. While it’s not strictly a twelve-hour, zero-touch no-knead recipe—because we do need a tiny bit of shaping to give it structure—it is very, very close! We only mix it until it’s “shaggy,” and the heavy lifting is done by the long rise time, not by working the gluten aggressively. If you’re looking for something truly hands-off, you could certainly let it rise longer and skip the final shaping step, but I find that minimal shaping really helps achieve that beautiful rise and the classic loaf shape. It’s basically No Knead Italian Bread with a tiny bit more manners!
If you have other baking questions, please reach out through the Contact Page—I love hearing from you!
Share Your Fresh Baked Loaf Experience
Now it’s your turn! I truly hope this recipe brings that wonderful, warm bakery smell right into your kitchen. Please let me know how your loaf turned out! Drop a comment below and tell me all about that crust—did it crackle just right? I love seeing your beautiful results, so be sure to share photos when you can. If you ever have trouble or just want to share a win, feel free to reach out through the Contact Page. Happy baking!
PrintUltimate Easy Crusty Homemade Italian Bread
Bake a rustic Italian loaf with a perfect, crunchy crust and a soft, airy interior. This straightforward recipe is ideal for beginners and makes excellent dinner bread for dipping.
- Prep Time: 15 min
- Cook Time: 30 min
- Total Time: 2 hours 15 min
- Yield: 1 large loaf 1x
- Category: Bread
- Method: Baking
- Cuisine: Italian
- Diet: Vegetarian
Ingredients
- 3 cups all-purpose flour
- 1 ½ teaspoons instant dry yeast
- 1 ½ teaspoons salt
- 1 ½ cups warm water (about 105-115°F)
- 1 tablespoon olive oil, plus more for the bowl
Instructions
- Combine the warm water and yeast in a small bowl. Let it sit for 5 minutes until it becomes foamy. This confirms your yeast is active.
- In a large mixing bowl, whisk together the flour and salt.
- Pour the yeast mixture and the olive oil into the dry ingredients. Mix with a wooden spoon until a shaggy, sticky dough forms. Do not overmix.
- Lightly oil a clean bowl. Place the dough in the bowl and turn it over to coat lightly with oil. Cover the bowl tightly with plastic wrap.
- Let the dough rise in a warm place for 1 to 1.5 hours, or until it has doubled in size. This is your bulk fermentation.
- Gently turn the risen dough out onto a lightly floured surface. Shape it into a rough oval or round loaf. Avoid punching down the dough aggressively to keep air pockets.
- Place the shaped loaf on a baking sheet lined with parchment paper or in a proofing basket. Cover loosely with plastic wrap or a clean kitchen towel.
- Let the dough rest for a second rise (proofing) for 30 to 45 minutes. While it rests, preheat your oven to 450°F (232°C) with a baking stone or an empty cast-iron pan inside to create steam.
- Just before baking, score the top of the loaf once or twice with a sharp knife or razor blade.
- Carefully place a few ice cubes into the hot pan in the oven (or pour ½ cup of hot water into the pan) to create steam, then quickly place the loaf into the oven.
- Bake for 25 to 30 minutes, or until the crust is deep golden brown and sounds hollow when tapped.
- Transfer the bread to a wire rack to cool completely before slicing. This step is important for the interior texture.
Notes
- For Italian Herbs and Cheese Bread, gently fold in 1/2 cup shredded mozzarella and 1 tablespoon of dried Italian herbs into the dough just before the final shaping step.
- If you prefer a very crusty artisan bread, bake the loaf inside a preheated Dutch oven for the first 20 minutes, then remove the lid for the final 10 minutes.
- This bread is excellent for dipping in olive oil or using for hearty sandwiches.
Nutrition
- Serving Size: 1 slice
- Calories: 180
- Sugar: 1
- Sodium: 300
- Fat: 2
- Saturated Fat: 0.5
- Unsaturated Fat: 1.5
- Trans Fat: 0
- Carbohydrates: 35
- Fiber: 2
- Protein: 6
- Cholesterol: 0