
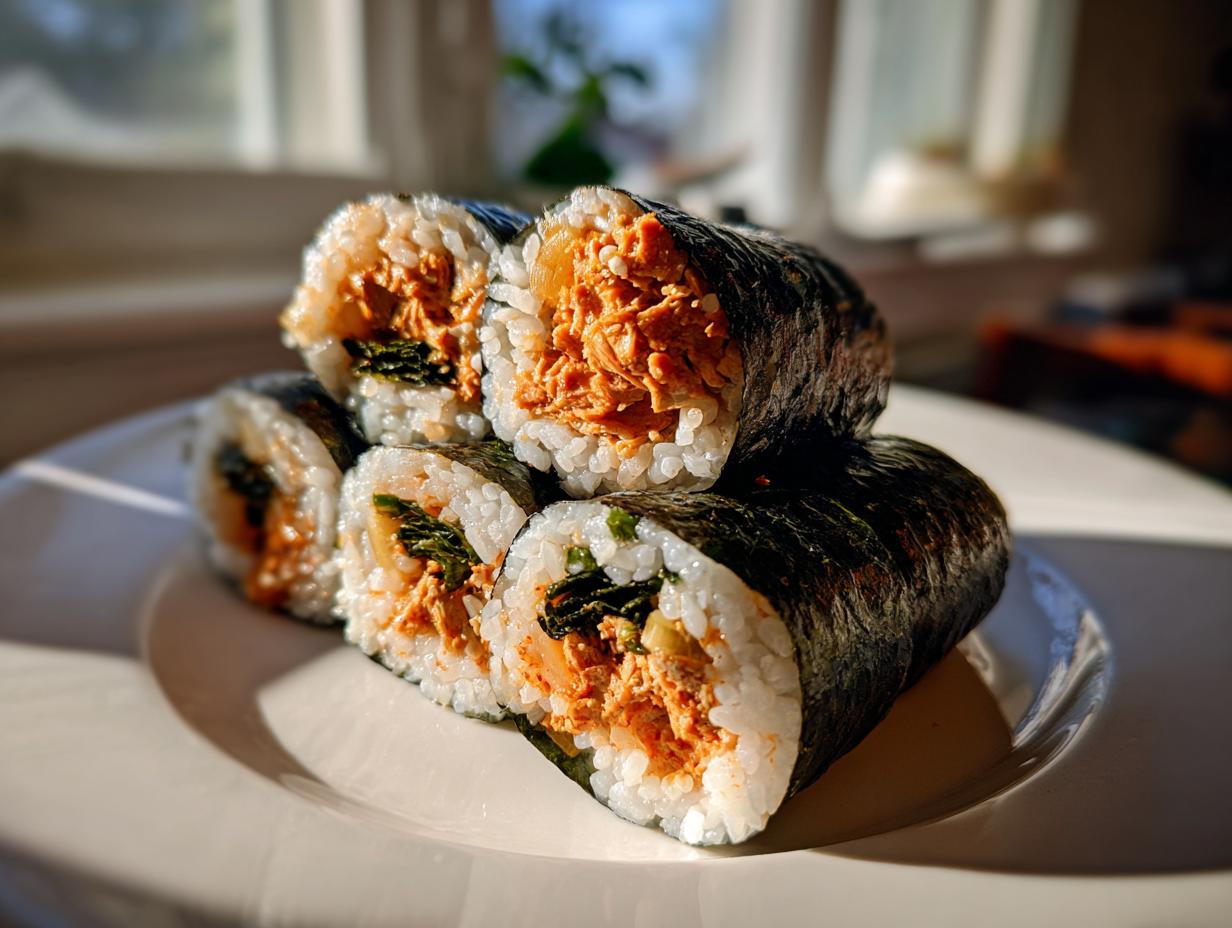
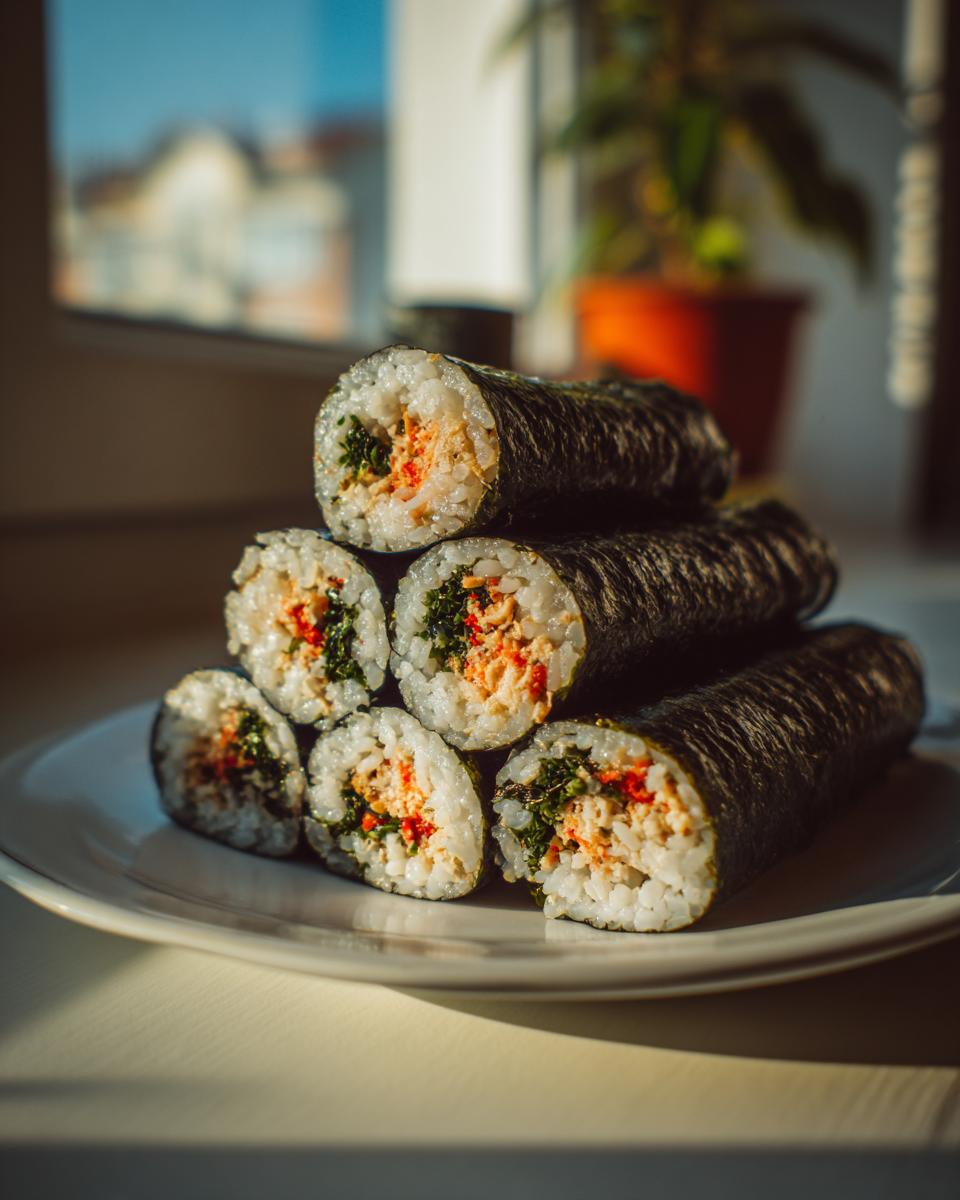
Oh, you know those days when you need something absolutely bursting with flavor but fifteen minutes is all you have? I totally get it. That’s why I’m so excited to share my approach to Tuna Kimbap, or Chamchi Kimbap. It’s one of my absolute favorites for a Quick Korean Lunch Idea because it uses pantry staples and comes together shockingly fast. As you know from my philosophy here at the blog, I want to take those incredible, soulful dishes from heritage kitchens and make them totally reliable for our busy, modern lives. Trust me, this is authentic flavor without juggling a dozen complicated steps!
We’re focusing on the amazing, slightly spicy version today. It’s bright, refreshing—and makes putting together a lunch box feel like a real accomplishment. Let’s see how we can whip up these amazing Canned Tuna Seaweed Wraps before the kettle even finishes boiling!
If you’re looking for more speedy meals, I keep adding new recipes to my quick weeknight dinners section!
- Why This Spicy Tuna Kimbap Recipe is Your New Go-To
- Gathering Ingredients for Perfect Tuna Kimbap (Chamchi Kimbap)
- Step-by-Step: How to Make Tuna Kimbap Quickly
- Tips for Perfect Homemade Kimbap Recipe Results
- Serving Suggestions for Your Canned Tuna Seaweed Wraps
- Storage and Make Ahead Korean Food Options for Tuna Kimbap
- Frequently Asked Questions About Tuna Kimbap
- Nutritional Estimates for Spicy Tuna Kimbap
- Share Your Homemade Tuna Kimbap Creations
Why This Spicy Tuna Kimbap Recipe is Your New Go-To
Honestly, I wouldn’t share this tuna kimbap recipe unless it was truly lightning fast. We are talking about flavor coming together in about 15 minutes total—assuming you have rice ready to go! It’s perfect for those afternoons when you need satisfying Quick Korean Lunch Ideas on the fly.
- It nails that spicy, creamy profile everyone loves in Spicy Tuna Mayo Rolls.
- Minimal cooking time means less time over the stove and more time enjoying your creation.
- It photographs beautifully, which is always a bonus when packing healthy lunch recipes!
- This is true Easy Kimbap for Beginners because the filling does all the heavy lifting.
Gathering Ingredients for Perfect Tuna Kimbap (Chamchi Kimbap)
Okay, let’s talk about what you need, because gathering everything first is the secret to keeping this a 15-minute meal! We are using simple pantry items, but the fresh green onions and those special leaves make all the difference when you’re going for Authentic Tuna Gimbap flavor. Don’t stress about making a grocery run; raid your cupboards! I’ve broken it down so you can tackle the prep work quickly.
For the Seasoned Rice
This rice needs to be stickier than regular steamed rice, so we season it right after it cooks. You’ll need:
- 2 cups cooked short grain rice (must be short grain or it won’t stick!)
- 1 teaspoon sesame oil
- 1 teaspoon sesame seeds
- 1 teaspoon salt
For the Spicy Tuna Mayo Rolls Filling
This is where the magic happens for our Spicy Tuna Mayo Rolls. Make sure to drain that oil completely—we don’t want watery rolls!
- 1 (5.3 oz) can tuna in oil, drained well
- 2 tablespoons green onion, very finely chopped (tiny bits are important!)
- 2 tablespoons Japanese mayonnaise (that Kewpie stuff works wonders here)
- 1 tablespoon Sriracha sauce (adjust this based on how much fire you like!)
For Assembly and Finishing
These are the things that hold it all together and give our tuna kimbap that beautiful sheen.
- 4 sheets nori (roasted seaweed)
- 4 perilla leaves, washed and dried, stems removed (these give that signature earthy note!)
- 1/2 teaspoon sesame oil (for brushing the outside)
- 1/2 teaspoon sesame seeds (for sprinkling)
Step-by-Step: How to Make Tuna Kimbap Quickly
Alright, time to put it all together! With your ingredients prepped, this whole process flies by. If you’ve got cooked rice ready, you are genuinely looking at less than 15 minutes until you are rolling these beauties. This is the best part of any Homemade Kimbap Recipe—the assembly!
Preparing the Rice Base
First things first, we need happy rice. Take your warm, cooked short-grain rice and put it into a wide bowl. Now, gently drizzle in that teaspoon of sesame oil, sprinkle in the seeds, and add the salt. Use a spatula or a paddle and mix it very gently. You don’t want to smash the grains, just coat them evenly so every spoonful of rice tastes amazing. Think folding, not stirring!
Creating the Signature Spicy Tuna Filling
Next up is our star: the spicy tuna mixture. In a separate bowl, combine that well-drained canned tuna, the finely chopped green onion, the creamy mayo, and your Sriracha. Mix it up until it looks uniform. Seriously, stop here and taste it! If you like it hotter, add another dash of Sriracha now—this is *your* Spicy Tuna Kimbap, after all!
Assembling and Rolling Your Tuna Kimbap
Time for the fun part: the roll! Lay your bamboo mat down, then place one sheet of nori, shiny side facing down. Over that, lay a perilla leaf—that’s important for that lovely fresh flavor. Spread about half a cup of your seasoned rice evenly over the sheet, but leave a good inch bare at the far edge. That empty strip is your glue!
Next, place a line of your spicy tuna filling right across the center. Now, for How to Roll Kimbap: lift the edge of the mat closest to you, tucking the filling tight, and start rolling. Keep rolling firmly until you reach that bare edge. Moisten that empty nori strip with just a tiny bit of water on your finger—that seals the deal and keeps your roll snug.
Finishing and Slicing the Korean Seaweed Rice Rolls
Once you have your log, gently brush the outside with that last bit of sesame oil and sprinkle on the sesame seeds for visual pop. Now, take a really sharp knife and dampen the blade slightly—this prevents the rice from sticking! Slice your log into about eight neat, bite-sized pieces. Seeing those perfect cross-sections makes you feel like you’ve totally mastered the Korean Seaweed Rice Rolls technique!
If you enjoyed this prep style, check out my tips for easy breakfast ideas that focus on speed!
Tips for Perfect Homemade Kimbap Recipe Results
Even with this super straightforward tuna kimbap recipe, a few small tricks can take your rolls from “homemade” to “I can’t believe I made this at home!” The rolling part trips up most beginners, so let’s focus on getting that satisfying, tight cylinder you see in the perfect Chamchi Kimbap Tutorial.
Controlling the Filling Consistency
My number one rookie mistake was always shoving too much filling in there! If you pile the tuna mixture too high, trying to tuck that first edge becomes a wrestling match, and your whole roll ends up lumpy or bursting open. The best advice I can give you is to keep that line of filling thin and centered. Remember, you’re seasoning the rice perfectly too, so you don’t need tons of filling for big flavor!
Ingredient Swaps for Your Tuna Kimbap
While I swear by the slight anise-like punch of the perilla leaf for that authentic feel, I know they aren’t always around! If you can’t find them, don’t panic. You can skip them, or you can use blanched spinach leaves instead. The spinach adds a nice green layer and keeps the moisture barrier going, even if it changes the flavor profile slightly. This recipe is super adaptable, which is what I love about it for a Quick Weeknight Korean Dinner.
Serving Suggestions for Your Canned Tuna Seaweed Wraps
Now that you have these incredible, easy tuna kimbap rolls, the question is: where are you eating them? Since they are so sturdy and delicious cold, they are honestly the champions of portable food. They look so beautiful tucked into a Korean bento box meal, making even a Tuesday lunch feel special.
For picnics or road trips, these are the ultimate Picnic Food Rolls because they’re self-contained and don’t get soggy easily. I love serving them with simple sides—maybe some crunchy pickled daikon or just a dollop of that extra spicy mayo on the side for dipping. If you need other grab-and-go ideas, check out my collection of easy lunch recipes. These spicy little bites are always the first thing gone!
Storage and Make Ahead Korean Food Options for Tuna Kimbap
One of the best things about making these tuna kimbap rolls is that you can totally use them for make ahead Korean food! If you have leftover rice and filling, this recipe is fantastic for meal prepping. Here’s my secret: if you know you need them for lunch tomorrow, assemble and roll them completely, but do not slice them yet.
Wrap the entire log—or logs—super tightly in plastic wrap. This keeps the moisture in and prevents the nori from getting chewy or ripping. I usually store them in the fridge for up to a whole day. When it’s time to eat, just unwrap, use that damp, sharp knife, and slice them up! It keeps them fresh for quick eating later. You can see more of my best batch-friendly ideas on my make ahead Korean food page!
Frequently Asked Questions About Tuna Kimbap
I know when you first try making tuna kimbap at home, you run into little snags. That’s totally normal! My goal here is to make sure your first attempt at this Homemade Kimbap Recipe is a huge success. Here are a few things folks ask me all the time when they are trying to master this simple roll.
Can I use rice other than short-grain for my tuna kimbap?
Oh, boy, please don’t! I’ve tried it when I was desperate, and it’s just not the same. You really need short-grain or even medium-grain rice, often labeled as sushi rice. Long-grain rice, like Basmati or Jasmine (unless it’s designated as sticky short-grain), just doesn’t have the starch content to glue itself together when it cools down. If you use it, your Korean Seaweed Rice Rolls will just crumble the second you try to slice them!
What is the best way to prevent the kimbap from falling apart?
This is where technique really matters if you want that professional look for your Chamchi Kimbap. The two secrets are rolling tightly and sealing properly. When you start rolling, use your fingers to push the filling back toward you as you bring the mat over it. You want a solid, firm roll—not squished, but definitely compact. And please, remember that tiniest bit of water on the far nori edge! That little bit of moisture is the magic glue that seals your beautiful work shut, ensuring it stays intact when you cut it.
How do I make my Spicy Tuna Mayo Rolls less wet?
This question probably comes up the most when people are making the spicy version! Nobody likes a soggy wrap, right? Even though we are using canned tuna in oil, you have to drain it like it owes you money! Once you dump the tuna into your mixing bowl, take a moment to gently press down on it with a spoon against the side of the bowl to squeeze out any lingering moisture or oil. If you skip that step, you risk thinning out your mayonnaise mixture and making your finished Spicy Tuna Mayo Rolls too wet inside. Drain, drain, drain!
Nutritional Estimates for Spicy Tuna Kimbap
Okay, you know I always try to keep things real here, and that includes food labels! Since every can of tuna and every drizzle of mayo is slightly different, please take these numbers with a grain of salt. These estimates are based on the ingredients listed in the recipe for one serving size (about 8 slices). This tuna kimbap is actually a pretty balanced meal when you think about the carbs from the rice and the lean protein from the tuna!
- Serving Size: 1 roll (approx. 8 slices)
- Calories: 350
- Protein: 18g
- Fat: 12g
- Carbohydrates: 45g
It’s proof that quick Korean lunch ideas can be flavorful and reasonably balanced. But remember, these are just estimates, not lab reports!
Share Your Homemade Tuna Kimbap Creations
Now that you’ve got the knowledge—and hopefully the delicious smell of sesame oil is filling your kitchen—I really, really want to see what you whipped up! Making tuna kimbap at home and sharing it is the whole point of this process, isn’t it?
Did you stick to the recipe exactly, or did you crank up the Sriracha for extra heat in your Spicy Tuna Kimbap? Tell me about it in the comments below! Seriously, I love hearing how you all adjust these family-style recipes to fit your own tastes. Did you use perilla leaves or spin your own substitution?
If you snap a picture of your perfect Chamchi Kimbap rolls, please tag me over on social media! Seeing your beautifully rolled, easy Korean lunch ideas makes my day. If you have any lingering questions that I missed, or if you just want to say hello, you can always reach out through my contact page. Happy rolling, friends!
PrintQuick Spicy Tuna Kimbap (Chamchi Kimbap)
Make this easy, flavorful Korean seaweed rice roll, Spicy Tuna Kimbap, perfect for quick weeknight dinners, lunch boxes, or picnics. This recipe focuses on a simple, spicy tuna mayo filling.
- Prep Time: 15 min
- Cook Time: 0 min
- Total Time: 15 min
- Yield: 4 servings 1x
- Category: Lunch
- Method: Rolling
- Cuisine: Korean
- Diet: Vegetarian
Ingredients
- 2 cups cooked short grain rice
- 1 teaspoon sesame oil (for rice)
- 1 teaspoon sesame seeds (for rice)
- 1 teaspoon salt (for rice)
- 1 (5.3 oz) can tuna in oil, drained
- 2 tablespoons green onion, very finely chopped
- 2 tablespoons Japanese mayonnaise (Kewpie or regular)
- 1 tablespoon Sriracha sauce
- 4 sheets nori (roasted seaweed)
- 4 perilla leaves, washed and dried, stems removed
- 1/2 teaspoon sesame oil (for coating rolls)
- 1/2 teaspoon sesame seeds (for sprinkling)
Instructions
- Prepare the seasoned rice: In a bowl, combine the cooked short grain rice, 1 teaspoon sesame oil, 1 teaspoon sesame seeds, and 1 teaspoon salt. Mix gently until combined.
- Make the spicy tuna filling: In a separate bowl, combine the drained canned tuna, finely chopped green onion, mayonnaise, and Sriracha sauce. Mix well until you have a uniform spicy tuna mayo mixture.
- Assemble the rolls: Lay one sheet of nori, shiny side down, on a bamboo rolling mat. Place a perilla leaf on top of the nori, covering most of the surface.
- Spread about 1/2 cup of the seasoned rice evenly over the nori and perilla leaf, leaving about a 1-inch border clear at the top edge of the nori.
- Place a line of the spicy tuna mixture horizontally across the center of the rice.
- To roll: Lift the edge of the mat closest to you and begin rolling tightly, tucking the filling in as you go. Moisten the top clear edge of the nori with a little water to seal the roll shut.
- Coat the finished roll lightly with 1/2 teaspoon of sesame oil and sprinkle with 1/2 teaspoon of sesame seeds.
- Repeat with the remaining ingredients.
- Slice each roll into bite-sized pieces using a sharp, slightly damp knife. Serve immediately or pack for your Korean bento box meals.
Notes
- For an easier roll, use less filling.
- You can substitute perilla leaves with blanched spinach if needed.
- Adjust Sriracha amount to control the spice level in your Spicy Tuna Mayo Rolls.
- These rolls are great for make ahead Korean food if wrapped tightly in plastic wrap before slicing.
Nutrition
- Serving Size: 1 roll (approx. 8 slices)
- Calories: 350
- Sugar: 3
- Sodium: 450
- Fat: 12
- Saturated Fat: 2
- Unsaturated Fat: 10
- Trans Fat: 0
- Carbohydrates: 45
- Fiber: 2
- Protein: 18
- Cholesterol: 35