
Oh, the heartbreak of a beautifully cut-out cookie sinking into a pool of runny glaze! We’ve all been there, right? You spend so much time getting those edges perfect, only for the icing to creep and run everywhere, refusing to dry. It’s frustrating when icing won’t cooperate, especially when you’re trying to make something look really special.

That’s exactly why I developed this recipe. Forget the complicated versions; I want you to have guaranteed success. This is my Ultimate 4-Ingredient Sugar Cookie Icing That Sets Rock Hard and Stays Glossy. I promise, this is the go-to batch you need for detailed work that stays put. Here at MDLATDMM Recipes, my whole goal is taking those timeless, slightly mysterious family methods and making them absolutely foolproof for your modern kitchen. This one is smooth, reliable, and totally worth making.
- Why This Is the Best Sugar Cookie Icing That Sets Firm
- Ingredients for Your 4 Ingredient Cookie Icing
- How to Make Sugar Cookie Icing Dry Hard: Step-by-Step Instructions
- Tips for Foolproof Sugar Cookie Icing Recipe Success
- Coloring and Storing Your Hardened Sugar Cookie Icing Recipe
- Serving Suggestions for Icing for Cut Out Cookies
- Frequently Asked Questions About Perfect Texture Cookie Glaze
- Estimated Nutritional Value for This Sugar Cookie Icing
- Share Your Glossy Sugar Cookie Frosting Creations
Why This Is the Best Sugar Cookie Icing That Sets Firm
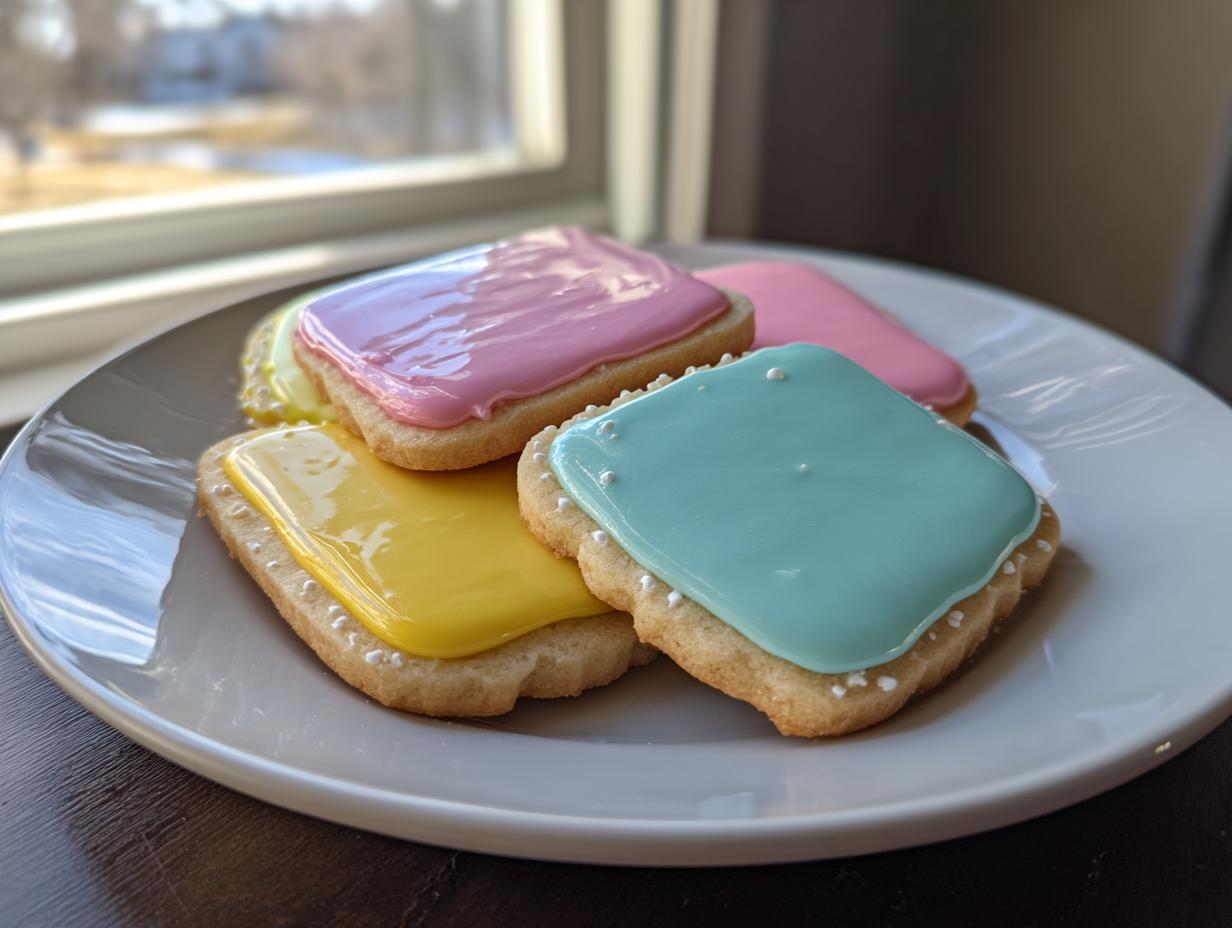
When you’re decorating for a party or carefully packaging cookies to give away, you need icing you can trust. This recipe delivers that perfectly solid shell every single time. It’s an easy cookie icing that sets firm, meaning you won’t end up with sticky, smudged messes two hours later. Seriously, we cut this down to just four ingredients, which keeps things simple, but the results are complex.
It creates a beautiful, shiny surface that looks professionally done. If you want that crisp, solid finish we always see in bakeries, this is it. You can rely on this icing to hold sharp lines, and it dries beautifully flat. You can even check out more tips on getting that hard finish over at this great post!
Achieving a Rock Hard, Glossy Sugar Cookie Icing
The secret weapon here, my friends, is the meringue powder. While some people use raw egg whites, I find that totally unnerving with something meant for gifting! Meringue powder is just so much more reliable and shelf-stable. It gives you that structure—that satisfying, slightly crisp shell—that traditional royal icing has, but without the fuss.

This guaranteed hardening ability is what elevates it to bakery style cookie icing quality. You can outline a shape, let it dry for a moment, and then flood it, knowing the outline isn’t going anywhere. It gives you the precision you need for those detailed holiday designs or beautiful cursive messages.
Ingredients for Your 4 Ingredient Cookie Icing
When I say this recipe is simple, I truly mean it. You likely have most of these items already, which is why this becomes my go-to batch time and time again. We’re sticking to just four main players here to keep things clean and effective!
Make sure you follow the measurements exactly, especially when dealing with the water. A little too much liquid, and we lose that rock-hard dry factor we’re aiming for! Always sift your powdered sugar first—it stops lumps right from the start.
- 3 cups powdered sugar, sifted
- 4 tablespoons meringue powder (this is key for setting firm!)
- 6 tablespoons water, plus more for thinning as needed
- 1 teaspoon vanilla extract
How to Make Sugar Cookie Icing Dry Hard: Step-by-Step Instructions
Getting that firm, non-sticky finish really relies on the mixing time—you can’t rush this part! Trust me, this is step one on how to make sugar cookie icing dry hard without resorting to crazy chemicals. We’re going to build that beautiful gloss right here in the bowl.
- First, get your sifted powdered sugar and the meringue powder whisked together really well in a medium bowl. Make sure there are no pockets of powder hiding out!
- Now, pour in your water and vanilla extract. Don’t crank the mixer on high yet! Start slow, maybe on low speed just until that dry powder is incorporated. We don’t want a sugar cloud explosion in our kitchen, oops!
- Once it’s just combined—meaning no more dry streaks are visible—crank that mixer up to medium-high. You need to beat this for a solid 3 to 5 minutes. This high-speed whipping adds air, which is what gives you that shiny, gorgeous look when it sets.
- After you’ve mixed it for the full time, use it immediately for outlining your cookies. Let that outline set for about 15 minutes so it firms up a tiny bit before you flood the center.
If you need help knowing when it’s perfect, you can always peek at some great visual guides like the one found here. But really, the mixing time does most of the heavy lifting! This process is key to avoiding the thick, clumpy results you sometimes get with other cream cheese icings, like the one I use for my carrot cake—totally different texture goals for that one!
Achieving Perfect Consistency for Piping and Flooding
This is where we tailor the icing for decorating. For piping those sharp lines, like borders, you want a consistency that holds its shape—like a soft peak when you lift the mixer paddle. If you pull the paddle out and the icing droops slowly, that’s perfect piping thickness.
For flooding the inside of that border, we need it thinner. This is what creates that smooth cookie decorating glaze texture. Add water just a teaspoon at a time. You know it’s right when you do the 10-second flow test: lift the mixer, let the icing drip back into the bowl, and it should take about 10 seconds for that little dip on the surface to completely smooth out. If it disappears faster, it’s too thin!
Tips for Foolproof Sugar Cookie Icing Recipe Success
Even with the best instructions, sometimes humidity throws us a curveball, right? That’s why having a couple of quick fixes handy makes this recipe truly a foolproof cookie icing recipe. My goal is always to make sure you feel confident when you sit down to decorate, knowing this icing won’t let you down.
When you’re making something this perfect, you have to learn how to save it when things go slightly sideways. Don’t panic if the consistency isn’t perfect right off the mixer; we can usually adjust it quickly!
Troubleshooting Common Sugar Cookie Icing Issues
The biggest heartbreak for me is when icing dries with fine spiderweb cracks across the top—it’s almost always a sign that the ratio got messed up. If you notice cracking after it’s been sitting for a while, I’m sorry to say, you probably added just a touch too much liquid during thinning. The fix is easy, though: just grab another tablespoon of sifted powdered sugar and gently mix it in by hand until it smooths out again.
And remember what I said earlier? Sifting your sugar isn’t just a suggestion; it’s vital for that smooth cookie decorating glaze finish. If you skip it, you might spend all that beating time trying to crush sugar lumps! If your icing is too thin to flood properly, slowly add a half teaspoon of powdered sugar at a time until it passes that 10-second rule. For more great tips on keeping things smooth, check out this great advice here.
Coloring and Storing Your Hardened Sugar Cookie Icing Recipe
Once you’ve whipped up your batch of icing, you have enough to cover about two dozen standard 3-inch cookies. Not too shabby for just a few minutes of work, right?
When it comes to color, please, please use gel food coloring, not the liquid kind you use for cake batter. Liquid colors dump a lot of water into the mix, and we absolutely cannot risk thinning out this hardened sugar cookie icing recipe. Just a toothpick dip into the gel is usually enough for vibrant shades.

If you make a big batch and aren’t using it all right away, cover it tightly! Store leftover icing in an airtight container at room temperature for up to three days. Don’t toss it if it seems stiff the next day; just give it a gentle stir or a tiny splash of water to bring back that perfect smooth texture before you start decorating again.
Serving Suggestions for Icing for Cut Out Cookies
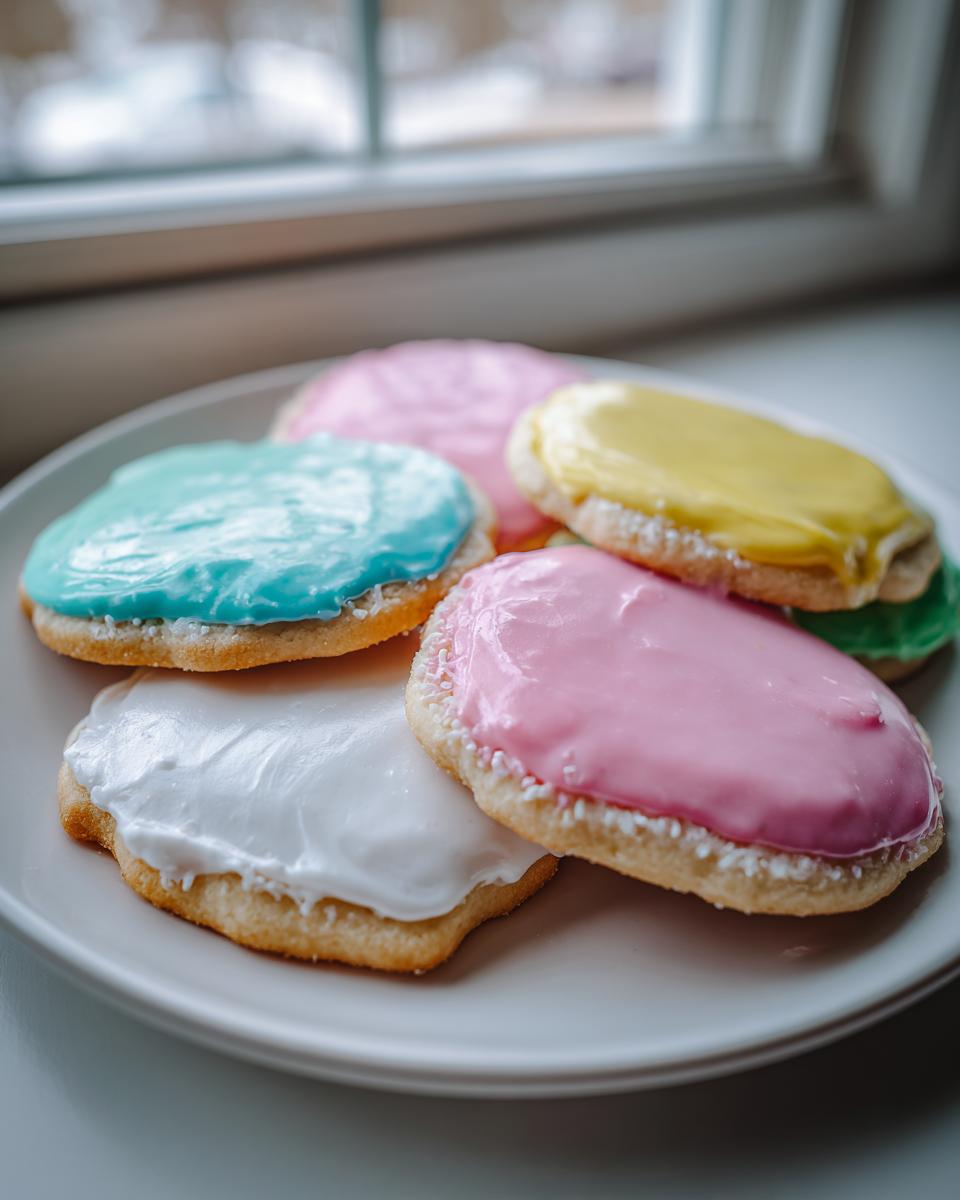
Because this icing dries so completely hard and flat, it really shines when you need your cookies to hold up. Think about stacking them in a tin for gifting—no smearing or sticking together here! This reliable finish makes your effort look incredibly professional, even if you’re brand new to decorating. This is the best icing for cut out cookies when durability matters.
Use this batch for Christmas cookies, birthday favors, or anytime you want that perfect, glossy top. It means your gorgeous designs—whether simple floods or detailed scrollwork—stay exactly as you made them. Want to try another reliable classic? You should check out my recipe for chewy chocolate chip cookies; they are always a crowd-pleaser!
Frequently Asked Questions About Perfect Texture Cookie Glaze
I know when you’re investing time in decorating, you have questions! It’s smart to ask before you start mixing, so you protect your whole batch. Here are the things I hear most often about getting this beautiful, perfect texture cookie glaze right.
Does this sugar cookie icing need to dry overnight?
Usually, no! That’s one of the best parts of this formula. In good, dry conditions, the icing will be completely set—rock hard to the touch—in about 4 to 8 hours. Now, if you live somewhere super humid, like me sometimes in the summer, you might want to give it a full 10 or 12 hours just to be safe. But generally, you don’t have to wait until the next day to stack them!
Can I use milk instead of water in this quick sugar cookie frosting?
Please don’t swap the water for milk in this specific recipe! Milk introduces fat and milk solids, which messes up how this icing cures. We need that pure water to let the meringue powder and sugar do their hard-setting magic. If you use milk, you’ll end up with a soft, tacky top, which is the opposite of the quick sugar cookie frosting we want here.
What is the difference between this and traditional royal icing?
That’s a fantastic question! Traditional royal icing often calls for raw egg whites, which, you know, gives some folks pause. My recipe uses meringue powder instead, which is just dried, pasteurized egg whites—totally shelf-stable and reliable! This makes it less intimidating and perfect for anyone who feels like a beginner cookie decorating icing user. It gives you the exact same performance without the food safety worry.
If you’re curious about other reliable recipes for family favorites—especially things that need a little bit of baking time unlike this no-bake glaze—you can always check out my recipe for pumpkin banana bread! It’s another comforting classic.
Estimated Nutritional Value for This Sugar Cookie Icing
Now, just like with any icing—especially one that’s mostly sugar and powder—the nutritional profile isn’t exactly health food! But since so many of you have asked me to be transparent about what’s going into the fun stuff, I wanted to break down the estimates for this batch.
Remember, this is just an estimate based on the volume of the ingredients we used. If you use organic sugar or a different brand of meringue powder, those numbers might shift slightly, so take this as a good general guide for your amazing, rock-hard sugar cookie icing.
- Serving Size: 1/4 cup
- Calories: 190
- Sugar: 47g
- Sodium: 2mg
- Fat: 0g
- Saturated Fat: 0g
- Trans Fat: 0g
- Carbohydrates: 48g
- Fiber: 0g
- Protein: 1g
- Cholesterol: 0mg
I always say, you need good fuel to get through a long decorating session, and a little bit of this sugary goodness is totally warranted! Just know that high quantities of sugar like this mean the icing hardens so reliably—it’s the price of getting that beautiful, smooth finish.
Share Your Glossy Sugar Cookie Frosting Creations
Okay, now it’s your turn! I shared all my secrets for achieving that perfect, rock-hard, glossy sugar cookie frosting, and I genuinely cannot wait to see what you create. Once that icing sets firm, the decorating possibilities are endless—you can get so much more detailed!
Please try this batch out the next time you’re frosting cutout cookies. If you get fantastic, smooth results, come back and leave me a star rating! It helps other bakers trust this method, and honestly, it just makes my day to know I helped someone ace their decorating session.
When you post pictures of your gorgeous, stackable cookies online, please tag me! I love seeing everyone’s designs. Show off that gorgeous, smooth cookie decorating glaze you managed to whip up so easily. If you need more ideas for baking projects that bring comfort and joy, swing by my page for more delicious dessert recipes. Happy decorating, friends! I hope your cookies look unbelievably perfect!
PrintThe Ultimate 4-Ingredient Sugar Cookie Icing That Sets Rock Hard and Stays Glossy

Make bakery style sugar cookie icing that hardens perfectly every time. This easy recipe uses only four ingredients to create a smooth, glossy finish ideal for detailed cookie decorating.
- Prep Time: 10 min
- Cook Time: 0 min
- Total Time: 10 min
- Yield: Covers about 2 dozen 3-inch cookies 1x
- Category: Dessert
- Method: Mixing
- Cuisine: American
- Diet: Vegetarian
Ingredients
- 3 cups powdered sugar, sifted
- 4 tablespoons meringue powder
- 6 tablespoons water, plus more for thinning
- 1 teaspoon vanilla extract
Instructions
- In a medium bowl, whisk together the sifted powdered sugar and meringue powder until fully combined.
- Add the water and vanilla extract to the dry ingredients.
- Mix on low speed with an electric mixer until the ingredients are just combined and no dry streaks remain.
- Increase the speed to medium-high and beat for 3 to 5 minutes until the icing is smooth and glossy.
- Check the consistency. For piping details, the icing should hold a soft peak. For flooding, add water one teaspoon at a time until the icing flows smoothly off the mixer beater and sinks back into the bowl within 10 seconds.
- Divide the icing into bowls and mix in gel food coloring as desired.
- Use immediately for outlining cookies. Let the outline set for 15 minutes before flooding the center with thinner icing.
- Allow cookies to dry uncovered at room temperature until the icing is completely hard to the touch, which may take 4 to 8 hours depending on humidity.
Notes
- For the smoothest texture, sift your powdered sugar before measuring and mixing.
- If your icing cracks when dry, you added too much liquid. Add a tablespoon of sifted powdered sugar to correct the batch.
- If the icing is too thick to flood, add water sparingly, half a teaspoon at a time, until you reach the correct consistency for perfect flooding.
- Store unused icing in an airtight container at room temperature for up to three days; remix gently before use.
Nutrition
- Serving Size: 1/4 cup
- Calories: 190
- Sugar: 47
- Sodium: 2
- Fat: 0
- Saturated Fat: 0
- Unsaturated Fat: 0
- Trans Fat: 0
- Carbohydrates: 48
- Fiber: 0
- Protein: 1
- Cholesterol: 0