
Oh, summer! Doesn’t the scent of sunshine and melting ice cream just bring you right back to being a kid? I swear, when the mercury rises, my kitchen calls for something cool, creamy, and unbelievably easy. Forget turning on that hot oven—we’re keeping things chilled today! This No-Bake banana split cake is everything you love about that classic ice cream parlor treat, stacked up high and ready to disappear in minutes at your next gathering. Trust me on this one, this is, without a doubt, the absolute best summer dessert you’ll make all year. It’s simple enough for a Tuesday but pretty enough to be the star of the show at a big family potluck.
- Why This No Bake Banana Split Cake is Your New Favorite Summer Dessert Ideas
- Gathering Ingredients for Your Banana Split Cake Recipe
- Step-by-Step Instructions for the No Bake Banana Split Cake
- Tips for Success When Making Banana Split Cake
- Variations on the Banana Split Cake: Beyond the Classic
- Serving Suggestions for Your Layered Fruit Cake
- Storage and Reheating Instructions for Banana Split Cake
- Frequently Asked Questions About Banana Split Cake
- Share Your Experience with This Banana Cream Dessert
Why This No Bake Banana Split Cake is Your New Favorite Summer Dessert Ideas
Look, when it’s ninety degrees outside, the last thing I want to do is trap myself next to a hot oven creating something fussy. That’s why this No Bake Banana Split Cake jumps right to the top of my list for Summer Dessert Ideas. There’s zero baking involved, so your kitchen stays cool and you spend less time hovering and more time enjoying the party! You absolutely have to add this to your rotation of delicious dessert recipes.
This instantly became a staple at lake trips because it travels so well, and it’s undeniably the best Easy Banana Split Dessert around. I remember making this for a neighborhood cookout last year—neighbors who usually only bring chips and dip were asking for the recipe immediately! It always makes such a fantastic centerpiece because it looks like you worked all day, but really, you just mastered a little chilling magic.
The Appeal of a Chilled Creamy Dessert
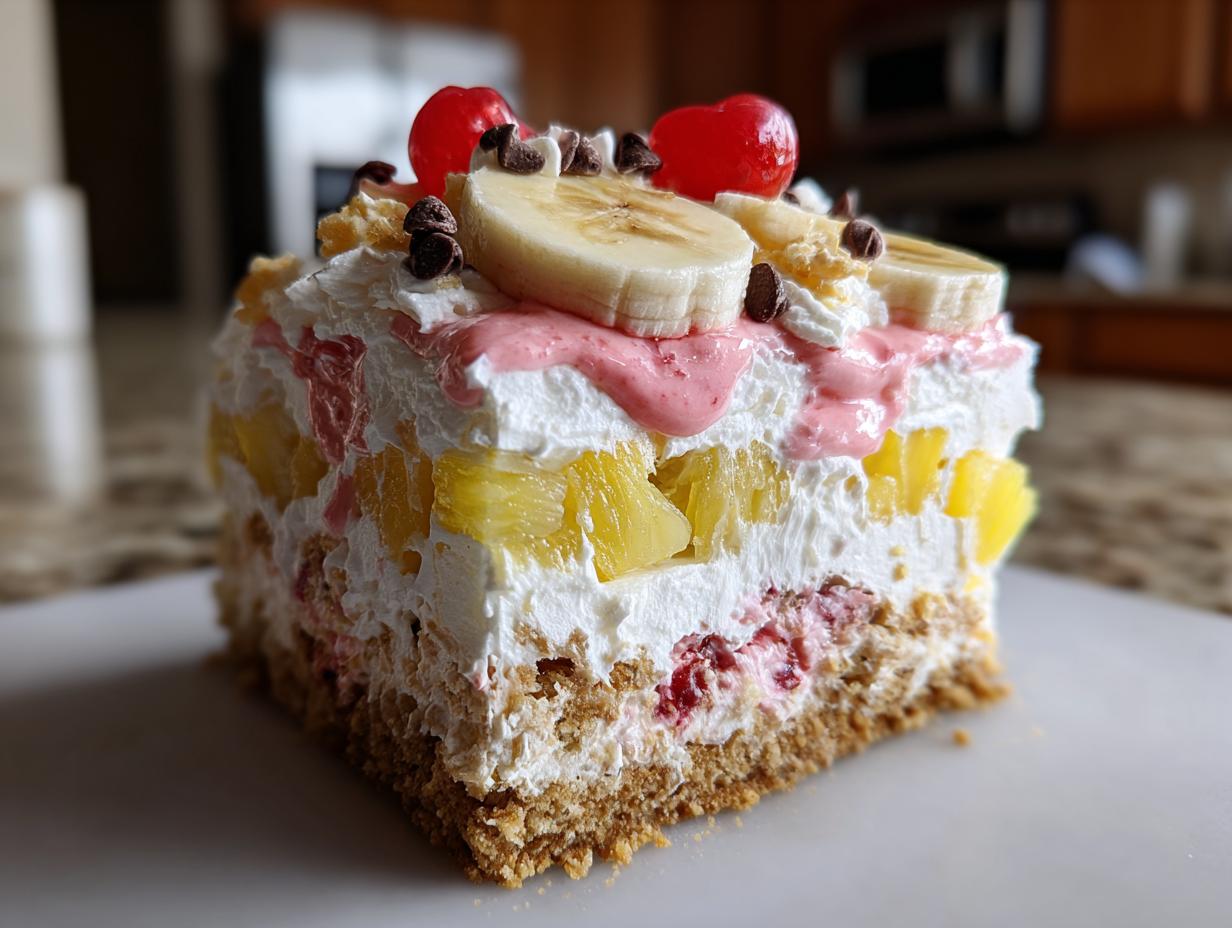
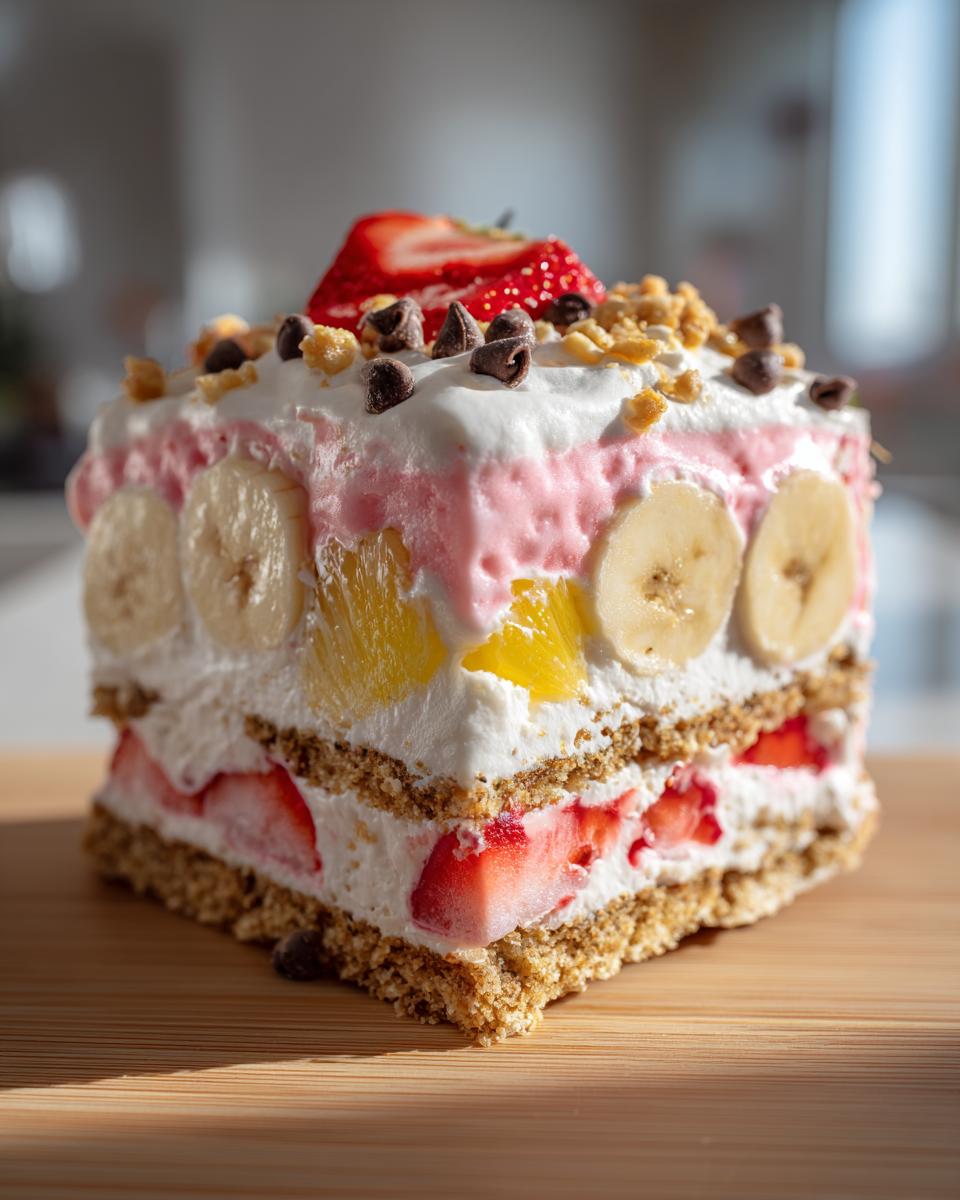
The structure of this dessert is what makes it so craveable. We’re creating these amazing, dense layers that need that cold time to really meld together. That mix of slightly tangy cream cheese and fluffy whipped topping creates the most dreamy counterbalance to the sweet fruit. Honestly, the texture of this final product is what elevates it; it eats just like a beautiful, thick Chilled Creamy Dessert, just packed with all those classic banana split flavors you already adore.
Gathering Ingredients for Your Banana Split Cake Recipe
Okay, let’s talk about what you need to grab. Because this is a no-bake recipe, the quality of the components really sings through, so try to get the best stuff you can find! When you look at the ingredient list, you’ll notice we have a pretty straightforward lineup for the crust, the creamy middle, and, of course, the glorious fruit toppings. Having everything ready to go before you start assembling is key—it’s like setting up your station before starting a marathon!
Now, I have to drill down on one specific thing, and if you take only one piece of advice from me today, let it be this: you absolutely must drain that canned crushed pineapple super, super well. I mean it! If it’s even a little bit watery, it’s going to seep into our lovely cream cheese layer and turn it into soup. I usually squeeze mine between a few layers of paper towels until I can’t get another drop out. Don’t skip that! That careful attention keeps our layers looking sharp, just like in my pecan cream pie.
Ingredient Notes and Substitutions for Banana Split Cake
When you’re buying your fruit, make sure your bananas are still nice and firm—not rock hard, but definitely not mushy! Soft bananas tend to break down too much once they are layered, and we want nice visible slices.
For the whipped topping, I always reach for the store-bought frozen kind, thawed in the fridge overnight. It whips up perfectly light and holds its shape better than if you try to whip heavy cream from scratch in the middle of summer heat; trust me on that workflow.
About those nuts? They are totally optional, but a light sprinkle of chopped pecans or walnuts on top of that final whipped layer adds the most fantastic little crunch. It mimics the texture you get on a sundae, so I usually sneak them in there!
And finally, that graham cracker base—it’s the sturdy foundation holding this whole masterpiece together. It’s simple, but if you ever need ideas for other crusts, think about using crushed Nilla wafers or even Oreos for a chocolatey twist instead of the graham crackers next time.
Step-by-Step Instructions for the No Bake Banana Split Cake
Alright, this is the fun part where everything comes together so beautifully! Believe me, putting this banana split cake together is almost as enjoyable as eating it, and it’s so satisfying watching those distinct layers form. The key here is working efficiently, especially since we aren’t baking anything. Remember that all those beautiful flavors need time to chill and set up properly, so don’t skimp on the refrigeration time we talk about at the end—that’s what takes this from a regular dessert to a perfect, sliceable treat! If you ever make my lemon cream cheese dump cake, you’ll notice similar layering techniques!
Crafting the Graham Cracker Crust Dessert Base
First things first, let’s build that sweet, buttery base. You want to mix your graham cracker crumbs and melted butter until everything looks evenly moistened, like sandy dirt after a light rain. Then, press that mixture firmly into the bottom of your 9×13 dish. I use the bottom of a flat measuring cup to really pack it down tight! This prevents it from crumbling when we go to serve it later. Once it’s packed, slide that dish right into the freezer while you tackle the filling. A cold, solid base helps keep those upper layers nice and distinct.
Assembling the Layers of Your Easy Banana Split Dessert
Next up is the creamy cloud center. Beat your softened cream cheese and powdered sugar until they are impossibly smooth—no lumps allowed! Then, gently, gently fold in half of your whipped topping. We want to keep those air bubbles in there to make it light! Spread that mixture over your chilled crust.
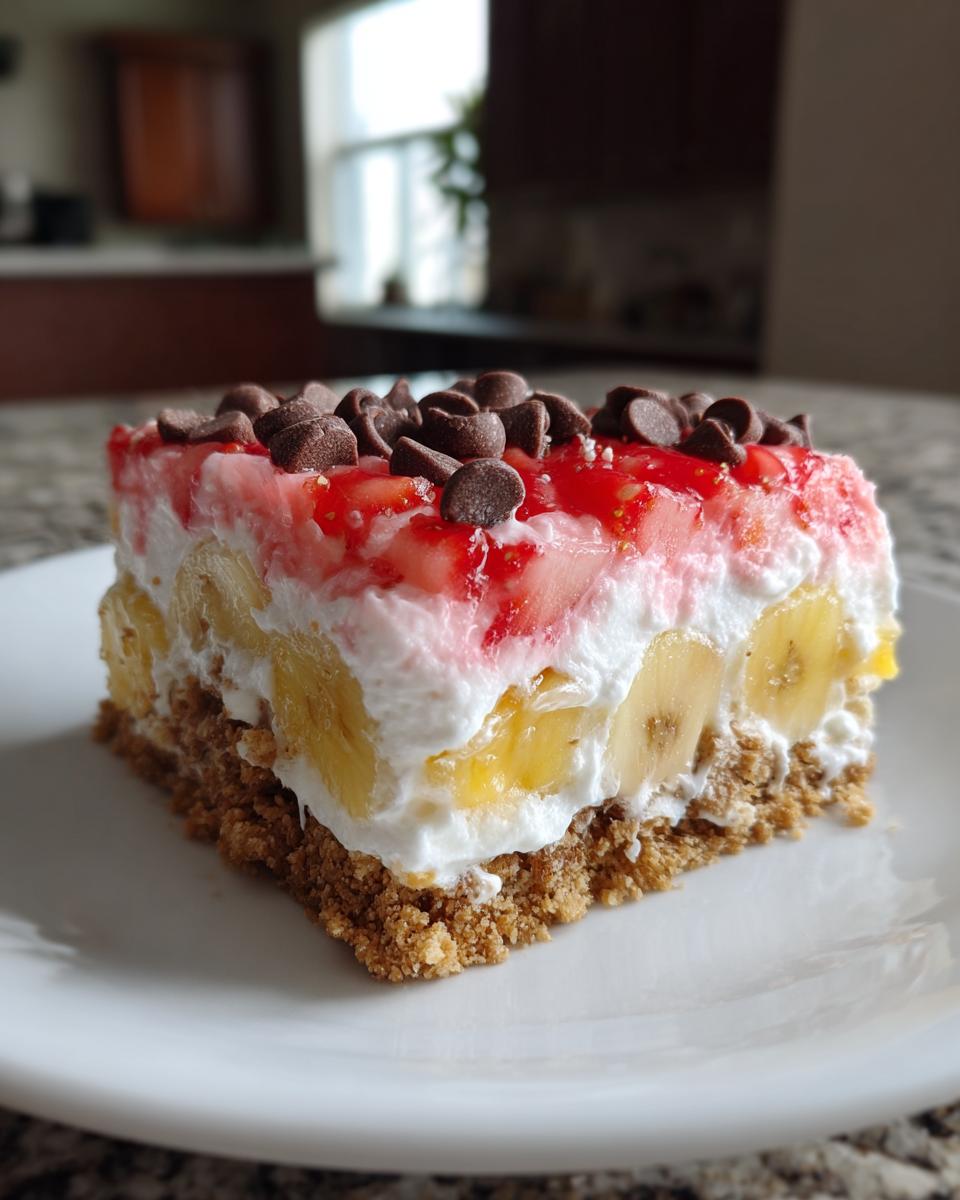
Now, we layer the fruit. Lay your banana slices down first, covering everything neatly. Next, gently spoon all that well-drained pineapple over the top of the bananas. Don’t just dump it in one spot; try to distribute it evenly. Once the pineapple is settled, spread the strawberry topping right over it. This might feel messy, but just glide it with a spatula. Cover that whole beautiful creation with the remaining half of the whipped topping. You’re creating such a stunning, vibrant, Easy Banana Split Dessert!

Finally, sprinkle those chocolate chips and your optional nuts across the top. Cover it loosely—don’t press plastic wrap onto the whipped cream!—and stash it in the fridge. I know it’s hard, but you absolutely must let this set for at least four hours. For the very best, perfectly firm slices of your incredible banana split cake, let it chill overnight. Trust me, waiting is the hardest, but most important, cooking step here!

Tips for Success When Making Banana Split Cake
I want you to get a perfect clean slice every single time you serve this! Since this is such a wonderful make ahead dessert, you have the luxury of chilling it long enough for it to firm up beautifully. The absolute best trick for clean serving is running a thin knife under hot water and wiping it dry right before you cut each piece. That little bit of warmth helps slice right through the creamy layers without dragging them.
Now, about those bananas turning brown—that’s the one tricky part! While I don’t add lemon juice directly to the main layers (it might curdle the cream cheese just a touch), if you find your bananas are sitting out for a while before you layer them, toss the slices quickly in about a tablespoon of pineapple juice pulled from the drained can. It gives them a barely-there citrus shield. Do this right before you place them on the cream cheese layer, and you won’t have any sad brown spots when you dig in!
Variations on the Banana Split Cake: Beyond the Classic
Even though this layered approach is my forever favorite, I love switching things up, especially when I’m trying to use up what’s in the pantry! Sometimes you just need a totally different texture or flavor profile, right? This banana split cake is so adaptable, which is part of why it’s such a fantastic recipe to keep handy.
If you aren’t loving the store-bought strawberry topping, you can easily swap it out! I’ve had great luck using canned cherry pie filling in its place for a fun, vibrant color change—it acts just like the strawberry layer did in terms of texture. Or, if you’re feeling ambitious, melt down some really good dark chocolate and swirl that into the cream cheese layer for a richer base before you add the fruit.
We also talked about changing the crust, and I highly recommend keeping that in mind for next time! The graham cracker base is classic, but crushing up a full package of Nilla wafers and mixing that with the butter gives you a totally different, vanilla-forward crunch. It pairs beautifully with the bananas!
Now, a lot of you have asked about making a Banana Split Dump Cake version, and that’s a fun direction to go! The difference between this layered assembly and a true dump cake is mostly in the mixing. A dump cake skips the step of making the cream cheese layer separately; instead, you might layer your fruit and then literally “dump” dry cake mix, perhaps some melted butter over the top, and let the oven do the heavy lifting.
For this *no-bake* version, we are sticking to defined layers because chilling lets us achieve that incredible, light texture between the graham cracker crust and the fruit. If you want the ultimate simple dessert, look at my recipe for apple cranberry cobbler; that uses a topping that mimics the easy, rustic feel of a dump cake without requiring an oven!
Serving Suggestions for Your Layered Fruit Cake
Once this beautiful banana split cake comes out of the fridge after its long chill, the presentation is everything! Because it’s so rich and loaded with cream, you don’t need a lot of fuss alongside it. It truly shines as the standalone centerpiece for any buffet table, especially when you’ve arranged those maraschino cherries just right.
This dessert is absolutely perfect for packing up for Potluck Desserts. Since you take the entire dish, just slice it right in the pan. I always bring a sturdy serving spatula—the wetter desserts sometimes need a little help releasing their slice neatly onto a plate, even after chilling!
If you’re serving this after dinner, I find it pairs wonderfully with a piping hot beverage to cut through all that creaminess. A strong cup of black coffee or even just some simple hot black tea really balances out the sweetness perfectly. It’s truly a classic pairing! If you’re worried about adding too much complexity to your meal, check out my recipe for the jiffy corn casserole; sometimes the simplest sides are the best compliments to a show-stopping dessert like this.
Storage and Reheating Instructions for Banana Split Cake
Because this banana split cake relies on cold temperatures to stay firm and delicious, the storage instructions are super important! We want to keep that whipped topping lofty and those fruit layers crisp, so we definitely don’t want to think about reheating this one!
The number one rule is keeping it covered tightly in the refrigerator. Make sure you use plastic wrap, but don’t let it just smoosh down onto the topping. I usually stick a few toothpicks spaced out onto the top layer before covering it loosely. This keeps the plastic wrap from sticking to the chocolate chips and making a total mess when you pull it off. In the fridge, this dessert is fantastic for up to three days. Honestly, it tastes better on Day Two once all those flavors have really had a chance to mingle together!
Now, can you freeze it? You can, but I’m going to be really honest with you, the texture changes quite a bit. The cream cheese and whipped topping layers, while they survive freezing, can get a little weep-y or grainy once thawed because of the high water content. If you *have* to freeze it, wrap that entire dish in plastic wrap, then cover it again with aluminum foil. Thaw it slowly overnight in the refrigerator. But remember, this is meant to be a refreshing, cold dessert, so keeping it in the fridge is always where it shines brightest, unlike something sturdier like my soft and chewy chocolate chip cookies!
Frequently Asked Questions About Banana Split Cake
It’s totally normal to have questions when you’re trying a new, amazing recipe like this! I’ve gathered up the ones I hear the most often, hoping to clear up any confusion before you dive into making this perfect banana split cake. Remember, this recipe is built on that classic no bake banana split cake style, so chilling is our superpower!
Can I make this banana split cake recipe ahead of time?
Yes, you absolutely can! In fact, I encourage it. This is one of my favorite make ahead desserts because it actually tastes better the longer the layers sit together in the fridge. While it needs a minimum of four hours to set up firmly, I find that if I make it the morning before a party, or even up to 24 hours in advance, the flavors have truly married beautifully. Just make sure you cover it loosely so the whipped topping doesn’t dry out!
What makes this a ‘No Oven Needed Cake’?
That’s the beauty of an icebox cake recipe style dessert! Unlike those baked cakes you might see floating around, every layer here—the crust, the cream cheese base, the fruit—is designed to set up and firm up when it’s chilled below 40 degrees. We aren’t relying on heat to create structure; we are relying on cold! This is what makes it such a refreshing, light summer dessert and saves you from heating up the house.
Here’s another quick tip: if you’re worried about the bananas, a tiny squeeze of lemon juice (just half a teaspoon!) tossed over the slices right before you layer them helps keep them bright yellow for longer. You won’t taste the lemon, promise! Plus, if you want even more ideas on how to handle cream cheese textures, my post on the carrot cake cream cheese frosting might give you some extra confidence!
For more ideas on this truly delicious no bake banana split cake recipe, you can check out the details over there as well!
Share Your Experience with This Banana Cream Dessert
Now that you have all the secrets to crafting the perfect banana split cake, I am just dying to hear how it turned out for you! Honestly, the best part of sharing these recipes—the whole reason I pour my heart into testing them—is knowing they end up making memories at your table.
Did you give it a try? I really hope you loved how refreshing and creamy this banana cream dessert was! Please take a moment and drop a comment below! Tell me if you stuck strictly to the classic lineup or if you decided to get adventurous with your fruit layers. Did you add cherries right into the mix, or perhaps use different nuts? I’m always looking for new ways to jazz up my own next batch!
If you loved this treat, I’d be so grateful if you’d hop over and leave a star rating right above the recipe card so other folks know this is the go-to for summer dessert ideas! And hey, if you’re hungry for another simple, crowd-pleasing treat that’s just as easy on your oven, you simply must check out the technique for my banana nut muffins next time you need an easy grab-and-go breakfast!
If you want to see another take on this classic, I always love checking in on what others are doing over at Cooking by Carla to see their approach to a great summer bake-off! Happy chilling, everyone!
PrintNo-Bake Banana Split Cake: Easy Layered Summer Dessert

Capture the classic ice cream parlor flavors in this simple, creamy No-Bake Banana Split Cake. This layered dessert features a graham cracker crust, sweet filling, fresh fruit, and chocolate, making it a perfect potluck dessert without needing your oven.
- Prep Time: 25 min
- Cook Time: 0 min
- Total Time: 4 hr 25 min
- Yield: 12 servings 1x
- Category: Dessert
- Method: No Bake
- Cuisine: American
- Diet: Vegetarian
Ingredients
- 1 1/2 cups graham cracker crumbs
- 1/2 cup unsalted butter, melted
- 1 (8 ounce) package cream cheese, softened
- 1 cup powdered sugar
- 1 (12 ounce) container frozen whipped topping, thawed, divided
- 2 large bananas, sliced
- 1 (20 ounce) can crushed pineapple, drained well
- 1 (21 ounce) can strawberry topping
- 1/2 cup semi-sweet chocolate chips
- 1/4 cup chopped nuts (optional)
- Maraschino cherries for garnish
Instructions
- Prepare the crust: Mix graham cracker crumbs and melted butter in a bowl. Press the mixture firmly into the bottom of a 9×13 inch baking dish. Place the crust in the freezer while you prepare the filling.
- Make the cream cheese layer: In a large bowl, beat the softened cream cheese and powdered sugar together until smooth. Gently fold in half of the thawed whipped topping until just combined.
- Assemble the first layer: Spread the cream cheese mixture evenly over the chilled graham cracker crust.
- Arrange the fruit: Place the sliced bananas over the cream cheese layer. Top the bananas with the well-drained crushed pineapple.
- Add the strawberry layer: Carefully spread the strawberry topping over the pineapple layer.
- Top with whipped topping: Spread the remaining half of the whipped topping over the strawberry layer.
- Garnish: Sprinkle the chocolate chips and chopped nuts (if using) over the top layer. Place maraschino cherries on top for decoration.
- Chill: Cover the dish loosely with plastic wrap and refrigerate for at least 4 hours, or preferably overnight, to allow the dessert to set completely. This chilling time is essential for the best texture.
- Serve: Slice and serve this easy banana split dessert cold.
Notes
- Drain the crushed pineapple very thoroughly; excess liquid will make the layers runny. Press it between paper towels if needed.
- For a richer chocolate flavor, you can melt the chocolate chips with a teaspoon of coconut oil and drizzle it over the top before chilling.
- This make ahead dessert tastes best when chilled for 8 hours or more.
Nutrition
- Serving Size: 1 slice
- Calories: 350
- Sugar: 35
- Sodium: 210
- Fat: 19
- Saturated Fat: 10
- Unsaturated Fat: 9
- Trans Fat: 0
- Carbohydrates: 45
- Fiber: 2
- Protein: 4
- Cholesterol: 35