
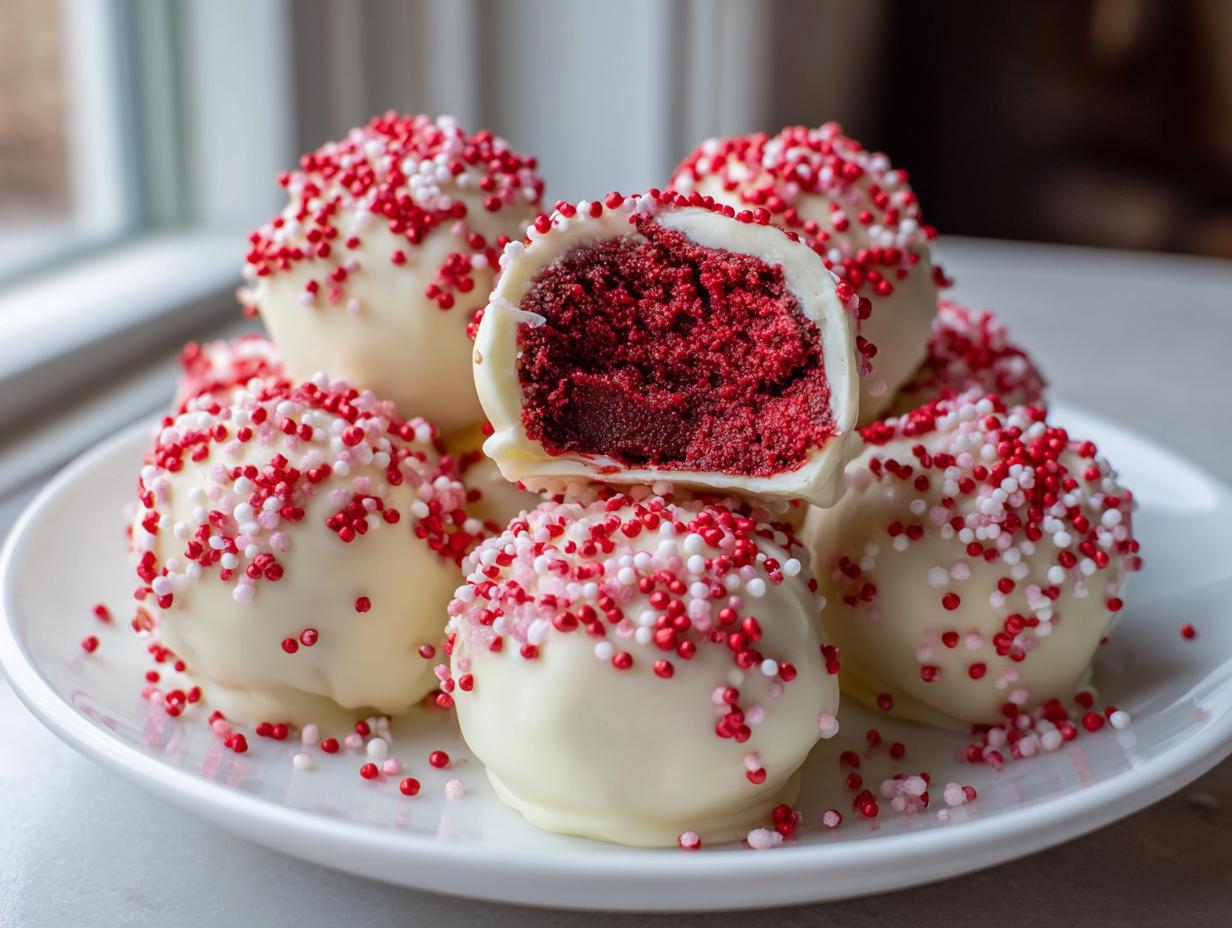
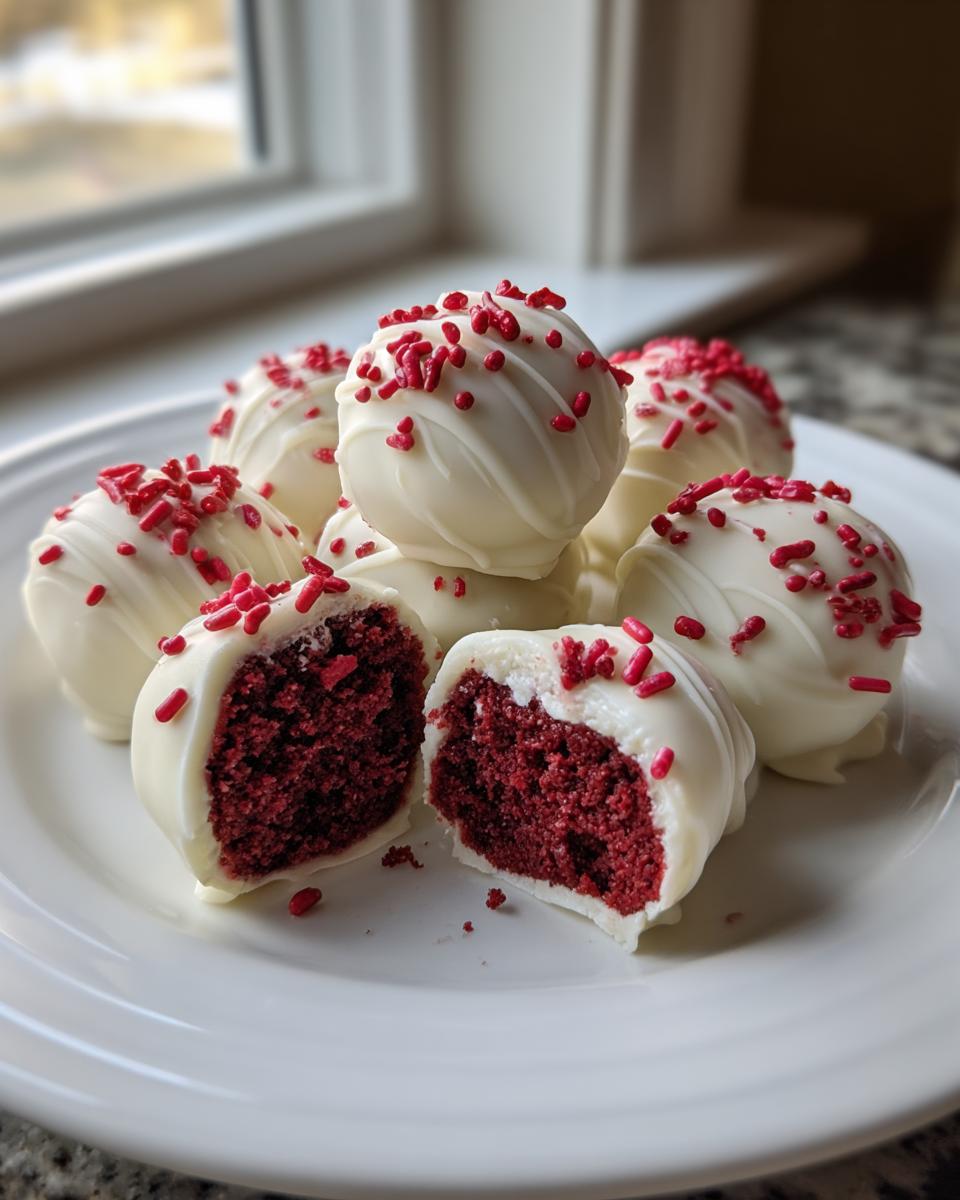
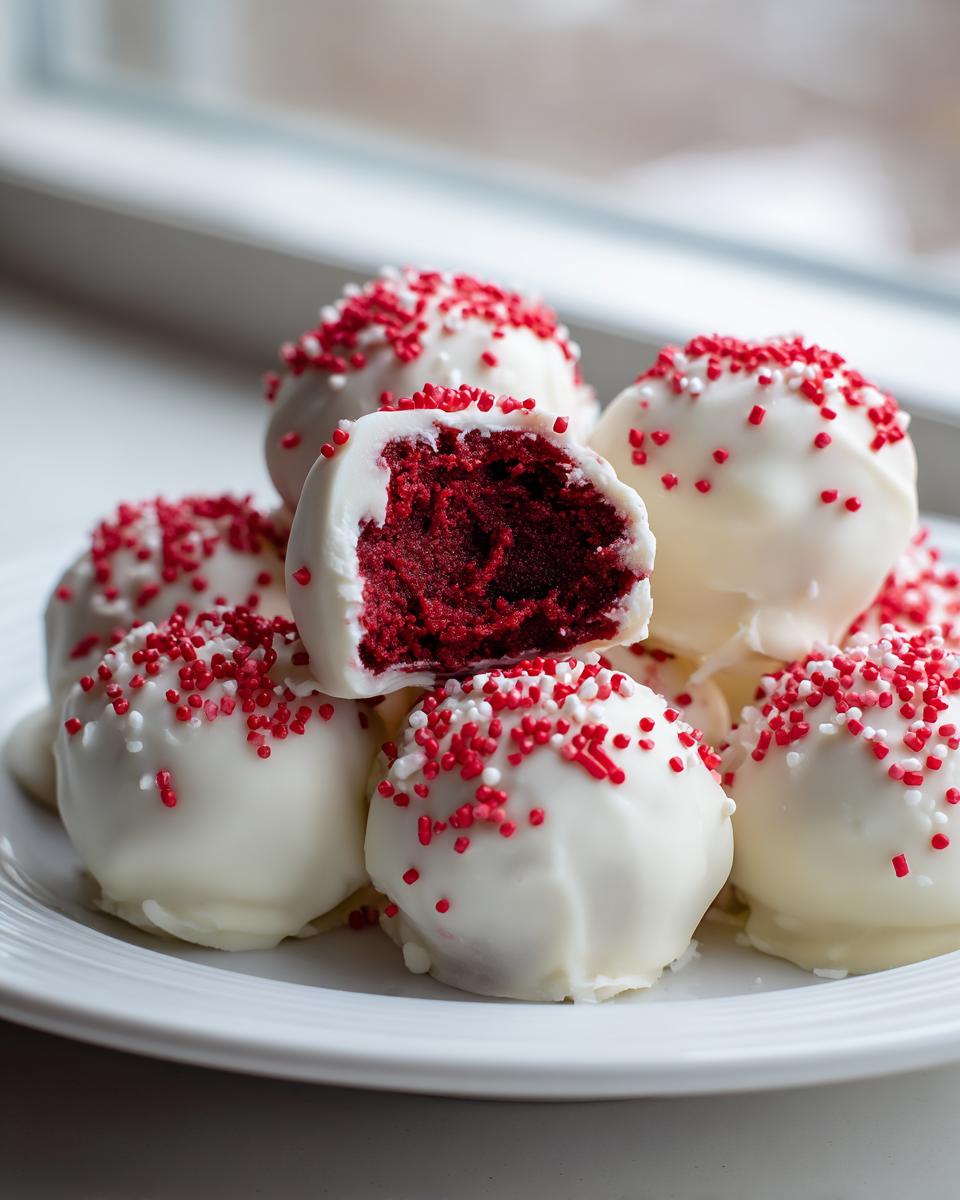
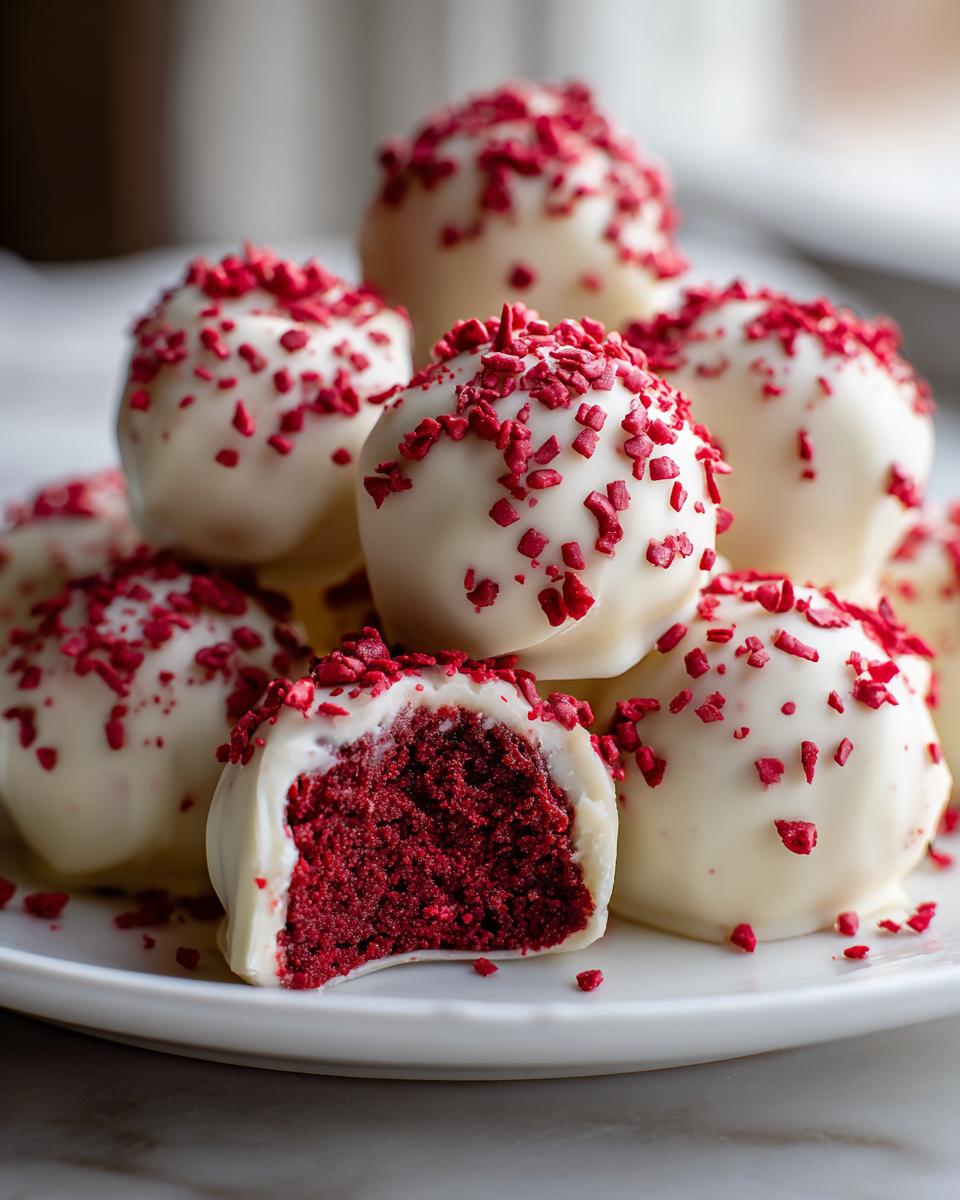
If you’re ever tasked with bringing the sweets to a gathering—a birthday, a holiday dinner, or just a Tuesday where you need a little something decadent—you know the pressure is on. We want something stunning, something delicious, but truly, we just want something easy, right? That’s why I’m so thrilled to share my go-to answer for those moments: these incredibly rich, simple red velvet cake balls. Forget fussing with cake pops or complicated layers; these are pure, concentrated flavor shaped into perfect little orbs. Here at MDLATDMM, my promise is to bring you home recipes that actually work for real life, and trust me, this foolproof recipe is going to be your new secret weapon for the best bite size red velvet desserts.
- Why This Easy Red Velvet Cake Balls Recipe Works (Expert Tips)
- Ingredients Needed for Your Red Velvet Cake Balls Recipe
- How to Prepare Easy Red Velvet Cake Balls Step-by-Step
- Tips for Perfect Red Velvet Truffles Amazing Results
- Storage and Make-Ahead Options for Red Velvet Cake Balls
- Variations for Holiday Red Velvet Treats
- Frequently Asked Questions About Red Velvet Cake Balls
- Estimated Nutritional Information for Red Velvet Cake Balls
- Share Your Homemade Red Velvet Cake Balls
Why This Easy Red Velvet Cake Balls Recipe Works (Expert Tips)
The beauty of these red velvet cake balls is that they skip the oven entirely once the cake is baked—hello, no-bake magic! We rely on straightforward components to deliver deep flavor without stress. My goal, just like when I make my ultimate cream cheese frosting, is reliability. These are designed to be your most requested party desserts, and they absolutely deliver on that promise of rich, moist red velvet bites.
The Secret to Perfect Red Velvet Cake Balls Texture
The real trick here is the ratio between the cake crumbs and the frosting. Too much frosting and your balls will melt into a puddle; too little, and they will crumble apart when you try to roll them. You want the mixture to feel firm, like damp soil when you press a handful. If your frosting seems really soft, stop! Pop those crumbs into the fridge for 15 minutes before blending in the frosting. That extra chill time makes all the difference for a firm, rollable dough.
Making Cream Cheese Frosting Cake Balls Simple
I know some recipes call for making frosting from scratch, but we’re keeping it real here! Using a container of good quality, store-bought cream cheese frosting is totally fine—in fact, it’s what makes these recipe so approachable. It perfectly complements that classic tangy-sweet red velvet flavor. When you combine the cake and the frosting, you get that famous, creamy center that melts beautifully in your mouth.
Ingredients Needed for Your Red Velvet Cake Balls Recipe
When we talk about making the best red velvet cake balls, we aren’t skimping on the flavor, even if we’re keeping the process simple! Since this recipe is mostly assembly, the quality of the main components really shines through. For the cake base, we rely on a boxed mix—no need to reinvent the wheel here! But for the coating and decoration, we want something that looks and tastes professional, like something you’d see at a high-end bakery.
You’ll need the baked and crumbled cake, plus that whole tub of cream cheese frosting you mixed in earlier. The final result relies heavily on that smooth, protective layer we apply at the end.
Coating Ingredients for White Chocolate Covered Cake Balls
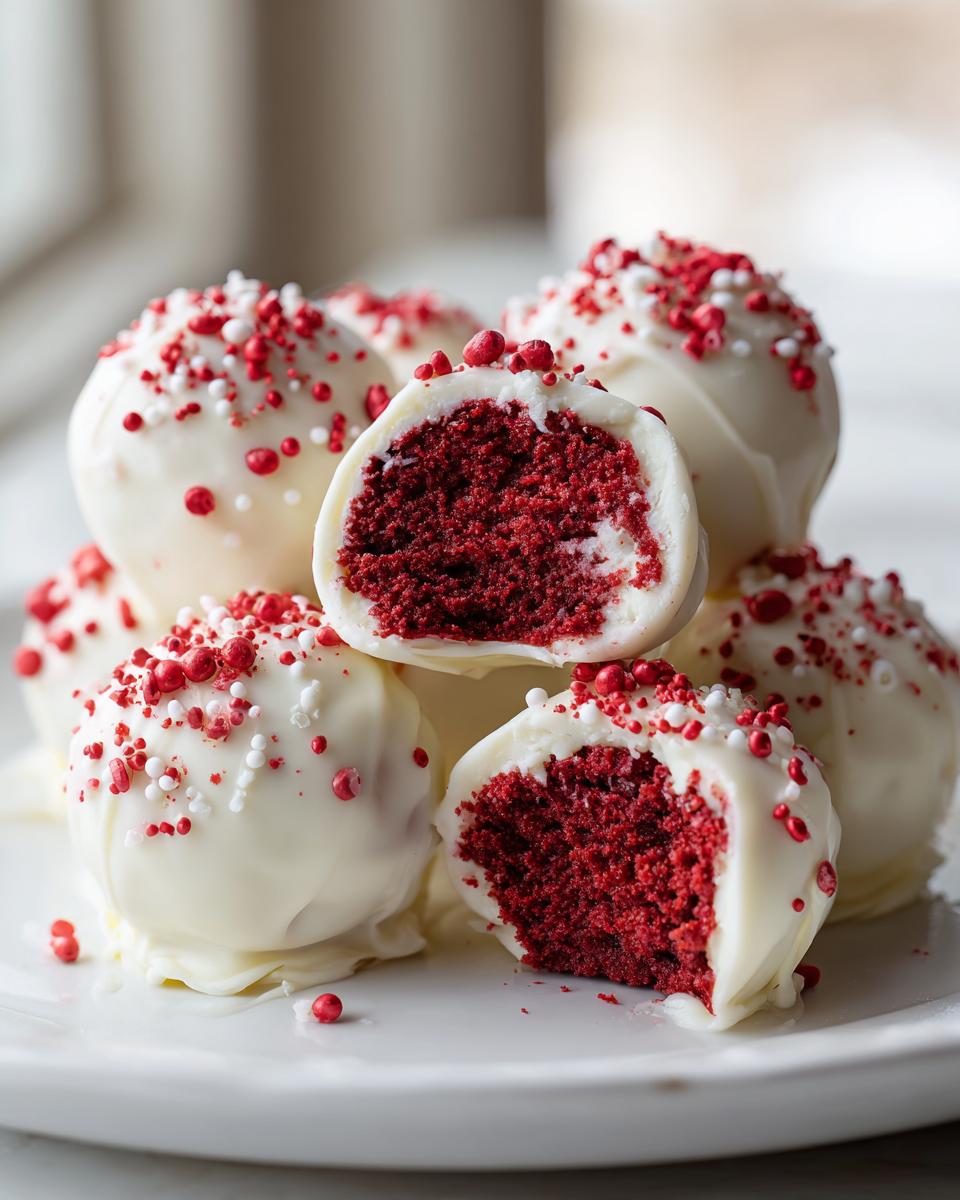
This coating is what elevates these from just ‘truffles’ to show-stopping white chocolate covered cake balls. You’ll need two cups of white chocolate melting wafers—I find wafers melt much smoother than standard chips, which is important for a professional look. If you want that extra silky dip where the chocolate flows like water off the ball, mix in just one teaspoon of coconut oil. It sounds small, but it thins the candy coating just enough so you get a thin, crisp shell instead of a thick, clunky one. Don’t forget your sprinkles for that final festive touch!
How to Prepare Easy Red Velvet Cake Balls Step-by-Step
Okay, this is where the magic really happens, and I promise you, it’s easier than mixing up a batch of my favorite classic cookies! Since these are no-bake, our job is assembly perfection. You just need a little patience for the cooling stages, but the hands-on time is super quick. Follow these steps exactly, and you’ll have gorgeous, professional-looking red velvet cake balls ready for your next event.
Baking and Crumb Preparation for No Bake Cake Balls
First up, we need to bake that cake. Mix up your red velvet cake mix exactly according to the box directions—using the water, oil, and eggs specified. We’re aiming for a standard cake baked in a 9×13 inch pan. Once it’s out of the oven, you absolutely must let that cake cool completely. Seriously, walk away! If you try to crumble warm cake, it gets gummy and sad. Once cool, just crumble the entire thing into fine crumbs into a large bowl. It should look like rich red sand. Then, and this is the fun part, plop in that whole container of cream cheese frosting. Mix it all up until it’s uniform and holds together beautifully. If you’re working with softer frosting, just slip the crumb-frosting mix into the fridge for about 15 extra minutes now; it firms up nicely.
Rolling and Chilling the Red Velvet Cake Balls
Now we roll! Try to keep all your balls about the same size, roughly one inch across. Uniformity is key for good presentation, especially if you’re making these for party dessert recipes. Pop these uniform spheres onto a baking sheet lined with parchment paper. This next step is non-negotiable: you need to chill them for at least 30 minutes in the refrigerator. Cold, firm balls dip so much cleaner than room-temperature ones! If they are warm, the chocolate coating will melt right off and look messy.
Mastering the Chocolate Dipping Technique
While those beauties are chilling, melt your white chocolate wafers. Pop them into a microwave-safe bowl and go slow—stir every 30 seconds on medium power. You don’t want burned chocolate! If you’re using that optional coconut oil, stir it in right at the end until the chocolate is glossy. Use a fork or a dipping tool to quickly dunk each chilled ball, making sure it’s totally covered. Lift it out, let the excess drip off—don’t scrape the fork on the edge of the bowl, just tap gently! Place it back on the parchment paper. If you want decorations, sprinkle them on right away before the chocolate sets. If you need a quick set, pop the tray back into the fridge, just like how I chill my pumpkin bars before frosting them. Head over to Basics with Bails if you want another peek at the dipping process!
Tips for Perfect Red Velvet Truffles Amazing Results
Even with the most straightforward recipes, sometimes things don’t flow perfectly, and that’s okay! That’s why I stand by every recipe here at MDLATDMM—we cover the tricky spots so you don’t have to worry. If you follow the chilling steps, you should find these turn out like those red velvet truffles amazing everyone begs for. But if you run into a little hiccup, don’t panic!
Handling Sticky Dough in Your Simple Cake Ball Recipe
The number one issue people ask me about is sticky dough. If you mix everything and the resulting mixture feels looser than you’d like for rolling, don’t try to sneak in tons of extra frosting or flour—that throws off the delicate balance. Instead, just cover that bowl and give it another 20 minutes in the fridge. Cold makes the mixture firm up beautifully and lets the frosting tighten its grip on those crumbs. If you are curious about other desserts that use lots of cream cheese, you should check out my recipe for lemon cream cheese dump cake. For an alternative approach to the base mix altogether, see the 3-ingredient cake balls idea over here!
Storage and Make-Ahead Options for Red Velvet Cake Balls
One of the best parts about these red velvet cake balls is that we made them totally no-bake (after the initial cake cooling, of course!). This means they are absolutely perfect for making ahead of time, which is a lifesaver when you’re hosting or prepping for big holidays. If you’ve ever stressed last minute while making my pumpkin dip, you know the value of getting desserts done early!
Honestly, they taste even better the next day once the frosting has fully set up inside the truffle. For the best experience, I always make my batch a full day before I plan to serve them. Just make sure they are fully set and the chocolate coating is hard before you store them.
When it comes to keeping things fresh, refrigeration is your best friend. Store your finished, coated cake balls in a single layer inside an airtight container. If you stack them, they might stick together or smudge that pretty chocolate coating, and nobody wants that! They hold up great in the fridge for about a week. If you need to keep them longer—maybe you made a huge batch for Christmas, like those lovely holiday red velvet treats—go straight to the freezer!
Freezing is super straightforward. Place the tray of coated balls in the freezer until they are completely solid. Then, transfer them into a heavy-duty freezer bag or container. You can easily keep them frozen for up to three months. When you need them, just pull them out and let them thaw in the refrigerator overnight. They come back to life perfectly—rich, moist, and ready to serve without any extra work from you on party day!
Variations for Holiday Red Velvet Treats
The base recipe for these red velvet cake balls is so versatile, which is one of the reasons I love it so much for my holiday baking! Once you master the ratio of cake to frosting, you can really play around with how you finish them up. They become fantastic valentine day sweets or spooky Halloween bites with just a few simple tweaks to the coating or the decorations.
Don’t feel locked into the white chocolate look, either! The beauty of a chocolate-coated dessert is that you can really customize the shell to fit whatever theme you’re working with. These are perfect for customizing for your dessert table.
Alternative Coatings Beyond White Chocolate
While I adore how the white chocolate makes that deep red color pop, milk chocolate and dark chocolate work just as beautifully here. If you use milk chocolate, you might want to skip that teaspoon of coconut oil, as the milk chocolate coating will be a bit thinner to begin with. Dark chocolate is always a decadent choice—it cuts through the sweetness of the cream cheese frosting perfectly, making them taste closer to a rich truffle!
For holidays, I highly recommend grabbing some colored candy melts. Think bright green and red for Christmas, or pastel pinks and reds for Valentine’s Day. Melt those right alongside your wafers or chocolate chips. If you want to get extra fancy, melt the white chocolate first, dip your ball completely, let that set, and then take a fork and drizzle a contrasting color over the top. That double-dip drizzle really makes these simple no bake cake balls look like you spent hours on them!
Frequently Asked Questions About Red Velvet Cake Balls
I always get a ton of questions after I post these because everyone wants to know how to tweak them or ensure they are perfect for their big events. Since these are such popular party dessert recipes, planning ahead is key! Here are some of the things I hear most often about making these little gems.
Can I make red velvet cake balls without baking the cake first?
Absolutely, that’s the beauty of the no bake cake balls category! If you want to shave off that 30 minutes of baking and cooling time, you 100% can use a store-bought pre-made red velvet cake. Just grab a cake that’s already frosted, crumble it up, and mix it right in with the cream cheese frosting. It works just as well, maybe even better since the frosting is already integrated! Or, if you have leftover red velvet cake from another project—maybe you only needed a half-recipe for something else—use those scraps! It saves time and reduces waste. If you ever want to try a savory version of this concept, feel free to check out how I make my stuffing balls!
What is the best way to serve these bite size red velvet desserts?
For parties, presentation really matters, and thankfully these bite size red velvet desserts look elegant without any effort on your part! After the chocolate coating is fully set, the best way to display them is on a lovely white platter or a tiered serving tray. If you used sprinkles, try to keep them visible! For a really festive look, especially for Valentine’s Day or Christmas, consider using small paper liners, like those tiny cupcake wrappers. It makes them easier for guests to grab without getting chocolate fingerprints everywhere. For a real showstopper, arrange them in a tight circle like a wreath or a flower pattern on a cake stand.
Estimated Nutritional Information for Red Velvet Cake Balls
Now, I know we aren’t baking these for health reasons, right? These are treats that sing of celebration and comfort! But just so you have a good idea of what you’re whipping up—especially if you’re juggling party menus or just curious—I put together an estimated set of nutrition facts for one of these sweet little bites.
Please remember, just like when I measure out the pinch of spice for my holiday gingerbread cake, the actual numbers can shift based on the exact brand of cake mix or cream cheese frosting you end up using. These estimates are based on the recipe provided, assuming they yield 24 balls.
Here is the breakdown for roughly one of these decadent red velvet cake balls:
- Calories: About 250 per ball. Yep, they are rich, but worth every single bite!
- Total Fat: Around 15 grams. That comes largely from the decadent white chocolate coating and the butter in the cake mix/frosting combo.
- Carbohydrates: Roughly 28 grams. This is where the sweetness comes from!
- Protein: About 3 grams. Not a health shake, but every little bit helps!
You can see the higher fat and sugar content because we are dipping them in chocolate coating, which is what makes them so satisfying and gorgeous. If you were making the 3 ingredient cake balls idea using just cake mix and frosting, those numbers would be much lower, but you’d miss out on this incredible chocolate shell!
Share Your Homemade Red Velvet Cake Balls
Now, the truly best part of sharing these recipes is seeing them come to life in *your* kitchens! I poured my heart into testing this recipe so you wouldn’t have to guess about that perfect cake-to-frosting ratio, and now I’m dying to see how they turned out for your get-togethers. Did you go with the classic white chocolate shell, or did you try a dark chocolate drizzle?
Please, please, please come back to this page and leave me a star rating. It seriously helps other home cooks know that this method for making red velvet cake balls is reliable and delicious. If you had a tip that worked really well for you—maybe your perfect spot for chilling, for example—drop it in the comments below. We’re building a community here, just like the one I learned from growing up!
And if you snapped even one gorgeous photo of these gorgeous little sweets, tag me! Sharing pictures on social media tells me you found joy in the process, and that’s exactly what I hope MDLATDMM Recipes brings to your busy week. You’re carrying on that tradition of sharing food made with love, and that’s what my founder story is all about. Happy baking (and rolling, and dipping)!
PrintEasy No-Bake Red Velvet Cake Balls with Cream Cheese Frosting

Make these simple, rich red velvet cake balls using a boxed cake mix and cream cheese frosting. They are no-bake, coated in chocolate, and perfect for parties or holidays.
- Prep Time: 30 min
- Cook Time: 30 min
- Total Time: 90 min
- Yield: 24 servings 1x
- Category: Dessert
- Method: No Bake
- Cuisine: American
- Diet: Vegetarian
Ingredients
- 1 box (15.25 oz) red velvet cake mix
- 1 cup water (or as directed on cake mix box)
- 1/2 cup vegetable oil (or as directed on cake mix box)
- 3 large eggs (or as directed on cake mix box)
- 1 container (16 oz) cream cheese frosting
- 2 cups white chocolate melting wafers
- 1 teaspoon coconut oil (optional, for smoother dipping)
- Red or white sprinkles (optional, for decoration)
Instructions
- Prepare the red velvet cake according to the package directions, using the water, oil, and eggs specified on the box.
- Bake the cake in a 9×13 inch pan. Let the cake cool completely on a wire rack.
- Once cool, crumble the entire cake into fine crumbs into a large bowl.
- Add the entire container of cream cheese frosting to the cake crumbs. Mix well with your hands or a sturdy spoon until the mixture is fully combined and holds together when pressed.
- Roll the mixture into small, uniform balls, about 1 inch in diameter. Place the balls on a parchment-lined baking sheet.
- Chill the cake balls in the refrigerator for at least 30 minutes to firm them up. This step is important for easy dipping.
- Melt the white chocolate wafers in a microwave-safe bowl according to package directions, stirring every 30 seconds. Stir in the coconut oil if using.
- Dip each chilled cake ball into the melted white chocolate, ensuring it is fully coated. Use a fork or dipping tool to lift the ball out, letting excess chocolate drip back into the bowl.
- Place the coated cake balls back onto the parchment-lined sheet.
- Immediately add sprinkles, if desired, before the chocolate sets.
- Allow the chocolate coating to set completely at room temperature, or speed up the process by chilling them for another 15 minutes.
Notes
- For a shortcut, you can use a store-bought, pre-made red velvet cake instead of baking one from a mix.
- If the mixture feels too sticky after adding the frosting, chill it for an extra 15 minutes before rolling.
- If the chocolate coating becomes too thick while dipping, microwave it in 15-second intervals until smooth again.
- These **bite size red velvet desserts** freeze well. Store them in an airtight container in the freezer for up to three months.
Nutrition
- Serving Size: 1 ball
- Calories: 250
- Sugar: 25
- Sodium: 180
- Fat: 15
- Saturated Fat: 8
- Unsaturated Fat: 7
- Trans Fat: 0.5
- Carbohydrates: 28
- Fiber: 1
- Protein: 3
- Cholesterol: 30