
Oh, the smell! Honestly, there’s nothing that says ‘home’ quite like pulling a fresh loaf of homemade bread out of the oven. It’s warm, it smells yeasty and slightly nutty, and just thinking about that first slice makes my mouth water. If you’ve ever thought that making beautiful, artisan-quality bread was only for fancy bakers with endless time, I’m here to show you the secret! My favorite thing about this recipe is that we use the magic of the Dutch oven to get that crackling crust you usually only find at an expensive bakery. It fits right into Maddie’s philosophy here at the blog—simple steps, accessible ingredients, and maximum comfort. Trust me, this No-Knead Dutch Oven Bread is going to change the way you think about baking bread!
- Why This Easy No-Knead Dutch Oven Bread is Your New Favorite Bread
- Simple Ingredients for Perfect No Knead Bread
- Step-by-Step Instructions for Your Dutch Oven Bread
- Tips for Success with No Knead Bread Baking
- Make-Ahead and Storage for Your Artisan Bread
- Serving Suggestions for This Versatile Bread
- Variations on the Classic No Knead Bread
- Frequently Asked Questions About Making Bread
- Share Your Homemade Bread Creations
Why This Easy No-Knead Dutch Oven Bread is Your New Favorite Bread
I know you’re looking for that perfect homemade bread recipe that doesn’t demand you stand over the counter kneading for twenty minutes. That’s exactly what we get here! This recipe is all about giving you big, bakery-quality results for minimal actual work. You just mix it up and let time do the heavy lifting.
- Only four simple ingredients are needed—you likely have them right now!
- It produces that gorgeous, deep crust that makes artisan bread so exciting.
- Zero kneading required, which means you can set it and forget it until it’s time to bake.
This loaf is truly the definition of a rewarding homemade bread recipe.
Achieving Bakery Style Bread Texture Without the Work
The secret sauce for this incredible crusty bread involves two parts: the long, slow, overnight rest and the Dutch oven. That long rest, which develops complex flavor, results in super active yeast. Then, when we drop that dough into our screaming hot Dutch oven, the lid traps all the steam released by the dough.
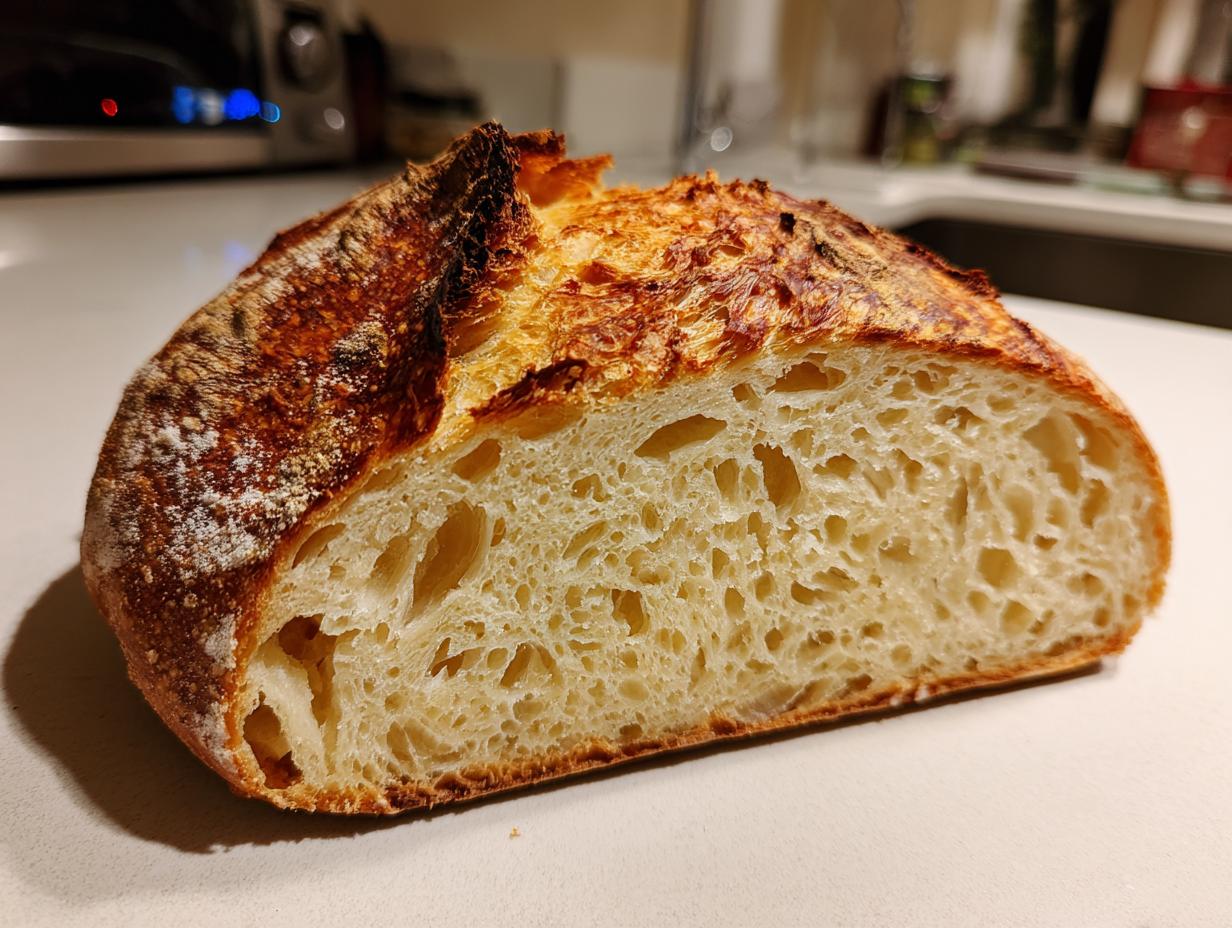
That steam keeps the outside of the dough supple enough to expand wildly—that’s called ‘oven spring,’ and it gives you those huge bubbles and that crackly, shattering crust. It’s pure magic! You get true artisan bread quality without ever having to knead or stress over temperatures.
Simple Ingredients for Perfect No Knead Bread
When I say this is a simple ingredients bread, I mean it! We aren’t dealing with fancy flours or complicated starters here. You just need four things to get this incredible loaf going. That’s the beauty of real home baking—it doesn’t have to be fancy to be extraordinary. We rely on a slow fermentation, not complicated steps, to build flavor.
We use all-purpose flour, salt, instant yeast, and water. That’s it! These staples mean you can decide on a whim at dinner time that you want fresh bread tomorrow, and you’ll have everything you need.
Ingredient Clarity and Preparation Notes
Let’s talk specifics just so you get that perfect shaggy dough. Make sure you are using instant yeast (or rapid-rise). If you only have active dry, you’ll need to proof it first in some slightly warm water, but instant yeast just mixes right in with the dry stuff! More importantly—the water has to be cool, not warm, when you mix it in with the yeast.
Seriously, if you use warm water, your yeast will wake up too fast and eat all the sugars before it gets its long nap. We want it to be slow and sleepy for the 12 to 18 hours it rests. Cool water keeps that yeast relaxed so it saves its energy for when we really need to bake it!
Step-by-Step Instructions for Your Dutch Oven Bread
Okay, let’s get our hands gloriously dusty! This whole process is so straightforward, but timing is everything, especially with our long rest period. I’ve broken it down into three easy phases so you can see exactly what’s happening between now and when you slice into that perfect loaf. Don’t worry if your final dough looks messy; that’s part of the charm of this easy bread baking method!
Phase 1: Mixing and Long Fermentation for Flavorful Bread
First, grab a big bowl. We’re just tossing the flour, salt, and yeast right in there. If you’re using instant yeast, just dump it in—no messing around! Now, pour in that cool water. Don’t use a fancy mixer here; just grab a wooden spoon and stir until everything is barely combined. It’s supposed to look shaggy, almost like a mess of wet clumps. Do not overwork it! Seriously. Cover that bowl super tight with plastic wrap. Now, walk away for 12 to 18 hours. That long rest is where the magic happens, letting those simple ingredients really develop that deep, complex flavor you expect from bakery bread.
Phase 2: Preheating the Dutch Oven and Final Proof
About 45 minutes before your dough is ready to bake, it’s time to get the oven hot! Place your actual Dutch oven—lid and all—into the oven and preheat it all the way up to 450°F (232°C). We need that pot scorching hot to create instant steam. Next, gently scrape that bubbly dough onto a lightly floured counter. Don’t punch it down! You want to gently fold the edges over onto themselves about three or four times to make a rough ball. Place that dough ball right onto a piece of parchment paper, cover it with a clean tea towel, and let it rest for just 30 minutes while that Dutch oven gets ready.
Phase 3: Baking the Crusty Bread
This takes courage, but you can do it! Carefully pull that blazing hot Dutch oven out of the oven. Use the parchment paper like a sling to gently lower your dough right into the center of the hot pot. Put the lid back on immediately. Bake it covered for 30 minutes. That lid traps the steam and lets the loaf puff up beautifully. After 30 minutes, take the lid off. Keep baking for another 15 to 20 minutes uncovered until your crusty bread is a deep, deep golden brown. That color is your sign of perfection!
Tips for Success with No Knead Bread Baking
Now that you’ve baked your first glorious no-knead bread, let’s make sure your next loaf is just as good, or even better! The biggest thing home bakers struggle with is the sticky dough, but honestly, that stickiness is your friend. Just remember to flour your surface lightly when you fold it, but resist the urge to add more flour to the actual dough itself. Adding too much flour while handling means you’re moving away from that beautiful, airy interior we love in this homemade bread.
The other huge, non-negotiable tip for this loaf is cooling. You simply must let this bread cool all the way down on a wire rack before you slice into it. I know that warm bread smell is driving you crazy, but cutting too soon traps the steam, and that beautiful, airy crumb turns into a gummy mess. Patience truly yields the best results in bread making!
Troubleshooting Common Issues with Homemade Bread
If your bread came out pale, I bet you didn’t let that Dutch oven preheat long enough, or you pulled the lid off too early. We need that initial blast of dry heat to set that magnificent crust! If your interior was gummy, go back to the cooling rule—did you slice it before it hit room temperature? Follow these little details, and I promise this simple recipe will become your go-to for excellent **bread** every single time. If you’re looking to dive deeper, check out my notes on maintaining a sourdough environment sometime, though this simple yeast loaf is much more forgiving for an evening bake!
Make-Ahead and Storage for Your Artisan Bread
Since this no-knead bread relies on that long, lazy rise time, you might be wondering what happens if 18 hours just isn’t going to work with your schedule. Don’t fret! If you need a shorter rest—say, only 12 hours—it will still taste great, but the flavor won’t be quite as complex because the yeast didn’t have as long to develop those lovely deep notes. If you’re gone for the whole day and think it might go past 18 hours, you can definitely stick the covered dough bowl in the fridge for up to 24 hours after the first couple of hours at room temperature. That cold nap slows everything down!
Now for storage—this is key to keeping that crust happy. Once your bread is fully cooled (remember that gummy rule!), you need to keep the crust crusty. Don’t seal it up tightly in plastic wrap right away; that traps moisture and turns your beautiful exterior soggy. For the first day, I just leave it cut-side down on the counter or wrap it loosely in a clean tea towel. If you need to keep it longer than two days, freezing it is best! Just slice it first, and then wrap slices tightly in foil before tossing them in the freezer. You won’t regret having that favorite loaf ready to toast!
Serving Suggestions for This Versatile Bread
Okay, you’ve got this massive, gorgeous, crusty loaf sitting on your counter. What do you do with it? Honestly, this bread is good enough to eat plain, but it truly shines next to hearty meals. Because it holds up so well and has those wonderful air pockets, it’s absolutely the best thing for soaking up sauces. Think dipping it into a rich, slow-simmered Italian sauce—it’s a must!
This bread is fantastic as a simple dinner bread beside a thick slice of meatloaf. Or, if you’re making something a little spicier, this neutral loaf is the perfect counterpoint to a vibrant chicken curry. You can also slice it thin, toast it up, and spread it with garlic butter for an instant appetizer. It truly works for everything!
Variations on the Classic No Knead Bread
The beauty of this foundational recipe is how easily we can jazz it up without messing up the timing or needing extra steps—it’s still super focused on easy bread baking! Once you’ve mastered the basic method, feel free to treat that shaggy dough like a blank canvas. Remember, we add these extras right at the beginning when you mix the flour, salt, and yeast together.
If you want to give yourself something lovely for dipping into soup, like that amazing Italian sausage gnocchi soup, toss in about two tablespoons of dried Italian herbs—rosemary and thyme work so well together. For a crunch, about a quarter cup of sunflower seeds or flax seeds adds great texture to every slice of your homemade bread.
Another fun one is adding a little cheese. You can stir in half a cup of grated sharp cheddar or even some dried minced garlic right into the dry ingredients. It turns this simple crusty loaf into something totally gourmet without adding any kneading time to your schedule. Experiment a little; it’s still the same reliable bread foundation!
Frequently Asked Questions About Making Bread
I totally get it; when you’re trying a new recipe, especially in baking, questions pop up like crazy! I’ve gathered the ones I hear the most often from friends who try this No Knead Dutch Oven Bread. Even though this recipe is designed to be super simple, knowing these little details helps ensure you get that perfect loaf of **bread** every time. We want to make sure your journey into **beginner bread making** is a complete success!
Can I use Active Dry Yeast Instead of Instant Yeast for This Bread?
Yes, you absolutely can, but you need to treat active dry yeast a little nicer! Remember, instant yeast is ready to go, but active dry yeast needs a wake-up call. Before you mix anything else, you have to proof it: dissolve the yeast in about half a cup of lukewarm—not hot!—water with a tiny pinch of sugar. Let it sit for about 5 to 10 minutes until it gets nice and foamy on top. Once it looks like a foamy carpet, then you can add it to your flour mixture with the rest of your cool water. If it doesn’t foam, your yeast is dead, so start over!
What If I Want a Softer Sandwich Bread Instead of Crusty Bread?
Gosh, I love a soft, fluffy bread for sandwiches too, and if that’s what you’re craving, you might need a slightly different approach than this very crusty artisan method. This recipe is dedicated to that crackly exterior, so getting a truly soft version is tough unless you change the baking environment. If you want a softer loaf next time, try making a regular yeast bread recipe that bakes in a loaf pan rather than the Dutch oven. For a slightly softer result here, you can substitute about half a cup of the cool water with milk, and brush the finished loaf with melted butter right out of the oven. It’s not quite Amish White Bread soft, but it’s a good compromise!
If you’re wanting to explore softer loaves, you should check out my guide on easy cornbread recipes—that often satisfies a different kind of baked comfort itch!
Share Your Homemade Bread Creations
Now that your kitchen smells absolutely heavenly and you’ve got a loaf of the best homemade bread sitting on your counter, I just have to know how it went! Did you manage to wait for it to cool before slicing into it? I hope so!

Please, please, please leave a rating for this Easy No-Knead Dutch Oven Bread right here on the page. Your feedback helps other folks who are a little nervous about trying their hand at baking for the first time build up their confidence. It’s so important to me that you feel capable in the kitchen, just like I did reconnecting with my roots!
If you took a gorgeous picture of that crackly crust or that airy interior—and I know you did—share it on social media and tag me! Seeing your success stories is honestly the highlight of my week. It proves that the simple joy of making something wonderful from scratch is still totally achievable, even with busy schedules. Happy baking, and enjoy every single slice!
If you’re already dreaming about what to bake next, or perhaps need something a little sweeter after all that wonderful bread, you can always browse through my other delicious dessert recipes while you wait for your next loaf to prove!
PrintEasy No-Knead Dutch Oven Bread
Make homemade artisan bread with this simple no-knead recipe using a Dutch oven. You get a crusty exterior and a soft interior with minimal effort.
- Prep Time: 10 min
- Cook Time: 50 min
- Total Time: 13 hours 0 min
- Yield: 1 loaf 1x
- Category: Baking
- Method: Baking
- Cuisine: American
- Diet: Vegetarian
Ingredients
- 3 cups all-purpose flour
- 1 1/2 teaspoons salt
- 1/4 teaspoon instant yeast
- 1 1/2 cups cool water
Instructions
- In a large bowl, mix the flour, salt, and yeast together.
- Pour in the cool water and mix with a wooden spoon until just combined into a shaggy dough. Do not overmix.
- Cover the bowl tightly with plastic wrap and let it rest at room temperature for 12 to 18 hours. The dough will become bubbly and increase in size.
- Lightly flour a work surface. Gently scrape the dough out of the bowl and fold it over itself a few times to form a rough ball.
- Place the dough ball on a piece of parchment paper, cover it loosely with a clean kitchen towel, and let it rest for 30 minutes.
- About 20 minutes before the rest period ends, place your Dutch oven (with the lid on) into your oven and preheat to 450°F (232°C).
- Carefully remove the hot Dutch oven from the oven. Lift the dough by the parchment paper handles and gently lower it into the hot pot. Cover with the lid.
- Bake for 30 minutes with the lid on.
- Remove the lid and continue baking for another 15 to 20 minutes, or until the crust is deep golden brown.
- Carefully remove the bread from the pot and let it cool completely on a wire rack before slicing.
Notes
- For a crispier crust, you can bake the bread for an extra 5 minutes after removing the lid.
- This recipe uses simple ingredients, making it a great beginner bread making option.
- Cooling the bread fully prevents the inside from becoming gummy when you slice it.
Nutrition
- Serving Size: 1 slice
- Calories: 200
- Sugar: 0.5
- Sodium: 300
- Fat: 0.5
- Saturated Fat: 0.1
- Unsaturated Fat: 0.4
- Trans Fat: 0
- Carbohydrates: 42
- Fiber: 1.5
- Protein: 7
- Cholesterol: 0