
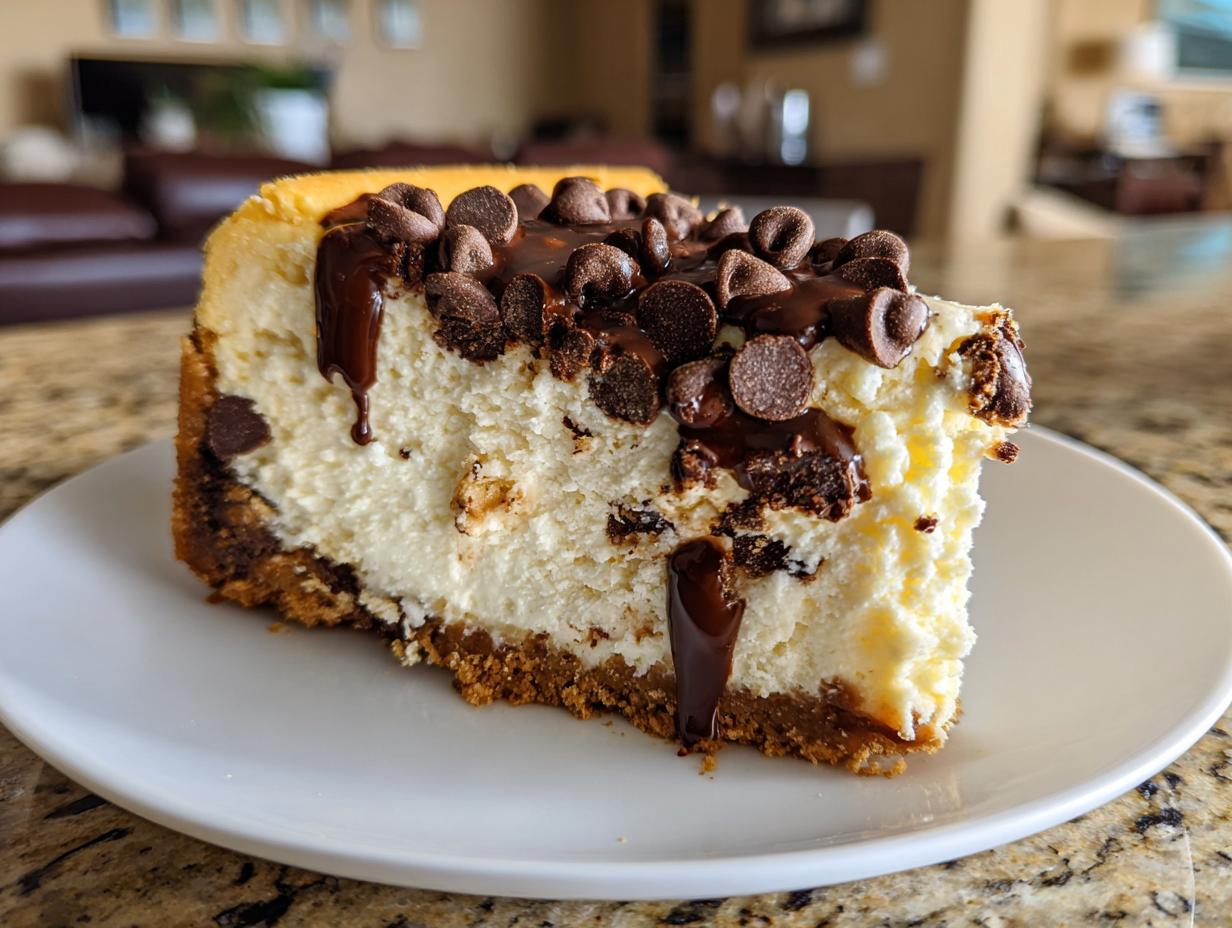
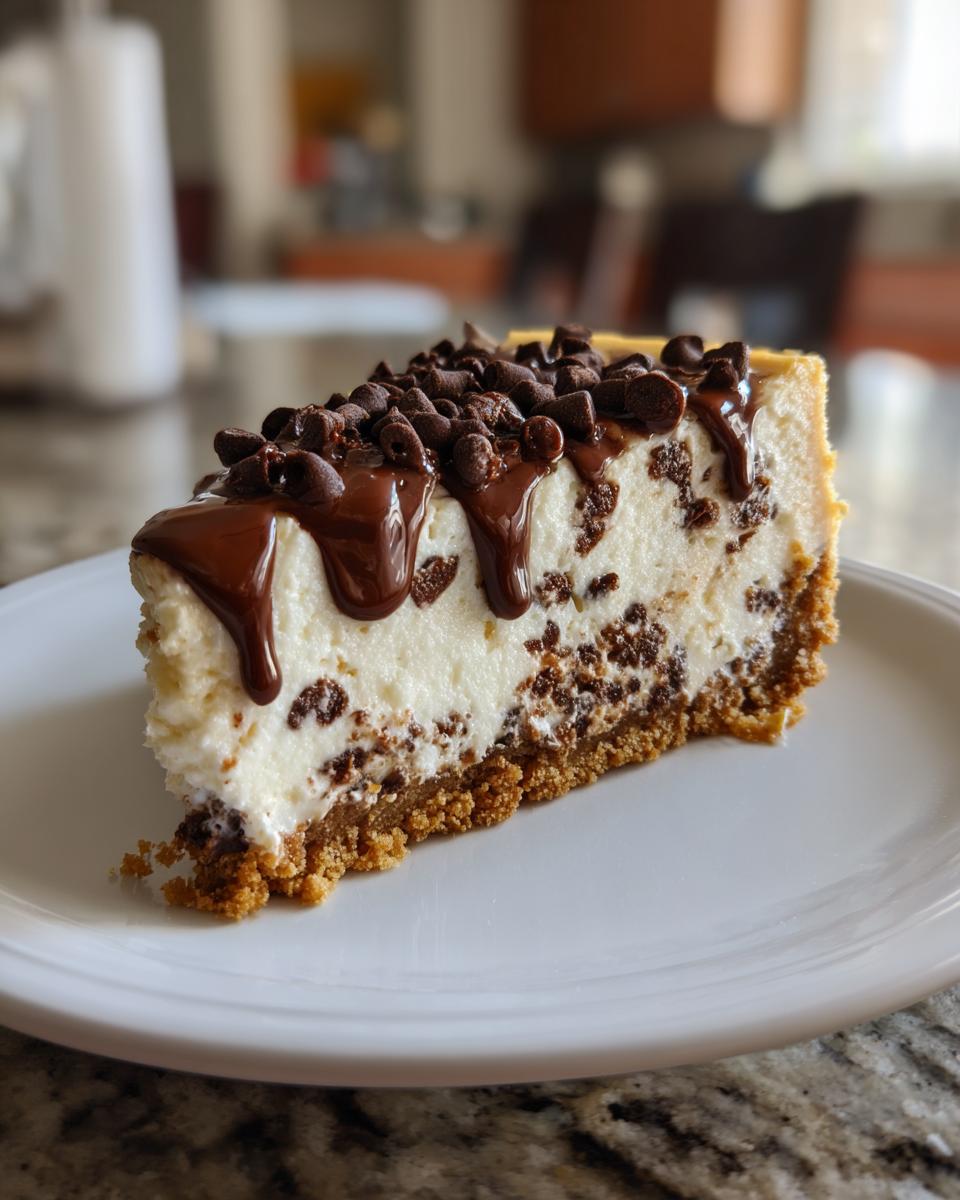
Oh my goodness, if you are looking for a dessert that screams ‘celebration’ but feels like a warm hug, you have landed in the right spot! I totally get it; sometimes you just need something utterly decadent, and for me, nothing beats the ultimate **chocolate chip cheesecake**. We are making my foolproof recipe today, the one that gives you that unbelievably rich and creamy texture every single time.
Forget those sad, cracked tops you see everywhere else. Achieving that perfectly smooth, crack-free surface isn’t luck; it’s about doing things right, especially regarding temperature and technique. I spent ages perfecting this, and when you pull that smooth, chocolate-flecked jewel out of the oven, trust me, the satisfaction is real. This isn’t just a recipe; it’s my little piece of baking magic, and I can’t wait to share it with you!
- Why This Creamy Chocolate Chip Cheesecake Recipe Works (Easy Dessert Recipes to Impress)
- Gathering Ingredients for Your Ultimate Chocolate Chip Cheesecake
- Simple Cheesecake Baking: Preparing the Graham Cracker Crust
- How to Make the Creamy Cheesecake Recipe Filling
- Cooling and Chilling: Secrets to the Best Chocolate Chip Cheesecake
- Tips for Success with Your Homemade Chocolate Chip Cheesecake
- Storage and Reheating Instructions for Chocolate Chip Cheesecake
- Frequently Asked Questions About Chocolate Chip Cheesecake
- Estimated Nutritional Data for This Decadent Cheesecake Dessert
Why This Creamy Chocolate Chip Cheesecake Recipe Works (Easy Dessert Recipes to Impress)
I know what you’re thinking: cheesecake seems intimidating, right? That’s exactly why I tweaked this recipe repeatedly! I wanted something that tasted like the most decadent cheesecake dessert imaginable but was straightforward enough for a busy weeknight. It’s designed to be one of those easy dessert recipes to impress anyone who walks through your door.
Here’s the deal on why this particular chocolate chip cheesecake recipe delivers every time:
- The water bath system guarantees the creamy cheesecake recipe interior—no dry spots here!
- We use room-temperature heavy hitters (cream cheese, eggs) so you don’t end up with lumps.
- The graham cracker crust is perfectly crisp and buttery.
- The result is that perfectly rich and creamy dessert texture that melts in your mouth.
We are skipping all the fuss so you can focus on enjoying this incredible homemade chocolate chip cheesecake. Check out my main baking tips if you want a deep dive into making sure everything is perfect before you even start mixing!
Gathering Ingredients for Your Ultimate Chocolate Chip Cheesecake
Okay, shopping time! When you’re making something as special as this chocolate chip cheesecake, you can’t just grab anything off the shelf. We need quality here because the ingredient list is pretty short. That means every single item really has to pull its weight for flavor.
Go ahead and grab your list—we are making one beautiful, luscious baked cheesecake, not separate components, so everything goes into two main stages: the base and the filling. Having everything ready before you start mixing saves so much stress!
Here’s the treasure map for what you need:
- 1 1/2 cups graham cracker crumbs
- 1/4 cup granulated sugar (for the crust)
- 6 tablespoons unsalted butter, melted
- 3 (8 ounce) packages cream cheese, softened
- 1 1/2 cups granulated sugar (for the filling)
- 1 teaspoon vanilla extract
- 1/4 teaspoon salt
- 4 large eggs, room temperature
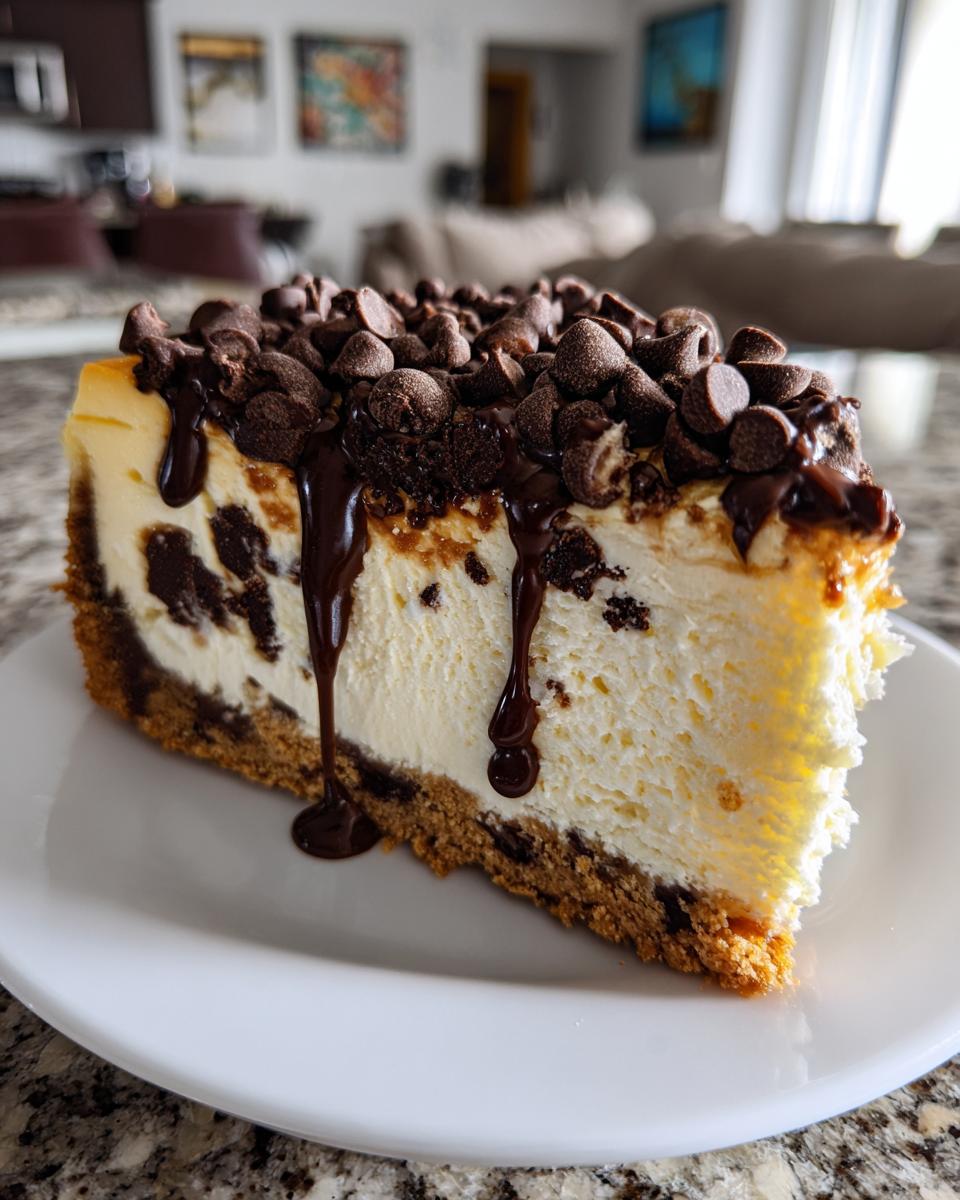
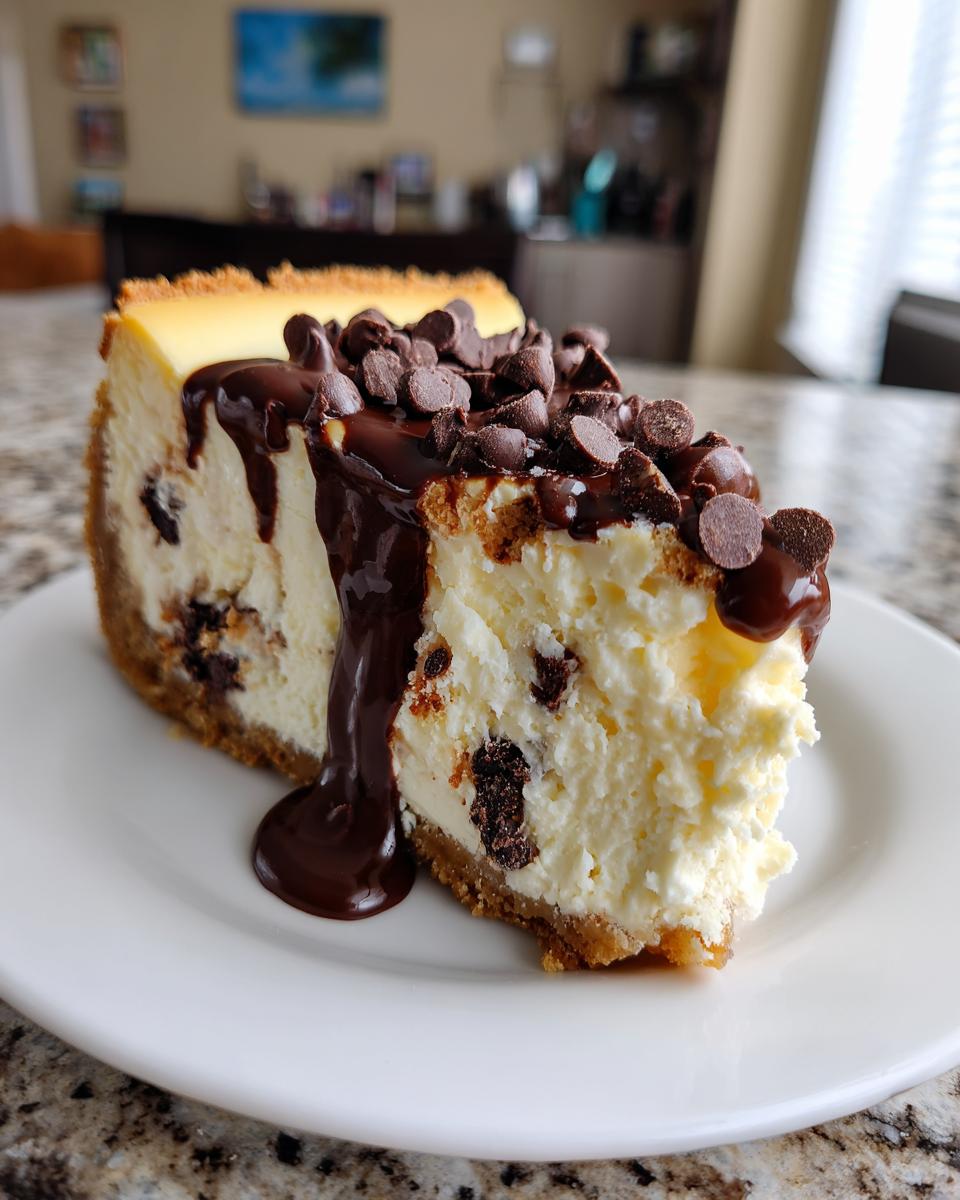
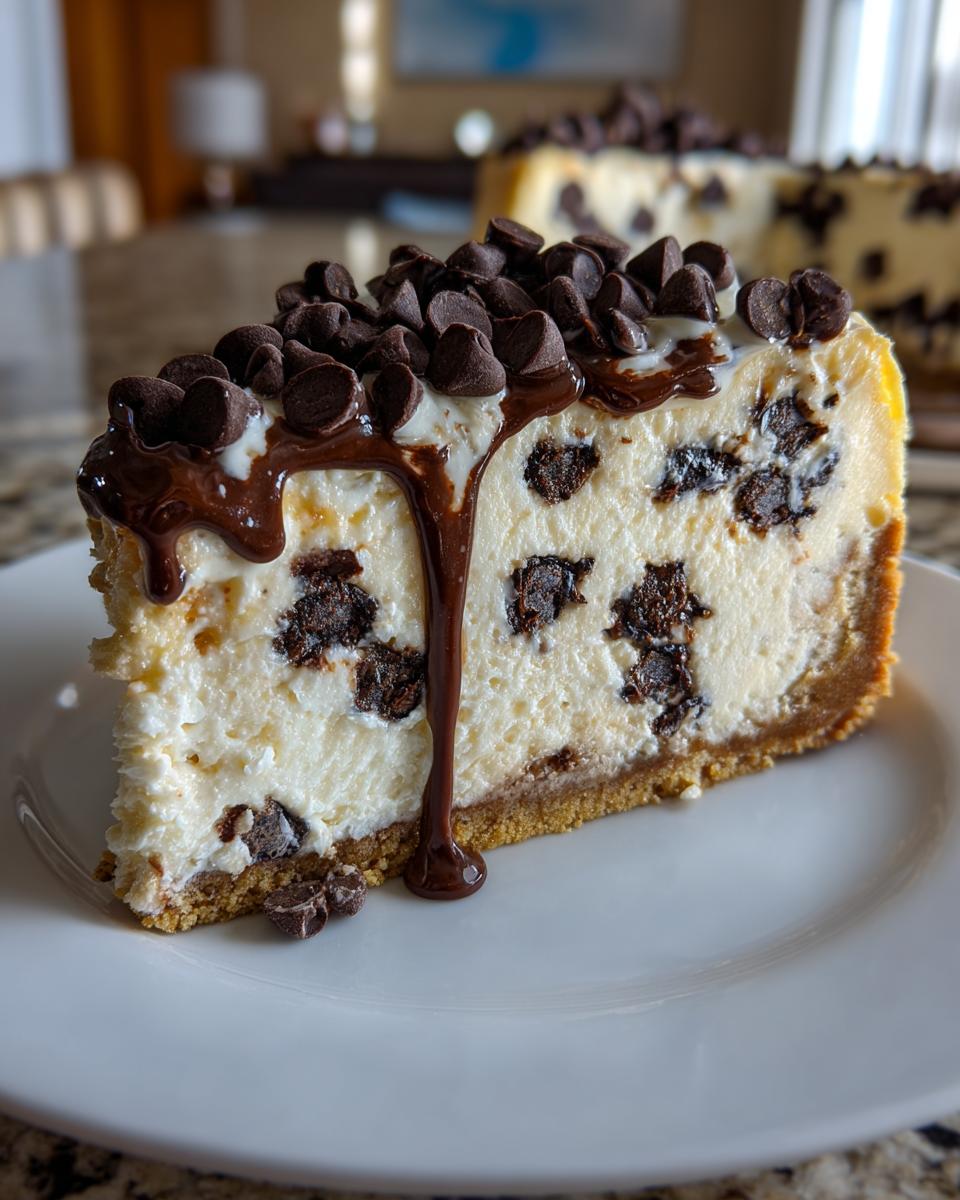
- 1 cup semi-sweet chocolate chips
Ingredient Notes and Substitutions for Chocolate Chip Cheesecake
Seriously, don’t cheat on the temperature here! Your cream cheese absolutely has to be soft—not sitting out for five minutes soft, but bendy soft. The same goes for those gorgeous eggs; make sure they are at room temperature. This is the number one trick to getting that silky, beautiful texture in your filling, avoiding those annoying lumps.
For the base, the crucial part of this graham cracker crust cheesecake is making sure that butter is fully melted right before you mix it with the crumbs. And the chips? Stick to semi-sweet unless you’re a dark chocolate fiend! They give you that best balance against the slightly tangy filling.
Simple Cheesecake Baking: Preparing the Graham Cracker Crust
Before we get to that dreamy, creamy filling, we have to secure the foundation! This part is so easy—it’s part of what makes this entire **chocolate chip cheesecake** an easy dessert recipe to impress. It takes about five minutes of actual work, and then it gets a little head start in the oven.
First things first: preheat that oven to 325°F, and make sure your 9-inch springform pan is wrapped tightly in heavy-duty foil. Trust me on the foil; we are going to use a water bath later, and nobody wants soggy graham crackers seeping into their precious cake. Wrap it nice and snug!
In a bowl, you’re just going to mix your graham cracker crumbs, that tiny bit of sugar for the crust, and the melted butter. Once it looks like wet sand—you know the texture, right?—plop it into the bottom of your springform pan. Now, here’s my little secret for an even press: grab the flat bottom of a drinking glass or a measuring cup and really press that mixture down! Get it firm and even along the bottom. It needs to bake for just 10 minutes to set up properly before we fill it. See? Super simple simple cheesecake baking!
If you want to see what I use in my kitchen daily, you can check out my favorite baking tools list. Having the right stuff makes even the simple steps a joy!
How to Make the Creamy Cheesecake Recipe Filling
This is where the magic happens for our creamy cheesecake recipe! Remember how we stressed the temperature? Now it pays off because we need that smooth base before we even think about chocolate chips. Grab your large bowl and your electric mixer. Start by beating that softened cream cheese until it’s totally smooth and lump-free. Don’t rush this part; we are building the foundation for a melt in your mouth cheesecake experience!
Once the cream cheese is perfect, mix in the larger amount of sugar, the vanilla, and the salt. We want this light and fluffy—scrape down those sides halfway through so everything incorporates evenly. Now comes the absolutely crucial step for consistency in your chocolate chip dessert inspiration. Add those four eggs in one at a time. Seriously, just one at a time! Beat *just* until the yolk disappears before adding the next one. And here is my famous mantra for preventing cracks: once the eggs are in, stop using the electric mixer! For more guidance on how to nail this specific part of the process, check out my thoughts on mixing techniques.
Switch over to a spatula and gently fold in those beautiful cup of chocolate chips. You are looking for even distribution, not aeration. Overmixing those eggs is what causes air pockets that expand and then collapse, giving you cracks. We are aiming for a truly rich and creamy dessert, so gentle hands win the race here. Pour this gorgeous batter over that cooled crust, and get ready for the final, essential step toward perfection!
Achieving a Crack-Free Chocolate Chip Cheesecake with a Water Bath
Okay, hear me out: yes, the water bath (or bain-marie) sounds fancy, but it’s just insurance! Remember how your pan is wrapped tightly in foil? That’s to keep water out while we create a gentle, steamy environment in the oven. Place that foil-wrapped springform pan inside a larger roasting pan—the one you use for Thanksgiving turkey works great.
Once the cheesecake is nestled inside, carefully pour hot or boiling water into the roasting pan. You want the water to come halfway up the sides of your cheesecake pan. This creates moist, even heat, which is the secret to that silky texture people rave about in the **best chocolate chip cheesecake** recipes. Pop the whole setup into your 325°F oven. It’ll bake for somewhere between 55 to 70 minutes. You’re looking for edges that are set, but the very center should still have a fun little wiggle when you gently nudge the pan. It’s how we make sure we get that perfect cake!
Cooling and Chilling: Secrets to the Best Chocolate Chip Cheesecake
We are almost there, hold onto your chocolate chip dreams! You might be tempted to yank this beautiful **chocolate chip cheesecake** right out of the oven the second it looks done, but please, *please* don’t! That quick temperature change is how we get those horrible cracks we worked so hard to avoid. Patience really is the final ingredient for the **best dessert recipes**.
Once the baking time is up and you have that gentle center jiggle, turn the oven off completely. Don’t touch the temperature dial, just switch it off. Prop the oven door open a tiny bit—I usually wedge it with a wooden spoon—and let the cheesecake sit inside the cooling oven for a full hour. This gradual cool-down period is what allows the filling to settle perfectly, guaranteeing that smooth, melt in your mouth cheesecake texture you crave.
After that hour, carefully take it out of the water bath and move it to a wire rack to finish cooling to room temperature. But wait, it’s not ready yet! The final test for a truly amazing, firm **creamy cheesecake recipe** is chilling. It needs at least six hours in the fridge, but honestly, overnight is so much better. It sets up solid and lets all those chocolate chip flavors really deepen up. If you need inspiration for what to do while you wait, you can see a popular chocolate chip cheesecake recipe online!
Tips for Success with Your Homemade Chocolate Chip Cheesecake
I want your homemade chocolate chip cheesecake to be an absolute showstopper, just like mine! So, let’s wrap up with a few quick reminders that I learned the hard way over the years. These little things are what take you from a decent cheesecake to that award-winning, creamy cheesecake recipe every time.
First off, I can’t stress this enough: room temperature for the cream cheese and eggs is non-negotiable! Cold ingredients fight each other in the mixer, and that fight creates lumps. Nobody wants a lumpy cheesecake, right? If you’re in a rush, you can zap the cream cheese in the microwave for 15-second bursts, but watch it like a hawk!
My second big tip is about mixing speed once those eggs join the party. We are incorporating, not whipping! Overbeating after the eggs are in incorporates too much air, leading straight to tears (cracks) later on. Use the baking tips I mentioned earlier to keep your spatula strokes slow and steady when folding in those wonderful chocolate chips. That’s the secret sauce for the ultimate indulgent texture!
Storage and Reheating Instructions for Chocolate Chip Cheesecake
This chocolate chip cheesecake is honestly even better the next day once it’s fully chilled and settled! You need to cover it loosely with plastic wrap—but make sure it’s not touching the top, or you might mess up that beautiful surface. Store any leftovers in the fridge; it keeps wonderfully for about five days, which is great because it means you have a ready-made rich and creamy dessert for later!
About reheating? Don’t even think about it! This isn’t a brownie; this is a dairy dream. Serve it straight from the fridge for that firmer, denser bite, or let it sit on the counter for about 20 minutes before slicing if you prefer a softer, slightly more melt-in-your-mouth texture. That’s all the warming up you need for this beauty!
Frequently Asked Questions About Chocolate Chip Cheesecake
I know you might have a few last-minute panics while you’re waiting for your beautiful chocolate chip cheesecake to chill! It’s totally normal; baking involves a lot of faith. Here are some of the questions I get asked most often when people try my recipe for the first time.
Can I adapt this recipe for a No Bake Chocolate Chip Cheesecake?
Oh, that’s a common request! While I adore this baked version for its unbelievable creaminess, you absolutely can make a no bake chocolate chip cheesecake. However, the technique is completely different; you’d need to use whipped stabilizers like gelatin or extra whipped cream to set the filling instead of the oven. My recipe relies on proper baking to achieve that specific texture. If you’re set on no-bake, I recommend finding a specific recipe built for that method!
What kind of chocolate chips work best in this cheesecake recipe with chocolate chips?
For this particular baked cheesecake recipe with chocolate chips, I stick with standard semi-sweet. They melt enough to be gooey but hold their shape just enough so you get those lovely bites of chocolate texture amongst the cream cheese. Mini chips are wonderful because they distribute more evenly, but if you only have regular-sized ones, just chop them roughly first. Don’t use dark chocolate unless you are prepared for a much less sweet experience!
Why is my cheesecake still soft in the middle after baking?
It’s supposed to be a little soft! That slight wobble you see when you take it out of the oven is the key to that incredible, melt in your mouth cheesecake finish. That soft center is what will firm up perfectly as it cools slowly in the oven and then chills totally overnight. If it’s totally firm when it comes out of the oven, it means it has likely cooked too long and will be dense, not creamy.
Where can I find other tried-and-true cheesecake inspiration?
If you’re really diving deep into the world of cheesecake, I always love seeing what others are doing successfully! You can check out older, established recipes for comparison, like one you might find over at Allrecipes. For my general philosophy on getting baking right every time, check out my deep-dive on baking FAQs!
Estimated Nutritional Data for This Decadent Cheesecake Dessert
Now, let’s talk numbers! I’m not a nutritionist, and after making something this intensely wonderful, maybe you don’t want to look too closely, but I figure it’s only fair to show you what we’re working with for this decadent cheesecake dessert. Since we use all that rich cream cheese and butter, it’s definitely a treat, not a light snack!
This information is based exactly on the ingredients list provided above. Keep in mind that if you swap out milk for heavy cream or use a different type of chocolate, these estimates will shift a little bit. Use this as a solid guideline for your chocolate chip cheesecake serving size.
| Nutrient | Amount (per slice) |
|---|---|
| Serving Size | 1 slice |
| Calories | 450 |
| Fat | 30g |
| Saturated Fat | 18g |
| Carbohydrates | 40g |
| Sugar | 35g |
| Protein | 8g |
| Cholesterol | 95mg |
Just one slice of this rich and creamy dessert has everything you need for a happy afternoon! Eat it slowly and savor every bite!
PrintCreamy Baked Chocolate Chip Cheesecake with Graham Cracker Crust
Make a rich and creamy chocolate chip cheesecake with a simple graham cracker crust. This recipe focuses on clear steps to achieve a smooth texture.
- Prep Time: 25 min
- Cook Time: 70 min
- Total Time: 1 hour 55 min
- Yield: 12 servings 1x
- Category: Dessert
- Method: Baking
- Cuisine: American
- Diet: Vegetarian
Ingredients
- 1 1/2 cups graham cracker crumbs
- 1/4 cup granulated sugar
- 6 tablespoons unsalted butter, melted
- 3 (8 ounce) packages cream cheese, softened
- 1 1/2 cups granulated sugar
- 1 teaspoon vanilla extract
- 1/4 teaspoon salt
- 4 large eggs, room temperature
- 1 cup semi-sweet chocolate chips
Instructions
- Preheat your oven to 325 degrees Fahrenheit. Wrap the outside of a 9-inch springform pan tightly with heavy-duty aluminum foil.
- Prepare the crust: Mix graham cracker crumbs, 1/4 cup sugar, and melted butter in a bowl. Press the mixture firmly into the bottom of the prepared springform pan. Bake for 10 minutes. Let cool slightly.
- Prepare the filling: In a large bowl, beat the softened cream cheese, 1 1/2 cups sugar, vanilla extract, and salt with an electric mixer until smooth. Scrape down the sides of the bowl.
- Add the eggs one at a time, beating just until combined after each addition. Do not overmix the batter once the eggs are added.
- Gently stir in the chocolate chips by hand using a spatula.
- Pour the filling over the cooled crust in the springform pan.
- Bake using a water bath: Place the foil-wrapped springform pan inside a larger roasting pan. Carefully pour hot water into the roasting pan until it reaches halfway up the sides of the springform pan.
- Bake for 55 to 70 minutes, or until the edges are set but the center still has a slight jiggle.
- Turn off the oven, crack the oven door open slightly, and let the cheesecake cool inside the oven for 1 hour. This slow cooling helps prevent cracks.
- Remove the cheesecake from the water bath and foil. Let it cool completely on a wire rack.
- Chill the cheesecake in the refrigerator for at least 6 hours, or preferably overnight, before serving. Remove the springform ring before slicing.
Notes
- Use room temperature ingredients for the cream cheese and eggs; this prevents lumps in your batter.
- To avoid cracks, do not overbeat the batter after adding the eggs.
- The water bath insulates the cheesecake, providing moist, even heat for a creamy texture.
Nutrition
- Serving Size: 1 slice
- Calories: 450
- Sugar: 35g
- Sodium: 250mg
- Fat: 30g
- Saturated Fat: 18g
- Unsaturated Fat: 12g
- Trans Fat: 0.5g
- Carbohydrates: 40g
- Fiber: 1g
- Protein: 8g
- Cholesterol: 95mg