
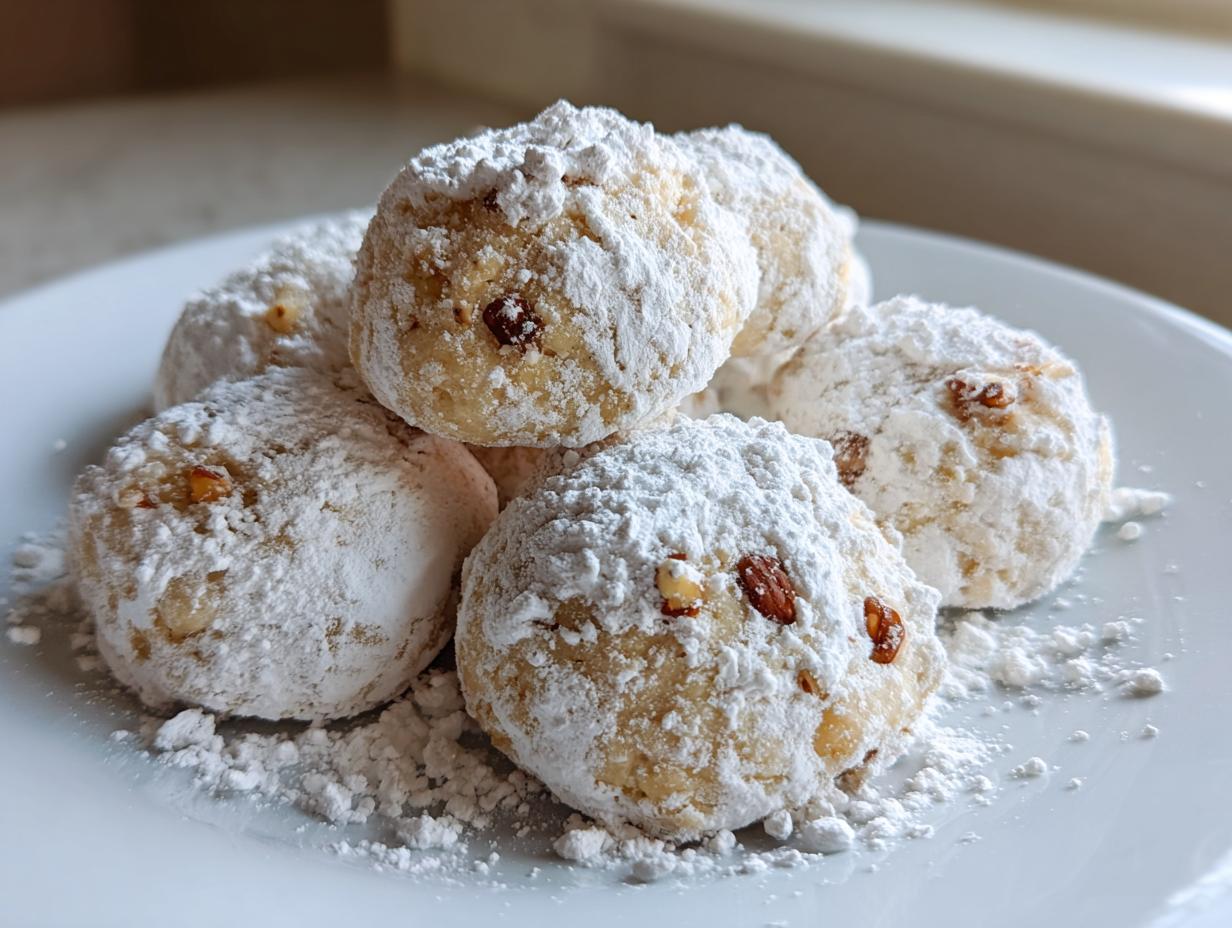
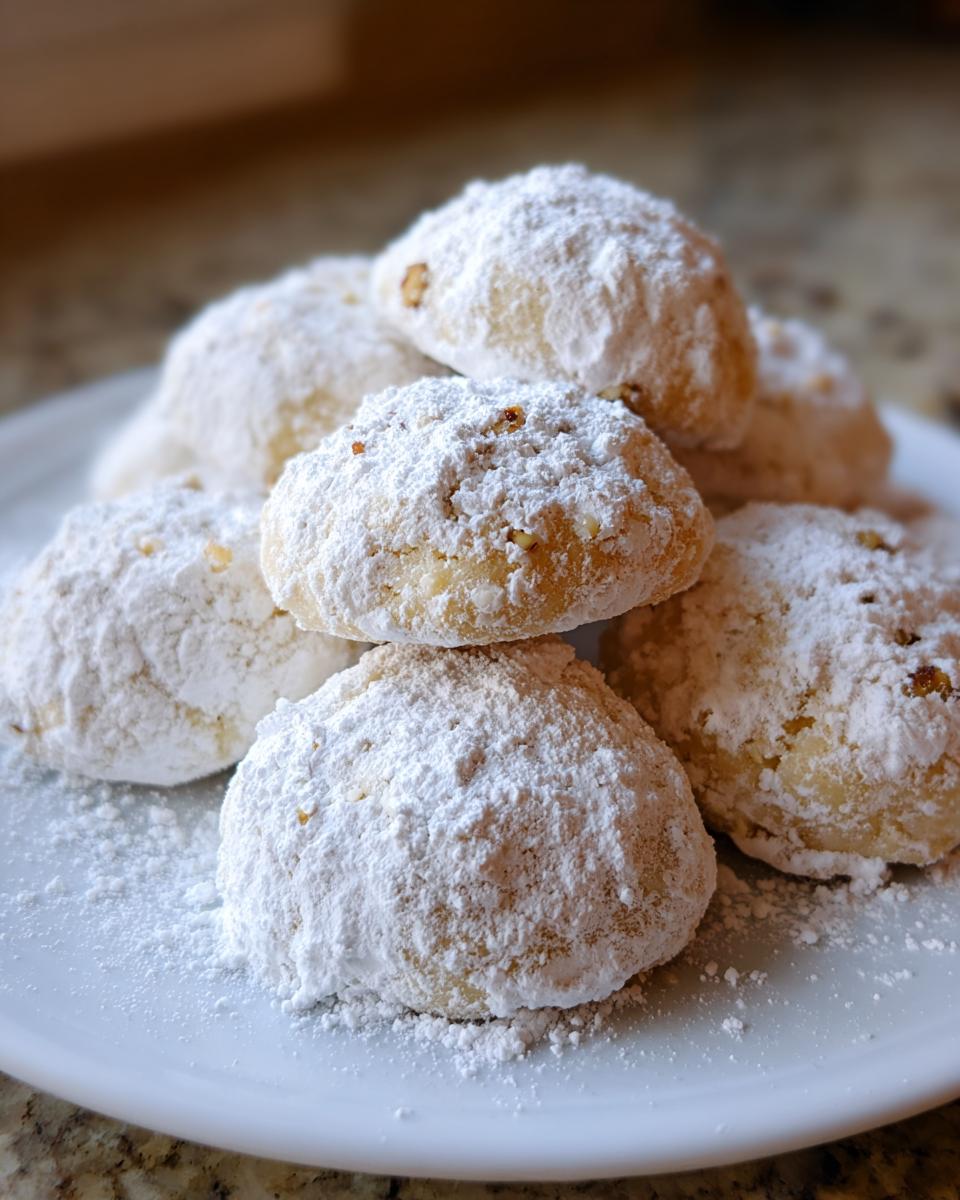
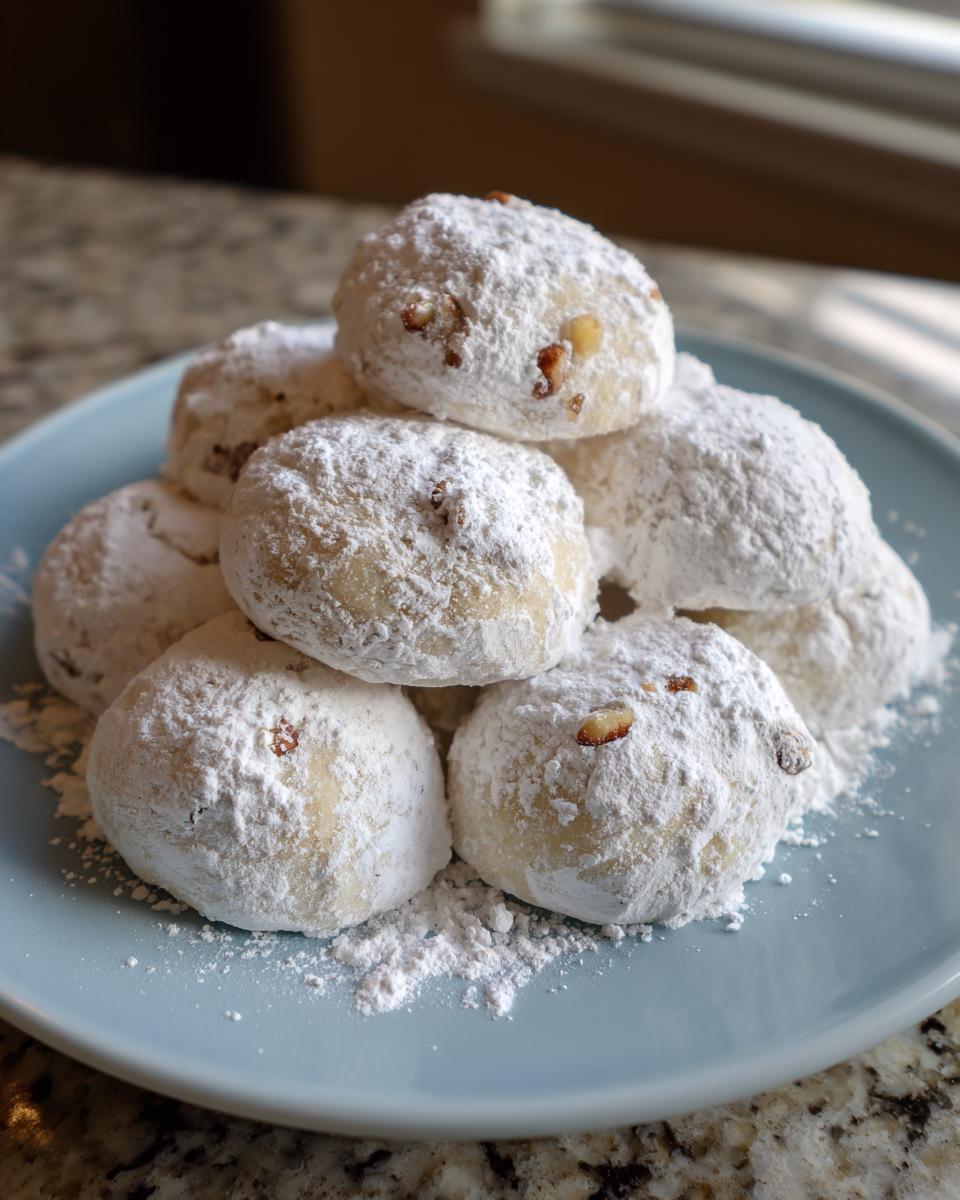
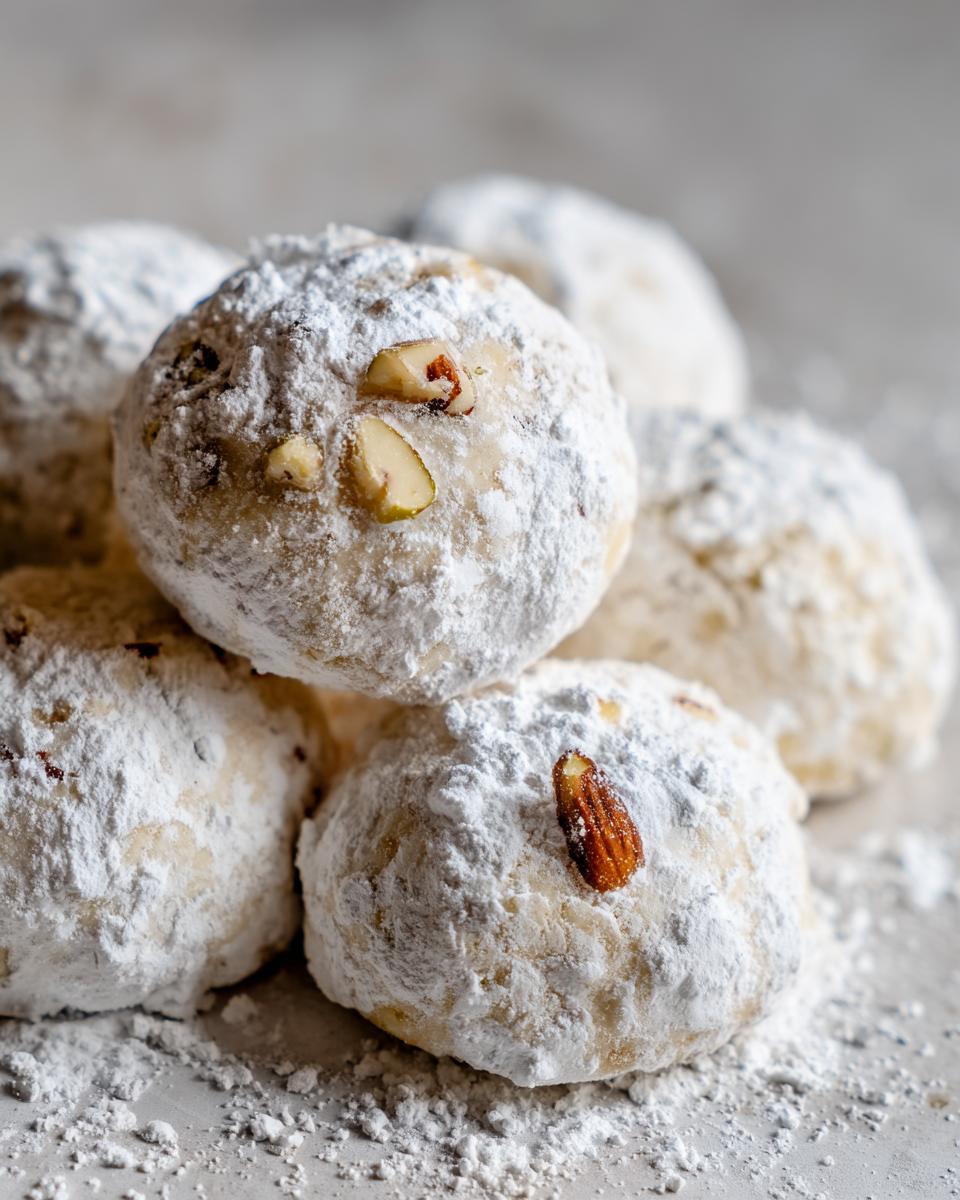
There is just nothing quite like those magical, powdery little cookies you find during the holidays. You know, the ones that practically dissolve the second they hit your tongue? If you’re hunting for the absolute best version of those, you’ve come to the right place! We’re talking about classic russian tea cakes here, made perfectly from scratch. Forget fiddly, complicated recipes—these are wonderfully easy, melt-in-your-mouth, buttery shortbread cookies that genuinely melt in your mouth. When I developed this recipe, I made sure it followed Maddie’s core belief: translating that old-school goodness into something reliable for your modern kitchen. They are a staple in our delicious dessert recipes collection! Trust me, these are the ones everyone asks you to bring to the cookie exchange!
- Why These Russian Tea Cakes Recipe Are a Holiday Baking Classic
- Gathering Ingredients for Your Melt in your mouth cookies
- Step-by-Step Guide to Making Classic Butter Cookies
- Making Powdered Sugar Cookies Ahead of Time: Storage and Make-Ahead
- Troubleshooting Common Issues with Homemade Tea Cakes
- Serving Suggestions for Your Russian Tea Cakes
- Frequently Asked Questions About Russian Tea Cakes
- Estimated Nutritional Data for Russian Tea Cakes
- Share Your Holiday Baking Classics Experience
Why These Russian Tea Cakes Recipe Are a Holiday Baking Classic
What sets our Russian Tea Cakes Recipe apart is that genuine, soft crumb. I know a lot of shortbread recipes exist out there, but these—these are the definition of melt in your mouth cookies. The secret isn’t even complicated: it’s the way we cream the butter here, just until it hits that perfect fluffy stage before adding the flour. That careful step ensures we get ultra-buttery shortbread cookies without any toughness.
They truly are some of the easy Christmas cookies you can make. They look elegant covered in snow, but they come together faster than almost anything else on my tray. Plus, I always pair them with similar tender treats, like these other melt-in-your-mouth cookies for a perfect comparison!
Understanding the Many Names: Snowball Cookies and More
If you call these anything else, don’t worry—you aren’t wrong! This cookie is famous, honestly. Around the holidays, you’ll see them popping up everywhere sometimes labeled as Snowball Cookies because of that thick white dusting. Some people swear by calling them Mexican Wedding Cookies, and if you add pecans, you might see them called Pecan Dreams Cookies. Honestly, whatever name you use, they are fantastic.
Gathering Ingredients for Your Melt in your mouth cookies
Okay, ingredient list time! Since these are so simple, the quality really matters, and this is where we build that famous light texture. Remember, we need that glorious butter to be properly softened—not melted, just soft to the touch. And listen closely: we use powdered sugar in two places, being careful not to mix them up!
- 1 cup unsalted butter, softened
- 1/2 cup powdered sugar (for the dough), plus lots more for rolling
- 1 teaspoon vanilla extract
- 2 cups all-purpose flour
- 1/2 cup finely chopped pecans or walnuts
- 1/4 teaspoon salt
Ingredient Notes and Substitution Tips for Russian Tea Cakes
When it comes to the butter, use the real stuff, please! That high-fat content is what makes these Classic butter cookies so tender. If you prefer a different flavor, feel free to swap out the pecans for walnuts or even almonds; just make sure they are finely chopped so they incorporate nicely into the dough.
And don’t cheat on the powdered sugar! We use a small amount in the actual dough for sweetness, but you need that big, fluffy pile set aside for coating later. If your kitchen is super warm, chilling the dough after mixing will actually help keep those little balls perfectly round. You can check out some other easy nutty dessert recipes for inspiration, but these tea cakes need that precise balance!
Step-by-Step Guide to Making Classic Butter Cookies
This is where the magic happens! It feels like a tiny construction project, but honestly, it moves fast. First things first: get that oven warmed up! Preheat everything to 350°F (175°C) nice and early and line those baking sheets with parchment paper. I always have my parchment ready to go! I’ve got a trick for making sure these little wonders never stick, which you can read about in my guide to melt-in-your-mouth cookies!
Now, grab your mixer and get that softened butter creamed together with the half cup of powdered sugar until it looks truly light and fluffy—this takes a minute or two, but it’s essential for that airy texture. Beat in your vanilla next. Then, slowly add the flour and salt mixture until it just comes together. Don’t mix it forever once the flour goes in! Gently stir in those chopped nuts by hand.
Roll those doughs into little one-inch balls and place them on the sheet, spaced out nicely. Here’s the key when baking these Classic butter cookies: you want them to bake for only 10 to 12 minutes. You are looking for the edges to be *barely* set and super pale. If they start looking golden brown, you’ve gone too far, and they won’t melt in your mouth!
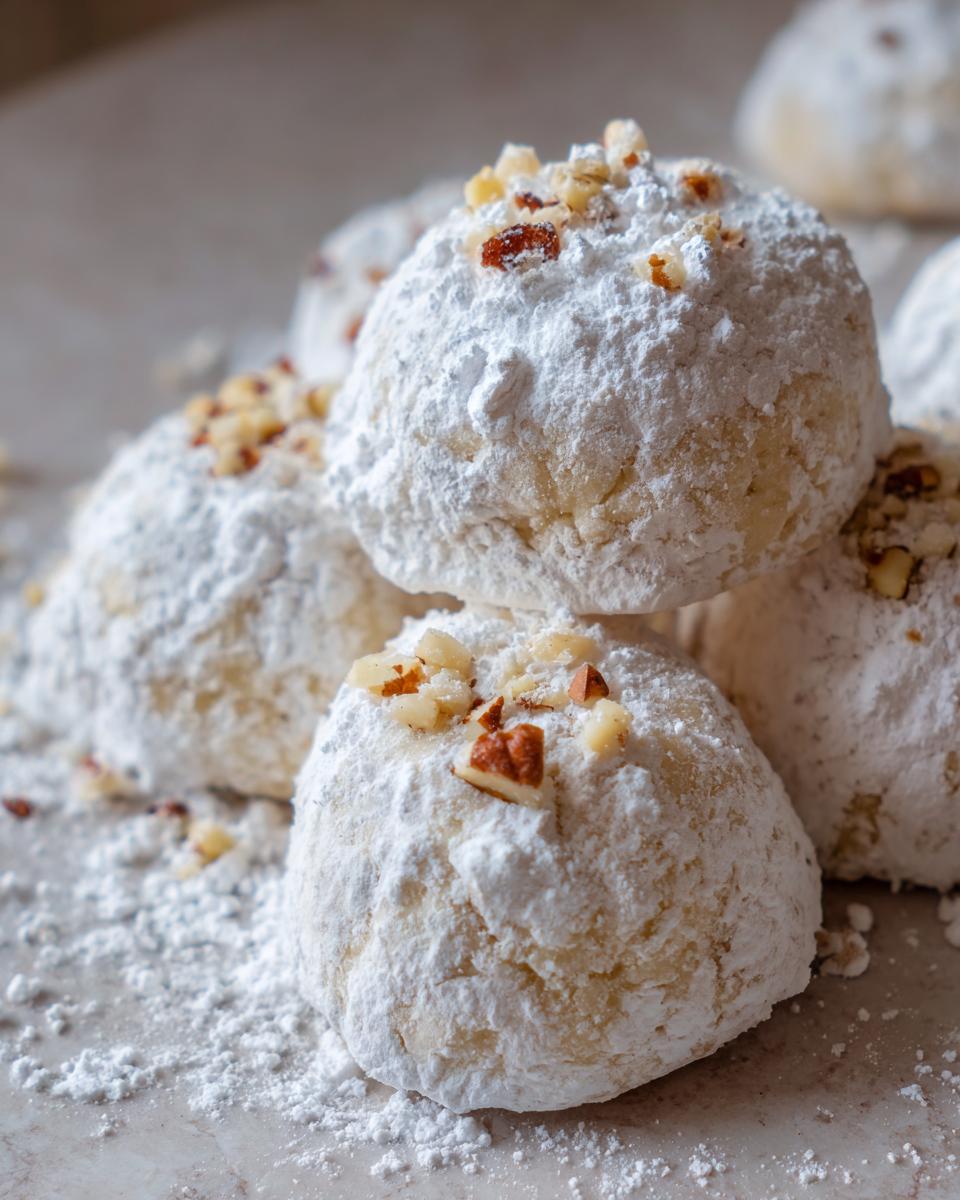
Pull them out, let them hang out on the hot pan for five minutes—they are fragile! Then, roll them while they are still warm in the extra powdered sugar. Once they cool down completely, you’re going to do that roll one more time for that thick, snowy blanket finish.
Expert Tips for Perfect Russian Tea Cakes Texture
If your kitchen is hot, please, chill that dough for 30 minutes before you roll it. It stops the butter from relaxing too much, which means the balls keep their shape and don’t spread out into flat discs! Remember:
- The edges should look ‘barely set’—meaning they look dry on the very edge, but the center is still soft when gently touched.
- Do not overmix once the flour is in, that’s how you make them tough instead of tender.
- The double dust of powdered sugar is non-negotiable for that authentic coating!
Making Powdered Sugar Cookies Ahead of Time: Storage and Make-Ahead
Because these Powdered Sugar Cookies are such incredible Holiday baking classics, people always ask me if they can get them made before the big rush. Well, yes, you absolutely can! The best news? They are actually better the next day. The buttery flavor deepens overnight, and that powdery coating truly sets in.
My main rule for storing authentic Russian Tea Cakes is to keep them in a sealed, airtight container. You can easily keep them on the counter at room temperature for about a week, and they stay so fresh! If you really need to make them ages ahead—like weeks before Christmas—I recommend storing the *un-sugared* balls of dough in the freezer. Then, just thaw them slightly before rolling and baking as normal. Happy prepping!
You can check out my tips for other Christmas shortbread cookies for general holiday storage advice, but these tea cakes are wonderfully resilient!
Troubleshooting Common Issues with Homemade Tea Cakes
Sometimes no matter how careful we are, things go a little sideways in the kitchen! If your adorable homemade tea cakes are spreading out everywhere and looking more like flat pancakes than pretty snowballs, it’s almost always because the butter was too soft or the dough got warm during rolling. That’s where chilling comes in handy, like I mentioned earlier.
If you find the powdered sugar just melts right off instead of sticking, that usually means you tried to coat them when they were too hot. You have to let them cool down enough that the warmth helps the first coat stick, but not so hot that the butter melts right through. Trust me, that second roll, once they are totally cool, is the move that locks in that perfect powdery texture!
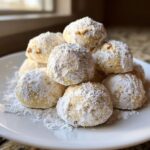
Serving Suggestions for Your Russian Tea Cakes
These Russian Tea Cakes really shine when served simply, embodying that perfect, delicate tea cookies recipe vibe. I always serve them on an elegant platter alongside a pot of strong, hot coffee or maybe some Earl Grey tea when I have friends over in the afternoon. Because they are so rich and buttery, they don’t need much else!
They look fabulous next to something tart, like cranberry shortbread, if you’re building a huge holiday dessert tray. Also, if you’re looking for the perfect morning treat to go alongside, try a few of my coffee cake muffins—the sweet richness of the tea cakes cuts through the coffee perfectly!
Frequently Asked Questions About Russian Tea Cakes
I know you probably have a few things swirling around in your head once you see a recipe this classic, so let’s clear up any last-minute baking mysteries before you dive in! Honestly, the questions I get most often usually revolve around keeping these the perfect melt in your mouth cookies.
Can I freeze the Russian Tea Cakes dough?
Oh yes, you absolutely can! This is one of the best features of these simple cookie exchange treats. Once you roll the dough into those little balls, just place them on a baking sheet and pop them directly into the freezer until they are solid. Once they are frozen hard, move them to a freezer-safe bag. When you want to bake them, you just pull out the amount you need and pop them into the preheated oven—you might need to add an extra minute or two onto the baking time, that’s all!
What makes these Nutty dessert recipes melt in your mouth?
It all comes down to two things that scream rich flavor: butter and time in the oven! We use a high ratio of butter to flour here, which creates that famously tender, crumbly texture. But the second most important thing is that we bake them low and slow, just until the edges are barely set. We want these nutty dessert recipes to come out pale; any browning means you’ve dried them out too much, and they won’t have that signature soft texture you love.
Also, don’t forget the nuts! Using finely chopped, fatty nuts like pecans adds richness that helps them crumble beautifully when you bite in. If you have any other questions, feel free to look through my general advice on preparing simple cookie exchange treats!
Estimated Nutritional Data for Russian Tea Cakes
I always like to post a general idea of what’s in these treats, though remember, my kitchen isn’t a lab! These numbers are based on the ingredients listed and serving size, but your specific brand of butter or type of nut can certainly change things up.
- Serving Size: 1 cookie
- Calories: 110
- Fat: 7g
- Carbohydrates: 10g
- Protein: 1g
So, they are rich treats, for sure, but totally worth every bite! Just use these figures as a rough guide. Enjoy them with your coffee!
Share Your Holiday Baking Classics Experience
Now that your kitchen probably smells incredible—a perfect blend of vanilla, butter, and toasted nuts—the best part is getting to share them! Honestly, this is why Maddie loves putting these recipes out there. Cooking isn’t just about the mixing; it’s about the connection it creates. So, please, take a moment after you’ve tried these beautiful russian tea cakes.
I would absolutely love to hear how they turned out for you! Did you stick to pecans, or did you try walnuts? Did they get that nice thick, powdery coating you were hoping for? Drop a comment below, tell me what beverage you paired them with, or even better, leave a star rating so I know this recipe is working its magic for you!
If you have questions later on, or just want to send a note about your baking adventures, you can always reach out via my contact page. Happy baking, and thanks for bringing these holiday baking classics into your home!
PrintClassic Melt-in-Your-Mouth Russian Tea Cakes Recipe
Make these easy, buttery Russian Tea Cakes, also known as Snowball Cookies or Mexican Wedding Cookies. They feature chopped nuts and a generous coating of powdered sugar for a classic holiday treat.
- Prep Time: 20 min
- Cook Time: 12 min
- Total Time: 32 min
- Yield: About 3 dozen cookies 1x
- Category: Dessert
- Method: Baking
- Cuisine: American/European
- Diet: Vegetarian
Ingredients
- 1 cup unsalted butter, softened
- 1/2 cup powdered sugar, plus more for rolling
- 1 teaspoon vanilla extract
- 2 cups all-purpose flour
- 1/2 cup finely chopped pecans or walnuts
- 1/4 teaspoon salt
Instructions
- Preheat your oven to 350°F (175°C). Line baking sheets with parchment paper.
- In a large bowl, cream together the softened butter and 1/2 cup of powdered sugar until light and fluffy.
- Beat in the vanilla extract.
- In a separate bowl, whisk together the flour and salt. Gradually add the flour mixture to the butter mixture, mixing on low speed until just combined.
- Stir in the finely chopped nuts.
- Roll the dough into small balls, about 1 inch in diameter. Place them on the prepared baking sheets, leaving about 1 inch between each cookie.
- Bake for 10 to 12 minutes, or until the edges are barely set and very light golden. Do not overbake; the cookies should remain pale.
- Remove from the oven and let cool on the baking sheet for 5 minutes.
- While the cookies are still warm, roll them gently in the extra powdered sugar until fully coated.
- Let the cookies cool completely on a wire rack. Once cool, roll them a second time in powdered sugar for a thick, snowy finish.
Notes
- For the best melt-in-your-mouth texture, chill the dough for 30 minutes before rolling if your kitchen is warm.
- You can substitute pecans with walnuts or almonds, depending on your preference for nutty dessert recipes.
- These cookies store well in an airtight container at room temperature for up to one week.
Nutrition
- Serving Size: 1 cookie
- Calories: 110
- Sugar: 6g
- Sodium: 25mg
- Fat: 7g
- Saturated Fat: 4g
- Unsaturated Fat: 3g
- Trans Fat: 0g
- Carbohydrates: 10g
- Fiber: 0g
- Protein: 1g
- Cholesterol: 15mg