
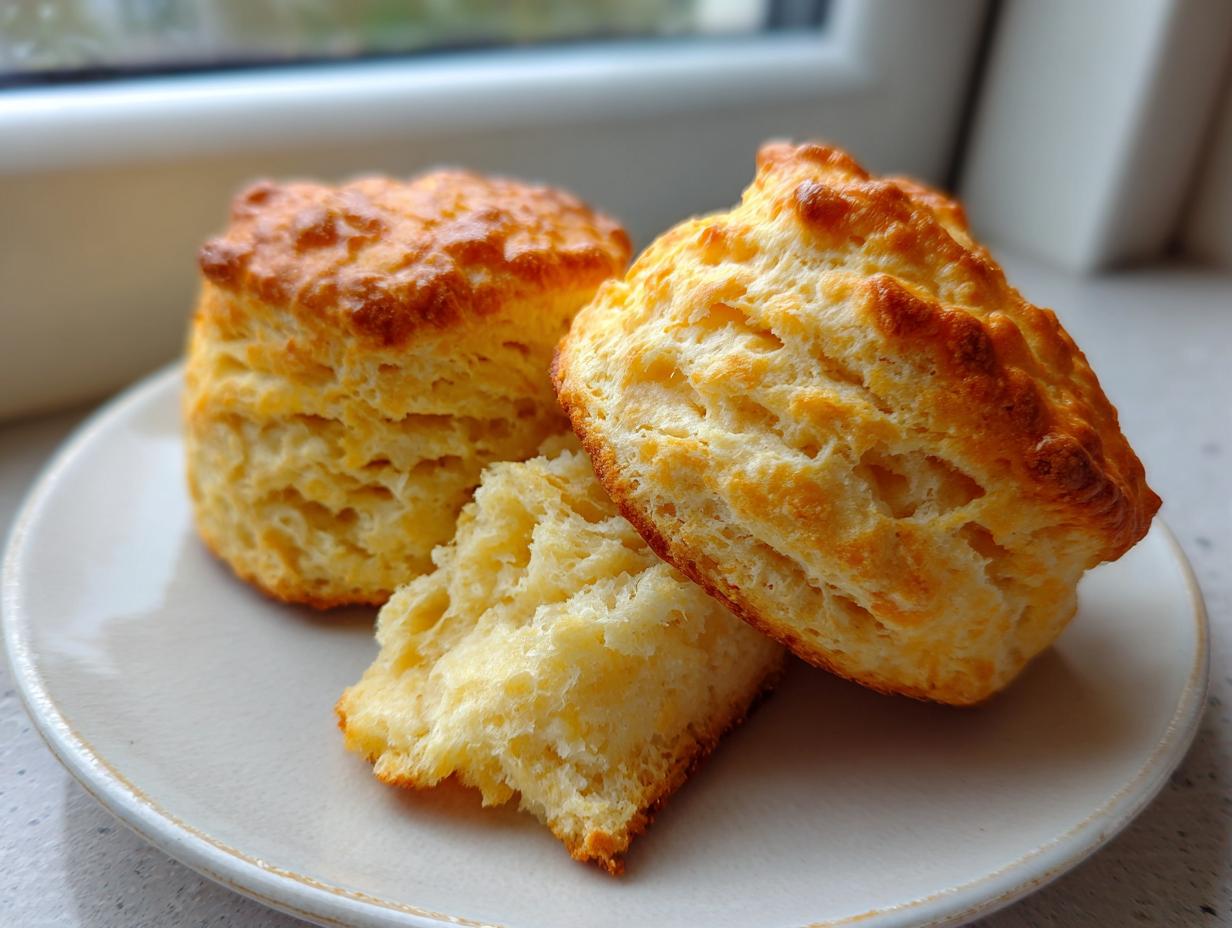
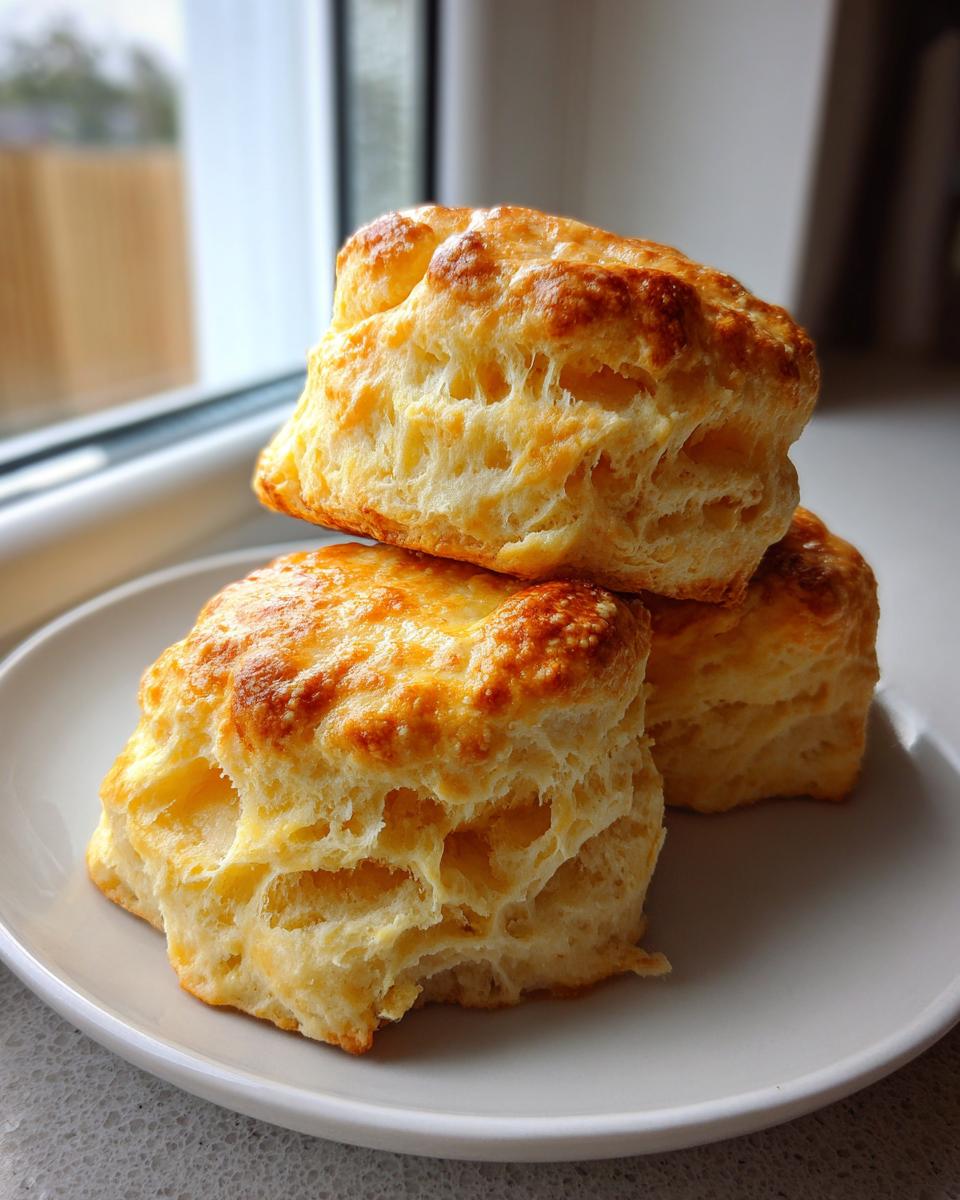
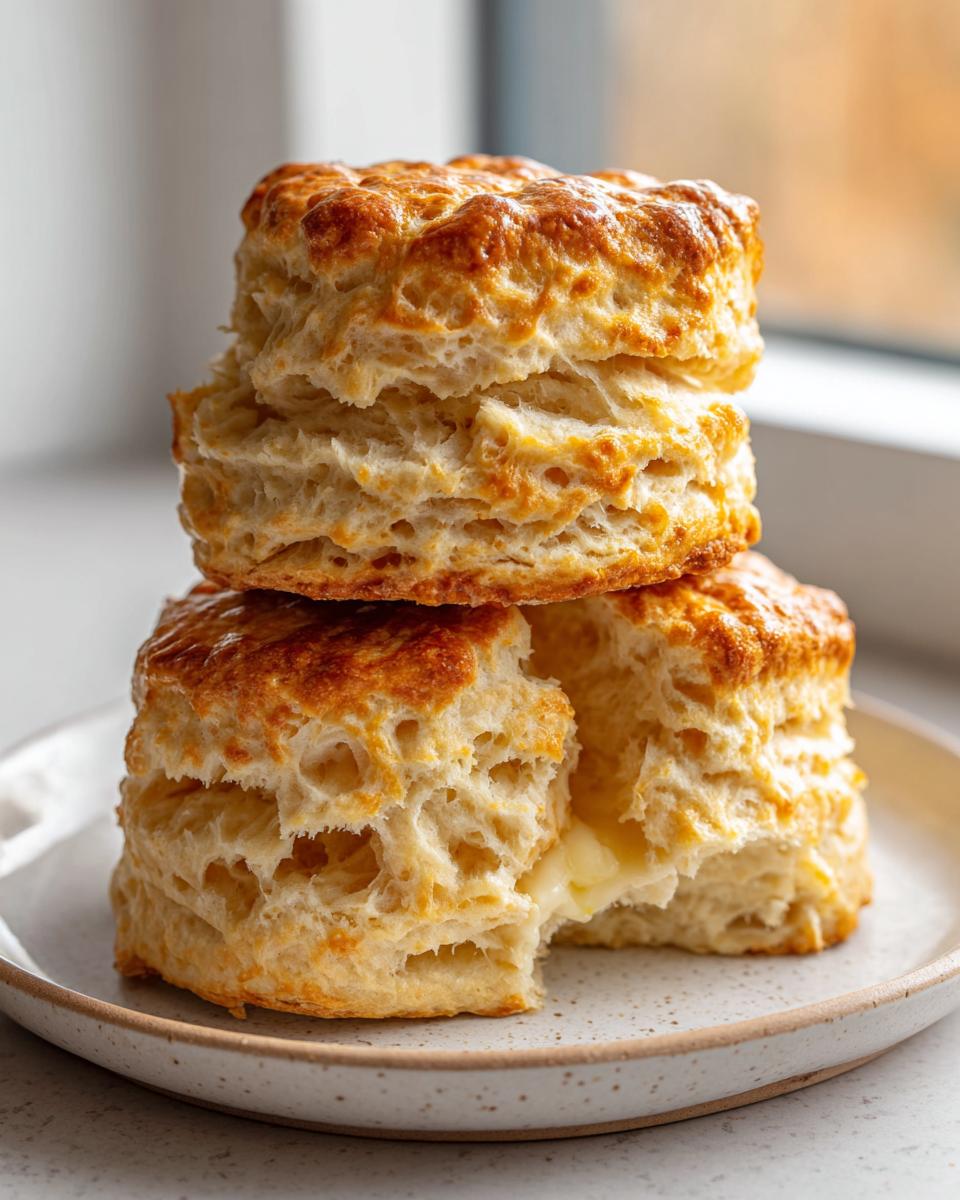
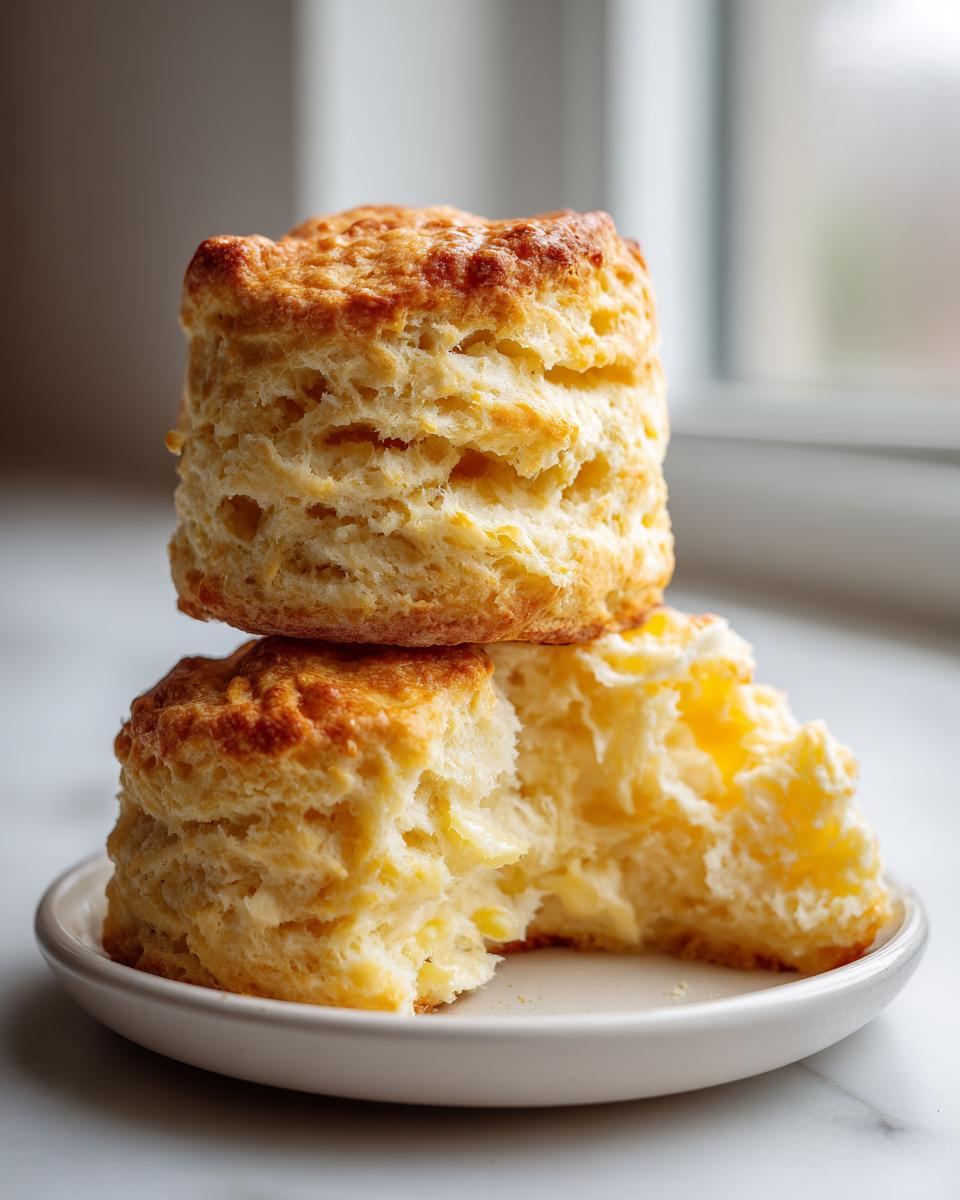
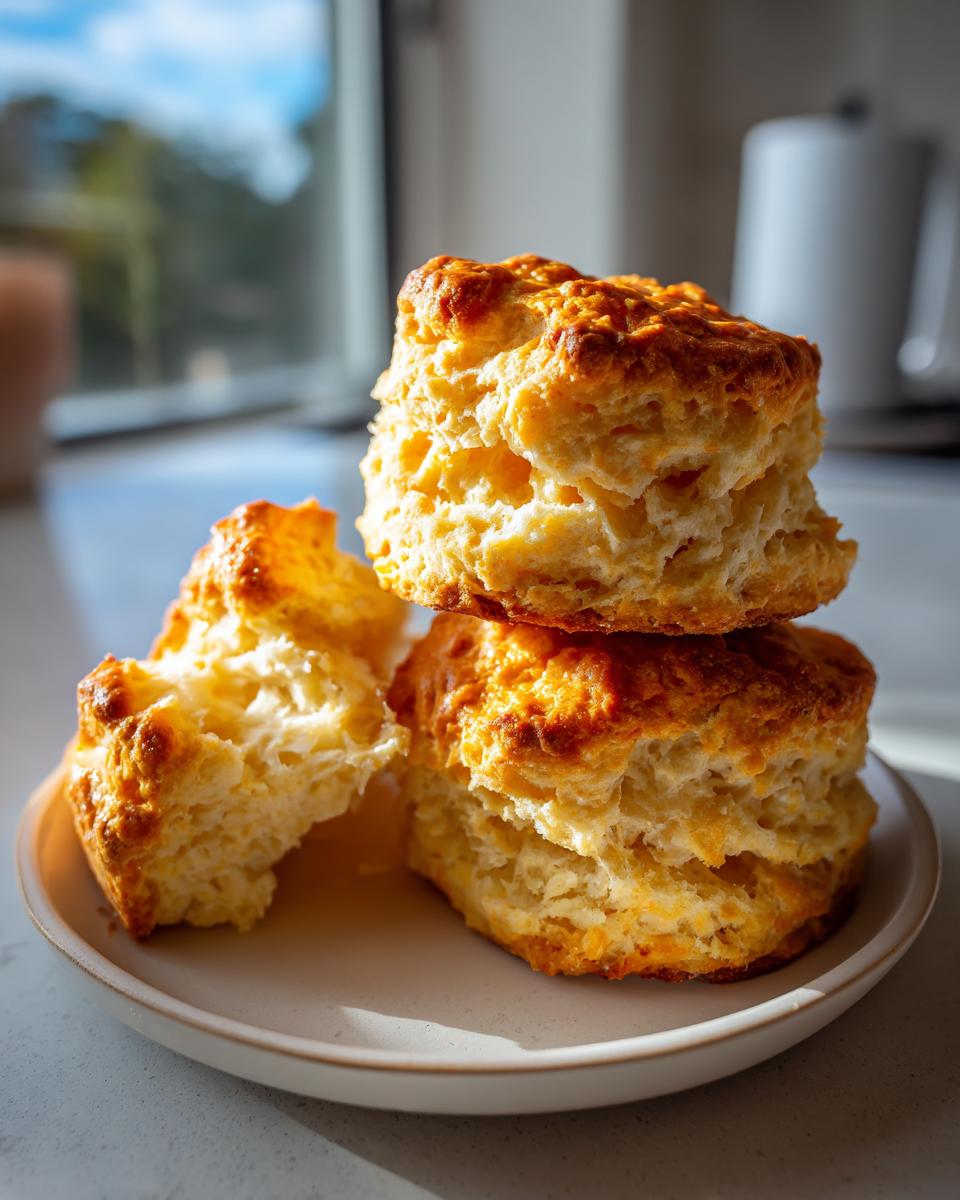
If your baking history is littered with stiff, crumbly, sad little discs instead of light, buttery breakfast clouds, listen up! I completely understand. So many recipes promise delicious bakery-quality treats, but end up delivering dry disappointments. That’s why I spent months testing and tweaking until I cracked the code on creating the absolute best, fail-proof **scones**. Seriously, these buttermilk **scones** come out tall, incredibly flaky, and moist—just like the ones you dream about at the best coffee shops. It’s all about nailing a few key techniques, and trust me, this recipe embodies everything I learned about reliable home cooking, which you can read more about over on our About Page.
We aren’t dealing with fussy pastry techniques here. We are using simple, honest ingredients and a clear method so you can enjoy truly tender scones without the stress. If you’re worried about making them too tough, put those worries aside. We are going for maximum flavor and that beautiful, layered height.
- Why This is the Best Scone Recipe for Tender Scones
- Gathering Ingredients for Your Perfect Scones
- Step-by-Step Instructions: How to Make Perfect Scones
- Flavor Variations for Your Buttermilk Scones
- Tips for Success with Easy Scone Recipe Baking
- Serving Suggestions for Your Afternoon Tea Treats
- Storage and Reheating Instructions for Scones
- Frequently Asked Questions About Making Scones
- Share Your Perfect Scones Experience
Why This is the Best Scone Recipe for Tender Scones
The secret to ditching those sad, dry scones everyone complains about boils down to science—and yes, a little bit of careful love. I tested batch after batch, trying every trick out there until I landed on this formula. This is genuinely the Best Scone Recipe because it prioritizes moisture and structure above all else. We rely on two non-negotiable things: super cold ingredients and hardly touching the dough at all.
The magic of buttermilk is key here; its acidity reacts beautifully with the baking power, giving these **scones** the lift they need to be perfectly **tall scones**. You also need those pea-sized chunks of icy butter to stay intact. When they hit the hot oven, those butter pockets create pockets of steam, which is exactly what delivers those gorgeous, light layers we want in our **flaky scones**. If you’re looking for reliably **tender scones** every single time, sticking to my testing notes makes all the difference. For more fuss-free morning ideas, pop over and check out my post on Easy Breakfast Ideas.
Key Techniques for Tall Scones
We aren’t looking for just baked dough; we want lift! That height comes directly from keeping the fat happy and cold. Make sure your butter is straight from the fridge and cut into small cubes—don’t even let it soften while you measure your flour.
The second technique you absolutely must use is the gentle fold, right before cutting. We aren’t kneading; we are just stacking the dough a couple of times. This simple action builds structure and really helps separate the layers, guaranteeing you won’t end up with flat **scones** that spread sideways across the pan.
Gathering Ingredients for Your Perfect Scones
Before we even think about mixing, we need to talk ingredients, because if these aren’t right, the whole batch of **scones** is going sideways, trust me! For the best results—the kind that taste like you hired a professional baker—we need things COLD. I mean, fridge-cold butter and ice-cold buttermilk. Do yourself a huge favor and have everything measured out before you even touch that pastry blender.
When you look at the ingredient list, you’ll see this is a straightforward recipe. You get four main players: flour, sugar, baking powder/salt, butter, and that gorgeous buttermilk. If you need printable instructions, the full list is right here in the recipe card!
Ingredient Notes and Substitutions for Scones
The buttermilk isn’t just for flavor; it’s critical for the rise. The acid in the buttermilk reacts with the baking powder, making your **scones** puff up tall and light as they bake. It’s chemistry, people! If you run out (and I’ve done it plenty of times!), don’t panic.
Here’s my quick fix for substituting buttermilk: take 1 cup of regular whole milk and stir in 1 tablespoon of white vinegar or fresh lemon juice. Let that sit on the counter for about five to ten minutes until it looks slightly curdled. That acts just like buttermilk! Don’t worry about add-ins, either. If you skip them entirely, you’re left with a perfect, classic plain scone—ideal for slathering with jam and cream.
Step-by-Step Instructions: How to Make Perfect Scones
Okay, are you ready? This is where we turn simple ingredients into actual breakfast gold. If you follow the ingredient prep we just talked about—butter COLD, buttermilk COLD—these directions are foolproof. This is truly How to Make Perfect Scones, and I’m going to walk you through it step-by-step so you get those beautiful, tall bakery versions. Seriously, that attention to detail helps you avoid the dinner scramble too; for more inspiration, check out what I recommend for quick weeknight dinners when you’re too tired to fuss over baking!
First things first: get that oven cranked up to 400°F (200°C) and get your baking sheet lined with parchment paper. We need a hot environment for that fast steam action! Next, in your big bowl, whisk together the dry stuff: flour, sugar, baking powder, and salt. Now for the butter cubes! Toss them in and use your pastry blender or your fingertips to work it in. You are looking for coarse crumbs, and I mean it—you should still see some visible, pea-sized pockets of that cold butter. That’s the secret weapon!
If you’re adding blueberries or chocolate chips, toss those in now, making sure they get lightly coated in the flour mixture so they don’t all sink to the bottom. Next comes the single lump sum of cold buttermilk poured right into the middle. Mix it with a fork until it just barely comes together. Seriously, stop mixing when it looks shaggy. If you overmix now, you’re going to activate the gluten fibers, and guess what? Flat **scones**!
Scrape the messy dough onto a lightly floured counter. Gently pat it into a thick circle or rectangle—aim for about 3/4 inch thick. Now, pay close attention, because this next part is what separates the pros from the flat **scones**, and it leads right into our next step.
Achieving Tall Scones Tutorial: The Folding Technique
This is the secret for a genuine **Tall Scones Tutorial**! Once you have your rough shape, we’re going to fold it over itself like you’re folding a business letter—into thirds. Don’t push hard; think gentle persuasion. Now, without flattening it too much, turn that folded dough 90 degrees and gently pat it down again until it’s about an inch thick.
Why do we do this? It encourages layers! We are building height into the structure of the dough before it even bakes, without overworking it. This gentle stacking action builds up those thin sheets of dough separated by butter—which, as we know, turn into those gorgeous, light layers when they steam in the oven.
Baking and Finishing Your Homemade Scones
Now that we have our structure, cut your **scones**! Grab a sharp, round cutter, dust it with flour, and press *straight down* without twisting. Twisting seals the edges and stops the **scones** from rising straight up—we want them tall! Place them close together on your baking sheet. They like being cozy!
For the finish, whisk your egg and milk together for a nice golden wash, or use straight heavy cream if you prefer a softer top, just like the coffee shops do. Brush it lightly over the tops. Pop them into that hot 400°F oven for about 14 to 18 minutes. They’re done when they are golden brown and sound slightly hollow when tapped. Don’t forget to transfer your beautiful **Homemade Scones** to a wire rack right away so the bottoms don’t steam and get soft. You’ve made it!
Flavor Variations for Your Buttermilk Scones
Now that you have mastered the basic technique for these fluffy **scones**, we need to talk about customization! Why make just one kind when you can whip up a whole batch of different flavors? This fail-proof dough is the perfect canvas, whether you’re serving **scones** for a fancy afternoon tea or just wanting a special breakfast treat that breaks up the routine. I found so many amazing ideas for seasonal twists, so you’ll have endless reasons to keep this recipe on hand.
If you’re looking for inspiration for cooler weather, peep this list of Fall Scone Recipes, but for now, let’s stick to what we can stir right into this buttermilk batter!
Sweet Scones Ideas: Blueberry Scones Recipe and More
When I want sunshine in a pastry, I immediately jump to fruit. The **Blueberry Scones Recipe** included in the main recipe is my go-to! The berries burst open and keep everything extra moist. If you feel like going zesty instead, swap the blueberries for fresh lemon zest—and if you add a little lemon juice to your glaze, you get amazing **Lemon Scones** that taste bright and fresh. Honestly, you can rarely go wrong adding things in!
Don’t forget about warm spices! If you stir in about a teaspoon of cinnamon, you’ve got the base for delicious **Cinnamon Scones**. And if chocolate is more your speed, toss in some white or dark chocolate chips. I even have a recipe for using cranberries that works beautifully if you swap them in here!
Savory Scones Ideas for Brunch Recipes
Who says **scones** have to be sweet? They are incredible as part of your larger **Brunch Recipes** lineup. When I make savory versions, I skip the sugar in the dry ingredients (cut it down to just a tablespoon, or skip it entirely). Then, I fold in things like sharp cheddar cheese and finely chopped chives. That combination is unbeatable!
Another great savory idea is bacon and sharp cheddar—it’s salty, buttery, and totally satisfying. For something a little different, try folding in some roasted garlic and rosemary! Save those holiday leftovers, too; you can even adapt this base for my stuffing ball flavors if you dry out some leftover bread crumbs a bit!
Tips for Success with Easy Scone Recipe Baking
I know I keep hammering this point, but honestly, mastering these few bits of input means the difference between an incredible, fluffy scone and a dense hockey puck. If you follow this **Easy Scone Recipe**, you’re already halfway there! The biggest **Scone Baking Tips** I have revolve around temperature and how gently you treat the dough.
First, remember that super cold rule: your butter and buttermilk must be icy. That icy fat is what creates the internal steam that pushes your **scones** upwards, making them light and layered. Second, and this applies to every stage once the liquid hits the flour: stop mixing! Seriously, stop when you see dry spots. Overworking the dough is the express lane to tough pastry, and we are striving for tender heaven here. Think of it as a quick massage, not a vigorous workout!
Also, when cutting them out, press straight down and lift straight up. No twisting! Twisting seals the sides shut, preventing that wonderful, tall rise. These little bits of focus are what turn this into a truly great recipe. Speaking of great recipes, if you ever need a reliable sweet bread recipe, my Pumpkin Banana Bread is a fall favorite!
Serving Suggestions for Your Afternoon Tea Treats
Now that you have these beautiful, golden **scones** fresh out of the oven—and I mean *fresh*—the real fun begins: deciding how to serve them! These aren’t just a quick breakfast item; they are meant to be displayed proudly as the star of your next lovely occasion. They shine brightest when paired with the right accompaniments for a proper **Afternoon Tea Treats** spread.
The classic way, and I’m a total sucker for tradition here, is serving them slightly warm with clotted cream and a really good quality strawberry jam. You just slice the scone open, generous dollop of cream, followed by the jam. It’s simple perfection, honestly. Don’t feel constrained, though; these buttermilk **scones** are so rich on their own, they don’t need much, but the toppings just elevate the whole experience.
If you happened to use one of the sweet variations, like a mild Lemon Scone, you might want to skip extra jam and just rely on the light lemon glaze we talked about earlier, maybe adding a thin slice of candied lemon peel on top for presentation. For a slightly richer finish, if you didn’t glaze them earlier, you can whip up a quick vanilla drizzle. It’s just powdered sugar cut with a splash of milk until it drizzles beautifully off the back of a spoon. Speaking of rich things, if you ever need an amazing dessert for after tea, you have to try my recipe for Pecan Cream Pie—it’s decadent!
Remember, whether you’re serving them alongside tiny sandwiches or just taking them out with a fresh pot of Earl Grey, these homemade **scones** look a million bucks just piled high on a nice cake stand. Presentation is half the battle when you’re aiming for that bakery feel!
Storage and Reheating Instructions for Scones
Even though these **scones** are so good I doubt you’ll have many leftovers, life happens, right? You need to store them properly so that the next batch you eat the following day is still that gorgeous, flaky texture we worked so hard to achieve. If you wrap them up tight in plastic wrap and then stash them in an airtight container at room temperature, they should stay perfectly good for about two days.
Now, here’s the most important part about leftovers: never, ever use the microwave to reheat your **scones**! I know it’s fast, but microwaving releases all the moisture trapped in the starches, and you end up with a hard, chewy disaster. We worked too hard for that!
For the real revitalization treatment, you need the heat to crisp up the outside again. Pop those beautiful **scones** into a 325°F oven or toaster oven for just about 5 to 7 minutes. This gentle heat warms them through and brings back that delightful crispness on the edges without drying out the inside. It brings them right back to that just-baked texture. It’s the only way I’ll eat day-old baked goods, and it works like a charm for these buttery beauties!
Frequently Asked Questions About Making Scones
I get so many questions about **scones** because everyone seems to have that one bad baking experience that scares them away! Don’t let that stop you. If you’re struggling with why your **scones** are spreading sideways instead of going up tall, or how to make sure they are perfectly golden, stick around. I’ve compiled the most common issues right here so you can bake with total confidence!
Can I use regular milk instead of buttermilk in these scones?
Yes, you absolutely can, though I highly recommend the buttermilk for that extra tender crumb! If you need to substitute, the magic ratio is one tablespoon of white vinegar or fresh lemon juice mixed into one cup of regular milk. Stir it up and just let it sit on the counter for about five minutes until it starts to look a little chunky. That acidity is what we are replacing, see?
It works because the acid reacts with our baking powder, creating those beautiful little bubbles of steam that give our **scones** that light, airy lift. Without that acid, milk alone won’t give you quite the same reaction, so make sure you let that substitution curdle properly before adding it in!
How do I prevent my scones from becoming dry?
This is my favorite question because it gets right to the core of why people fear making **homemade scones**! Keeping your **scones** moist comes down to two huge things we went over, and you have to respect both of them. The first is ingredient temperature: cold butter and cold buttermilk create the steam necessary for flakiness, but if your butter melts before it even hits the oven, you lose that structure.
The second, and perhaps more critical point, is handling. You must stop mixing as soon as the wet and dry ingredients barely come together. You want a shaggy, messy dough! If you knead it, fold it too much, or mix it until it looks perfectly smooth, you are developing gluten, and gluten loves to bake up tough and dry. Minimal mixing equals maximum tenderness, every single time. You can learn more about my general baking philosophy over on my Sourdough Starter page, as precision matters in that world too!
Another quick tip: Are you sure you’re not over-baking them? If you press a toothpick gently into the center, you want to see moist crumbs clinging to it, not wet batter, but definitely not a toothpick that comes out bone dry and dusty!
Share Your Perfect Scones Experience
Now that you’ve got the blueprint for these incredible, tall, and tender **scones**, I truly hope you give them a try this week! Seriously, once you bite into a perfectly flaky homemade scone, you’ll never want to settle for those dry, sad bakery versions again. This recipe is all about bringing that simple, comforting joy back into your kitchen, just like my grandmother did years ago with her own beloved classics.
When you bake this batch, I desperately want to see how they turn out! Did you go for the classic plain style, or did you dive into the savory cheese and chive trend? Snap some pictures and tag me on social media—it truly makes my day to see your kitchen successes. Knowing that this recipe brought a moment of delicious comfort to your home is exactly why I share everything here at MDLATDMM Recipes.
If you loved how reliable these **scones** turned out, please take just a moment to leave a quick star rating right here on the recipe card. Those ratings help other home cooks who might be scared of baking **scones** realize that this recipe is the real deal. And hey, if you have any burning questions that I didn’t cover or just want to tell me about your absolute favorite topping combination, don’t hesitate to reach out via the Contact Page. Happy baking, friends—may all your **scones** be tall and flaky!
PrintUltimate Fail-Proof Buttermilk Scones Recipe for Moist, Flaky Results

Make tall, buttery, flaky scones that rival coffee shop quality. This easy recipe uses buttermilk and simple techniques to guarantee moist, tender scones every time you bake.
- Prep Time: 15 min
- Cook Time: 18 min
- Total Time: 33 min
- Yield: 8 servings 1x
- Category: Breakfast
- Method: Baking
- Cuisine: American
- Diet: Vegetarian
Ingredients
- 2 cups all-purpose flour
- 1/4 cup granulated sugar
- 1 tablespoon baking powder
- 1/2 teaspoon salt
- 1/2 cup (1 stick) cold unsalted butter, cut into small cubes
- 1 cup cold buttermilk
- 1 large egg, beaten (for egg wash)
- 1 tablespoon milk or cream (for egg wash)
- Optional Add-ins: 1 cup blueberries, 1/2 cup white chocolate chips, or 1/4 cup dried cranberries
Instructions
- Preheat your oven to 400°F (200°C). Line a baking sheet with parchment paper.
- In a large bowl, whisk together the flour, sugar, baking powder, and salt.
- Add the cold, cubed butter to the dry ingredients. Use a pastry blender or your fingertips to cut the butter into the flour until the mixture resembles coarse crumbs with some pea-sized pieces of butter remaining. This step is key for flaky scones.
- If using add-ins, gently toss them into the flour mixture now.
- Make a well in the center of the flour mixture and pour in the cold buttermilk all at once.
- Use a fork to mix until just combined. Do not overmix; the dough will look shaggy.
- Turn the dough out onto a lightly floured surface. Gently bring the dough together into a rough circle or rectangle about 3/4 inch thick.
- For extra height and flakiness, perform the fold-dough technique: Fold the dough in thirds (like a letter), turn it 90 degrees, and gently pat it back into a thick round or square, about 1 inch thick.
- Use a sharp, floured round or square cutter (about 2.5 inches) to cut out the scones. Press the cutter straight down without twisting to keep the edges clean and tall.
- Place the cut scones close together on the prepared baking sheet.
- In a small bowl, whisk the egg and milk/cream together to create an egg wash. Brush the tops of the scones lightly with the wash.
- Bake for 14 to 18 minutes, or until the tops are golden brown and the centers are cooked through.
- Transfer the scones to a wire rack to cool slightly. Serve warm.
Notes
- Keep all your ingredients, especially the butter and buttermilk, very cold. Cold fat creates steam in the oven, resulting in flaky layers.
- Do not twist the biscuit/scone cutter; press straight down and lift straight up to prevent sealing the edges, which stops them from rising tall.
- For coffee shop quality, brush the tops with heavy cream instead of an egg wash for a softer crust.
- Adapt this recipe: Substitute lemon zest and juice for blueberries to make Lemon Scones, or add cinnamon and a light sugar glaze for Cinnamon Scones.
Nutrition
- Serving Size: 1 scone
- Calories: 280
- Sugar: 6
- Sodium: 250
- Fat: 15
- Saturated Fat: 9
- Unsaturated Fat: 6
- Trans Fat: 0
- Carbohydrates: 32
- Fiber: 1
- Protein: 6
- Cholesterol: 50