
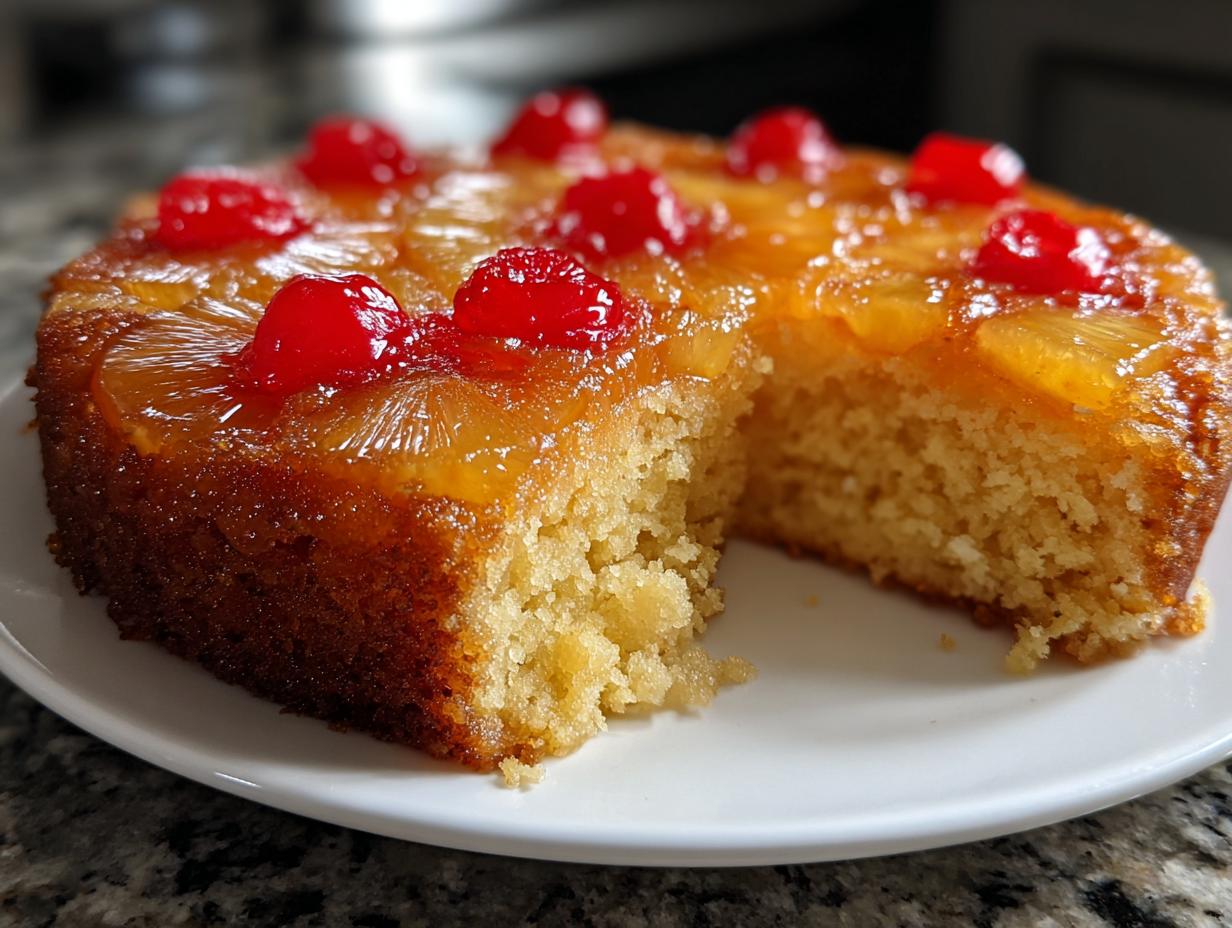
Oh my goodness, there is nothing quite like pulling the perfect golden-brown cake out of the oven and flipping it over to reveal that stunning, caramelized mirror of sticky pineapple and bright cherries. That scent? It just smells like childhood parties and Sunday suppers, doesn’t it? When I was developing this Classic, Extra Moist pineapple upside down cake, I wasn’t just looking for a good recipe; I wanted *the* recipe. After testing and tweaking all those old family notes mentioned over on our about page in our story, I finally nailed the technique that guarantees that incredibly buttery, perfectly caramelized pineapple dessert top every single time. Trust me, Maddie here has put hours into making sure this nostalgic retro baking staple is foolproof for you!
- Why This Classic pineapple upside down cake Recipe Works for You
- Ingredients for Your Homemade pineapple upside down cake
- Step-by-Step Instructions for the Best pineapple upside down cake
- Tips for an Expert-Level pineapple upside down cake
- Easy Upside Down Cake Variation Using Cake Mix
- Storage and Make Ahead Tips for Your pineapple upside down cake
- Serving Suggestions for a Nostalgic Retro Baking Treat
- Frequently Asked Questions About pineapple upside down cake
- Share Your Perfect pineapple upside down cake Creation
Why This Classic pineapple upside down cake Recipe Works for You
Look, I know there are a million upside-down cake recipes out there, but this one is different. It hits that sweet spot between pure nostalgia and genuinely great texture in a way others miss. It’s designed to be the best version of that familiar treat you remember.
- That Nostalgic Factor: This recipe brings back all those wonderful memories of classic American desserts. It’s just pure comfort on a plate!
- Crowd-Pleasing Results: It looks absolutely gorgeous when you flip it, which is perfect for making an impression at any gathering.
- Easier Than You Think: While it looks fancy, the steps are straightforward, making it a fantastic cake for beginners who want huge payoff.
Achieving the Perfect Buttery Caramelized Topping
You want that glorious, glossy, dark caramel, right? That’s the magic right there! The secret to that buttery and caramelized topping is actually incredibly simple: we start with melted butter poured right into the pan, followed by the brown sugar sprinkled evenly on top. Don’t try to substitute that base layer, because that rich mixture is what bubbles up against the fruit while baking to create that absolutely essential sticky, dark glaze.
The Secret to a Truly Moist pineapple upside down cake
A dry cake is a tragedy, and that’s never happening here! We fight dryness by making sure the batter has extra moisture where it needs it most. Beyond just using good quality ingredients, I incorporate the reserved pineapple juice—the liquid the fruit was canned in—right into the wet ingredients for my pineapple upside down cake. It adds just a tiny bit of tropical brightness while keeping the crumb incredibly tender and moist, even if you eat the leftovers the next day!
Ingredients for Your Homemade pineapple upside down cake
Okay, here’s the rundown of everything you need to grab from the pantry. When you’re dealing with a cake where the topping is almost as important as the cake itself, you can’t just wing it! I wrote down my specific instructions from the recipe card, so make sure you get these amounts right—especially for the topping components.
- 1/2 cup unsalted butter (this is for the caramel layer, so it needs to be melted later)
- 3/4 cup packed light brown sugar (make sure it’s packed down firmly!)
- 1 (20 ounce) can pineapple slices in juice, drained (and please, please save that juice for the cake batter!)
- 10 maraschino cherries, stems removed (I always pick out the prettiest ones for the centers!)
- 1 3/4 cups all-purpose flour
- 1 1/2 teaspoons baking powder
- 1/2 teaspoon salt
- 1/2 cup (1 stick) unsalted butter, softened (this is for the cake batter—it must be truly soft, not melted)
- 3/4 cup granulated sugar
- 2 large eggs (room temperature eggs mix in so much better, sometimes?)
- 1 teaspoon vanilla extract
- 1/2 cup milk
- 1/4 cup reserved pineapple juice (that important moisture booster we talked about!)
When you start pulling these out, just take a moment to make sure your butter for the cake batter is actually soft. If it’s too cold, it won’t cream properly, and we need that air whipped in for the best texture!
Step-by-Step Instructions for the Best pineapple upside down cake
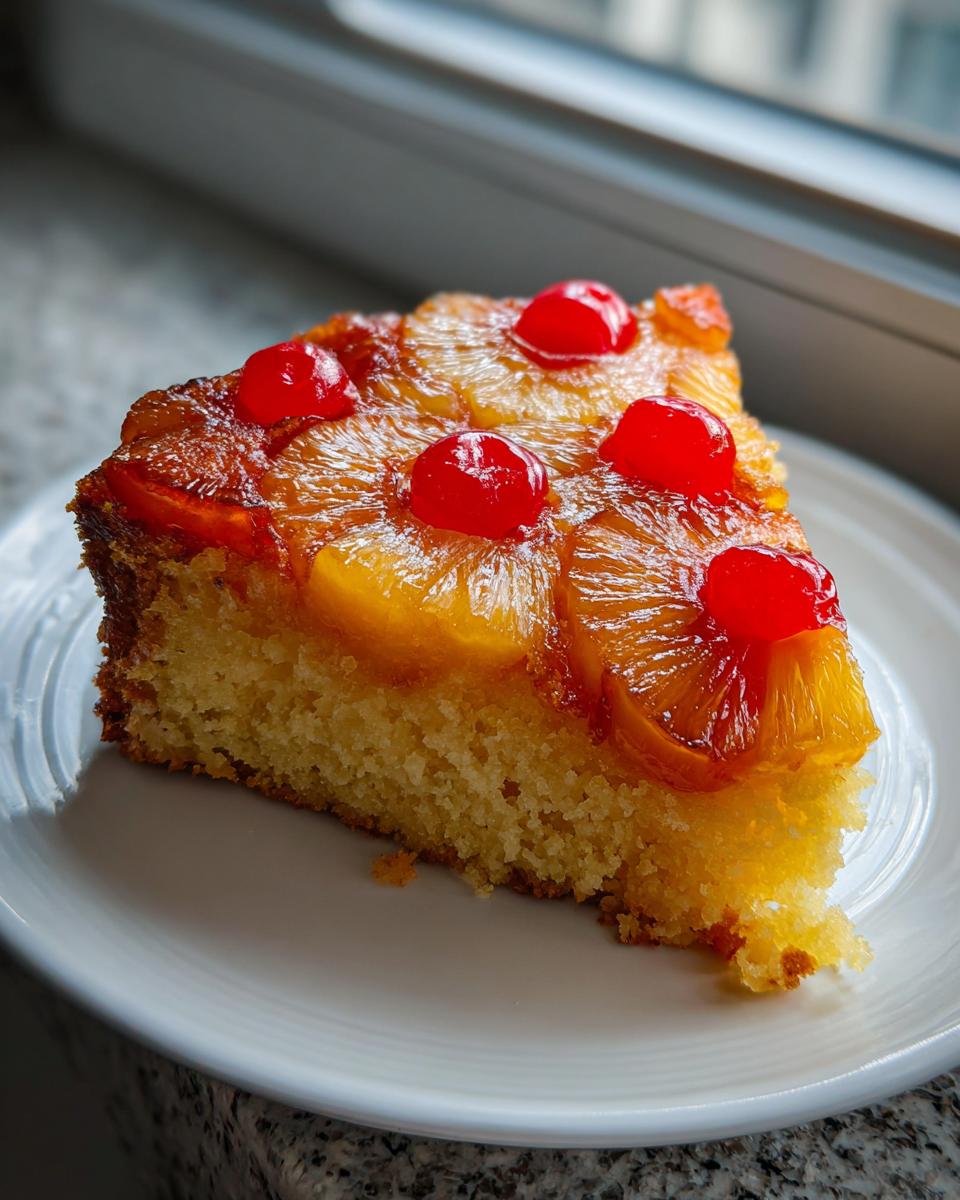
Alright, let’s get this beautiful creation assembled! I know flipping a cake always feels like the scariest part, but if you follow these steps exactly—especially that cooling time—you’ll have a flawless presentation. Don’t forget, we need that oven set to 350 degrees F, and grab your 9-inch round cake pan now so you’re ready to go. If you want to see a pro shot of this finished beauty, I love the look over at this site!
Preparing the Caramelized Topping Layer
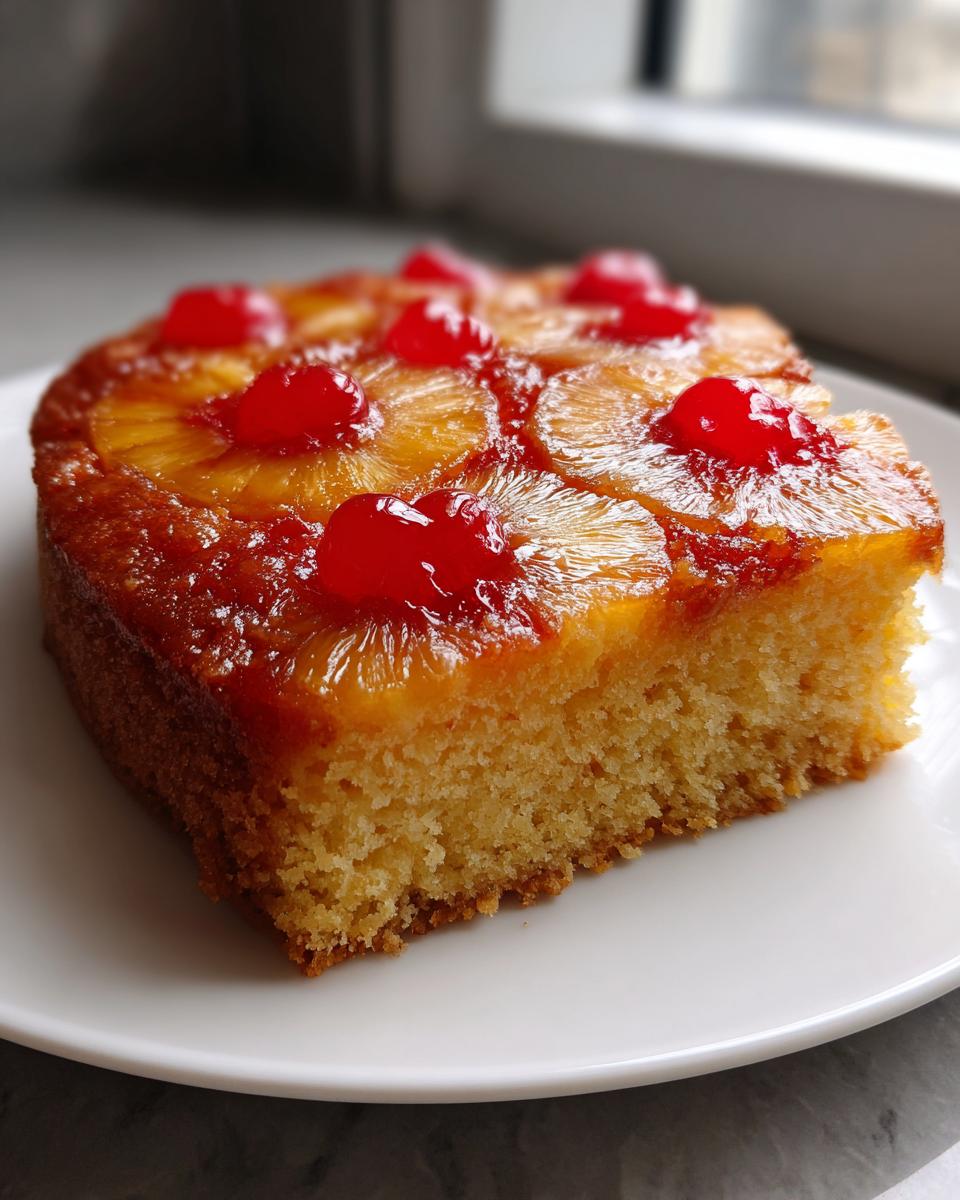
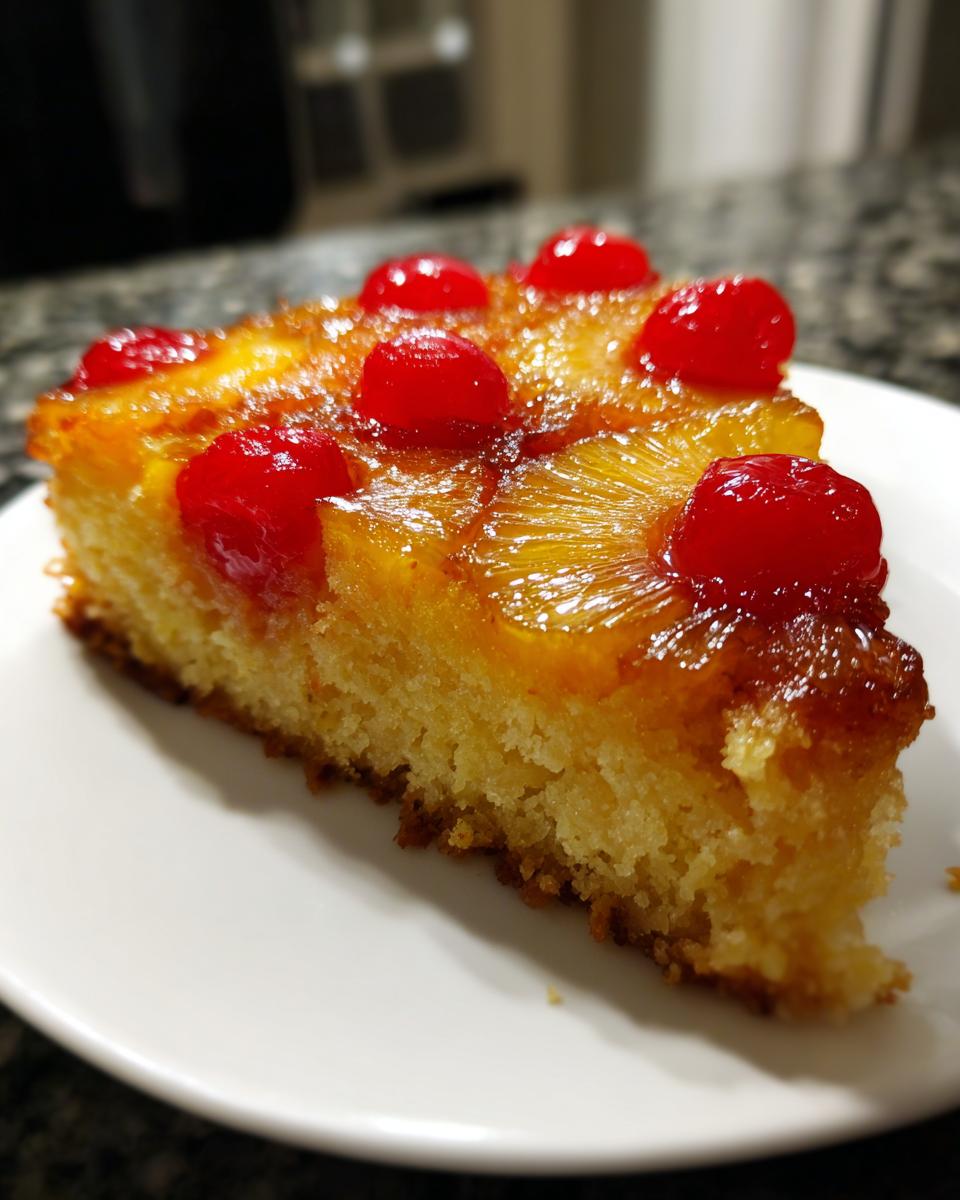
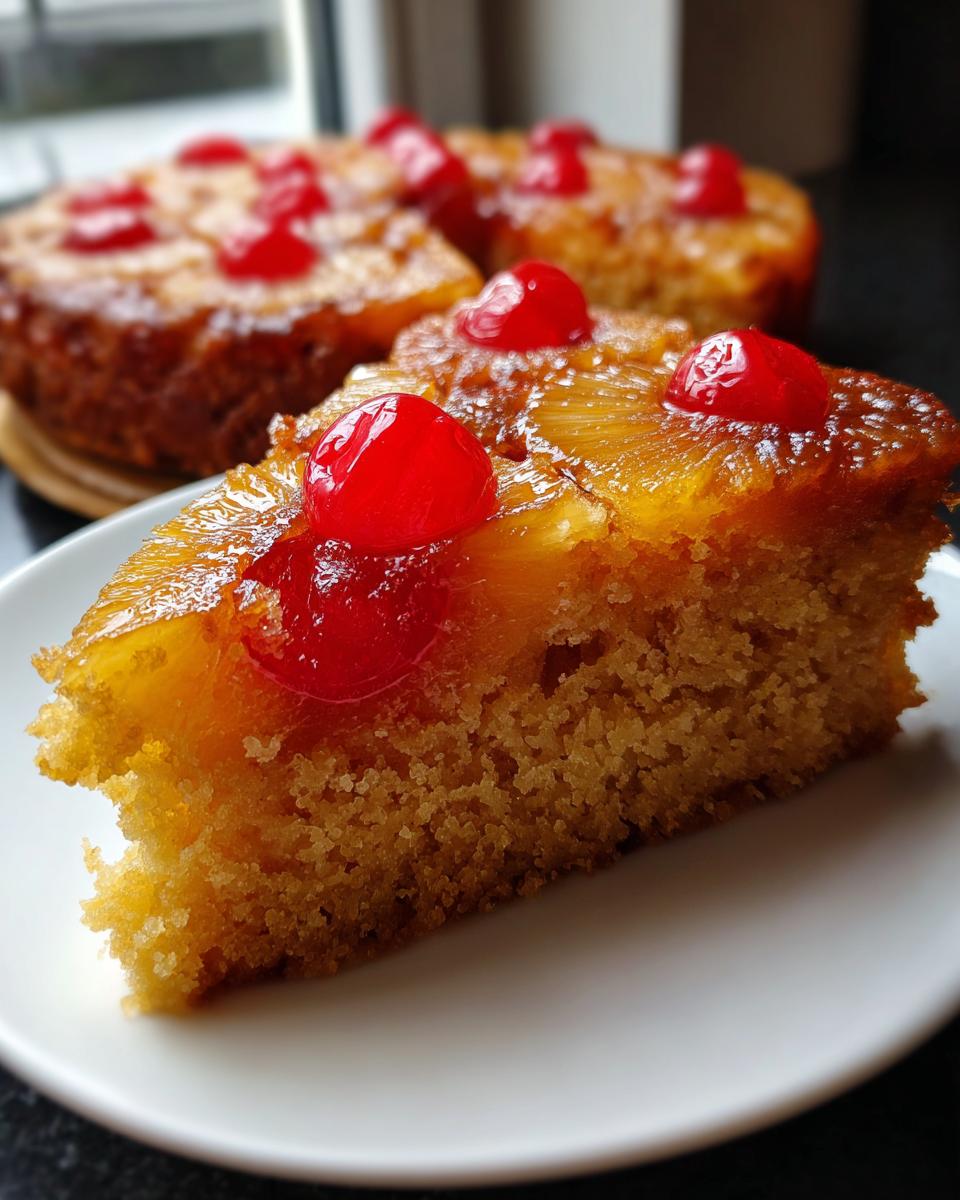
This is the art part! First, take that half-cup of butter and melt it right in your cake pan over low heat, or melt it separately and pour it in. Once it’s melted, sprinkle that sweet brown sugar all over the butter layer evenly. Now for the fun! Take your drained pineapple slices and arrange them however you like. I usually put one big ring in the middle and then fill the gaps. Pop one cherry right in the center of each ring and scatter the rest wherever there’s an empty spot. Make it look pretty, because upside down means it’s about to be right side up!
Mixing the Moist pineapple cake Batter
Next up, we build the cake! Whisk your flour, baking powder, and salt together in one bowl—that’s our dry team. In your big bowl, cream that softened butter and granulated sugar until it looks light—you have to get air in there! Beat the eggs in one at a time, then stir in the vanilla. Now, listen closely, because this is key for a Moist Pineapple Cake Recipe: mix the milk and that reserved pineapple juice in a small cup. You’re going to alternate—add some dry, then some of the wet mix, then dry again, ending with dry. Just mix until you see no more streaks of flour, seriously, do not overmix your pineapple upside down cake batter, or it gets tough!
Baking and Inverting Your pineapple upside down cake
Gently spoon all that glorious batter right over your fruit layer. Use a spatula to spread it slowly so you don’t knock your perfect pineapple design loose. Bake it for about 35 to 40 minutes. You’re watching for clean toothpick removal! Here is Maddie’s crucial advice about inverting your pineapple upside down cake: You *must* let it cool for exactly 10 minutes on a wire rack. Not 5, not 20! After 10 minutes, put your serving plate upside down over the pan, put on your oven mitts (yes, you still need them!), and flip it fast. If one little pineapple piece decides to stick to the pan bottom, don’t panic! Just lift it up with a small offset spatula and gently place it back where it belongs. Sometimes I even sneak a little extra drizzle of the warm melted sugar left in the pan right over the bare spots—secret trick!
Don’t forget, if you need a super quick fix for breakfast tomorrow morning, check out some easy breakfast ideas instead of cake!
Tips for an Expert-Level pineapple upside down cake
We’ve got the classic recipe down, which is fantastic, but becoming an expert means knowing the little tricks that separate a good cake from a show-stopping one. These aren’t huge changes—they’re just small adjustments that really pay off when you flip that pan over!
First off, let’s talk about that pan. While a standard 9-inch round cake pan works perfectly for this recipe, if you want that incredible, thick, gooey topping, you simply must use a 10-inch cast-iron skillet. Seriously! That heavy metal conducts heat so evenly, and it really helps that brown sugar mixture melt beautifully into a thick, uniform caramel. If you browse over on The Kitchn, you’ll often see seasoned bakers going straight for the skillet. It just gives that topping an extra edge.
Also, let’s re-emphasize the butter for the base. When you melt that first half-cup? Make sure it truly melts right in the pan over low heat. If you just pour hot, half-melted butter in, the brown sugar clumps up in spots instead of dissolving evenly. No clumps allowed! We want a smooth, liquid landscape of sweet goodness before the batter goes on top.
And finally, the pineapple juice. I know I mentioned it boosts moisture in the batter, but if you find your pineapple slices look a little pale after baking, try brushing a *tiny* bit of the reserved juice directly onto the fruit pieces before you pour the batter over them. It gives those rings a little extra boost of color and flavor saturation. It’s these little details that make the difference!
When you’re done baking, don’t forget to save some of my favorite delicious dessert recipes for next time!
Easy Upside Down Cake Variation Using Cake Mix
Okay, I have to be honest with you lovely bakers. Sometimes, you just need that comforting hit of tropical goodness, but you don’t have an hour to pull out the flour, baking powder, and whisk everything perfectly. I totally get it! This is where we lean into the brilliance of a great yellow cake mix to speed things up, and honestly, for a quick fix, this version is surprisingly delicious.
The beautiful thing about this adaptation is that the topping—the crucial, drool-worthy caramelized pineapple layer—stays exactly the same! You are absolutely still making our classic brown sugar, butter, and fruit base, so you keep all that gorgeous flavor and visual wow factor for your pineapple upside down cake.
So, what’s the substitution? You can ditch all the dry ingredients for the cake itself: the flour, baking powder, salt, the softened butter, the granulated sugar, eggs, vanilla, milk, and the reserved pineapple juice. Just replace all those items with one standard box of your favorite yellow cake mix. You’ll want to follow the box directions for what liquid/oil/eggs to add, but here is the crucial bit—use whatever the box calls for!
Once you have your quick batter mixed up according to those box directions, you just gently spoon it right over your arranged fruit just like we did in the main recipe. This shortcut transforms your afternoon baking session into something you can have ready for dinner! If you’re looking for another fast, fun dessert, you have to check out my recipe for the lemon cream cheese dump cake—it’s even easier!
This saves so much time but delivers that sweet, fruity flavor profile that makes this dessert a classic. You can see how some folks keep it super simple over at Molly’s Home Guide focusing primarily on the box mix shortcut for a super quick dessert night.
Storage and Make Ahead Tips for Your pineapple upside down cake
One of the best things about this retro beauty is that it’s genuinely great for making ahead! You don’t have to serve it piping hot right out of the oven, honestly, the flavors often meld together even better overnight. I always plan on making this the day before a big family event because it saves so much stress on party day.
Based on my testing and what Grandma used to do, this pineapple upside down cake keeps really well right on the counter. You can leave it covered tightly at room temperature for up to two full days. Keep an eye on it if your kitchen is super hot and humid, but generally, that high sugar content in the caramel topping acts as a natural preservative. Just make sure it’s on a good plate and covered well so it doesn’t dry around the edges.
Now, freezing is a little trickier because of that lovely sticky topping. If you absolutely have to freeze your pineapple upside down cake, let it cool completely first. Wrap the entire thing really tightly in plastic wrap, and then maybe throw some foil over that. When you thaw it on the counter, the caramel might sweat a little bit when it comes to room temperature, so you might need to give it a gentle blot with a paper towel before serving.
If you’re trying to plan ahead for entertaining, I’ve got a whole list of my favorite make ahead tropical dessert ideas over on the blog where you can prep things a day or two in advance!
Serving Suggestions for a Nostalgic Retro Baking Treat
This Nostalgic Retro Baking treat absolutely cries out for something cool and creamy alongside it, don’t you think? While it’s delicious all on its own, letting that warm, sticky cake meet something cold really makes the entire experience sing. In my family, we never served one of these without a scoop of something perfect!
My absolute go-to suggestion will always be just a nice, simple scoop of high-quality vanilla ice cream. The temperature contrast between the warm, caramelized pineapple and the cold, creamy vanilla is just heavenly. It melts right down into those little crevices and catches all that extra brown sugar syrup. It is perfection!
If you aren’t feeling ice cream, you can’t go wrong with a big dollop of freshly whipped cream. I usually sweeten mine just a touch with a tiny bit of powdered sugar and maybe a splash of almond extract instead of vanilla—it just gives it a little extra lift against the heavy sweetness of the topping. You can even dust the top of the whipped cream with a tiny sprinkle of cinnamon before serving if you want an extra warm note!
For something a bit richer, a thin drizzle of salted caramel sauce over the top layer right before serving really elevates this cake to a restaurant-level dessert without adding any extra fiddly steps. Honestly, serve it warm with whatever dairy side you love most, and you’ve won the dessert game!
If you’re looking for another classic comfort dessert to bake next weekend, you absolutely have to try my recipe for chewy chocolate chip cookies—they are another family staple!
Frequently Asked Questions About pineapple upside down cake
I know sometimes when you look at any recipe, the little things that aren’t perfectly clear pop up in your mind, so I wanted to answer a few common questions I get about making this classic dessert. Hopefully, this smooths out any last-minute worries!
Can I use fresh pineapple instead of canned for this pineapple cake recipe?
That’s a great question! Fresh pineapple is absolutely delicious, but it acts differently than the canned slices. Canned pineapple is already cooked down and packed in juice, which helps it absorb the caramel perfectly. If you use fresh pineapple, you’ll want to slice it a little thinner than the canned rings, and trust me on this—you *must* cook it down slightly first! Simmer your fresh rings with a little bit of water and brown sugar for about 10 minutes just to soften them up and get rid of excess liquid. Fresh fruit has way more water content, and we don’t want that watering down your beautiful caramel base!
What is the best pan size for this Classic Pineapple Upside Down Cake?
For this specific recipe ratio, I designed it to be perfect for a standard 9-inch round cake pan. That diameter allows the heat to distribute evenly, which is crucial for getting that topping nicely caramelized without burning the edges. However, I mentioned how much I love using a cast-iron skillet, and a 10-inch cast-iron skillet works wonderfully too! It gives you a slightly thinner cake, but that caramel layer gets incredibly rich. If you are making this for a big crowd and want a taller version, you might need to make 1.5 times the recipe and use a slightly deeper 9-inch pan, but I highly recommend sticking to the 9-inch round for this exact recipe to ensure you get that flawless flip!
Share Your Perfect pineapple upside down cake Creation
Now that you’ve gone through all the steps to make this spectacular dessert, I really want to see what you created! Flipping that pan over is the best reveal in baking, and I hope you got that gorgeous, glossy top we worked so hard for. I always tell folks that the magic of food is in the sharing, and I’d love to see how your finished pineapple upside down cake looks—did you stick to the classic pineapple and cherry pattern, or did you get creative with bananas?
Please, please leave a review down below! Star rating helps other bakers feel confident diving into the recipe, and your comments let me know how it went right there in your kitchen. Did the caramel set up just right? Was the cake wonderfully moist? Your feedback is how I keep making sure every classic American dessert here is absolutely the best it can be.
And if you took a gorgeous picture of that flip—which I really hope you did, since that’s what makes this dessert so great for sharing—snap it over to social media! Tag us, because seeing your homemade successes truly makes my day. It’s all about bringing that connection back to the kitchen table, one buttery, sticky pineapple upside down cake at a time! If you ever have questions about this recipe or anything else, don’t hesitate to reach out through my contact page. Happy baking, sweet friends!
PrintClassic, Extra Moist Pineapple Upside Down Cake Recipe
Make this classic pineapple upside down cake for a moist, buttery dessert with a perfectly caramelized topping. This recipe delivers nostalgic flavor and is simple to follow.
- Prep Time: 15 min
- Cook Time: 40 min
- Total Time: 55 min
- Yield: 8 servings 1x
- Category: Dessert
- Method: Baking
- Cuisine: American
- Diet: Vegetarian
Ingredients
- 1/2 cup unsalted butter
- 3/4 cup packed light brown sugar
- 1 (20 ounce) can pineapple slices in juice, drained (reserve juice)
- 10 maraschino cherries, stems removed
- 1 3/4 cups all-purpose flour
- 1 1/2 teaspoons baking powder
- 1/2 teaspoon salt
- 1/2 cup (1 stick) unsalted butter, softened
- 3/4 cup granulated sugar
- 2 large eggs
- 1 teaspoon vanilla extract
- 1/2 cup milk
- 1/4 cup reserved pineapple juice
Instructions
- Preheat your oven to 350 degrees F. You will need a 9-inch round cake pan.
- Melt 1/2 cup butter in a small saucepan over medium heat. Pour the melted butter into the bottom of the cake pan. Sprinkle the brown sugar evenly over the melted butter.
- Arrange the pineapple slices on top of the brown sugar mixture in a decorative pattern. Place one maraschino cherry in the center of each pineapple ring, and place any remaining cherries around the edges.
- In a medium bowl, whisk together the flour, baking powder, and salt. Set this dry mixture aside.
- In a large bowl, cream together the 1/2 cup softened butter and granulated sugar until light and fluffy. You can use an electric mixer for this step.
- Beat in the eggs one at a time, mixing well after each addition. Stir in the vanilla extract.
- In a small bowl, whisk together the milk and the reserved pineapple juice.
- Gradually add the dry ingredients to the wet ingredients, alternating with the milk and juice mixture. Begin and end with the dry ingredients. Mix until just combined; do not overmix the batter.
- Carefully spoon the cake batter over the pineapple and cherry layer in the pan. Spread the batter evenly without disturbing the topping arrangement.
- Bake for 35 to 40 minutes, or until a wooden pick inserted into the center comes out clean.
- Let the cake cool in the pan on a wire rack for 10 minutes.
- Place a serving plate upside down over the cake pan. Wearing oven mitts, carefully invert the pan and plate together. Lift the pan off the cake. If any topping sticks, gently place it back onto the cake.
- Serve warm or at room temperature.
Notes
- For an extra moist cake, use the reserved pineapple juice in place of some of the milk in the batter.
- If you want a quicker version, you can substitute one box of yellow cake mix for the flour, baking powder, salt, butter, sugar, eggs, vanilla, milk, and juice, following the box directions but using the topping instructions as written here.
- This cake keeps well at room temperature, covered, for up to two days.
Nutrition
- Serving Size: 1 slice
- Calories: 380
- Sugar: 35g
- Sodium: 250mg
- Fat: 19g
- Saturated Fat: 11g
- Unsaturated Fat: 8g
- Trans Fat: 0.5g
- Carbohydrates: 50g
- Fiber: 1g
- Protein: 4g
- Cholesterol: 85mg