
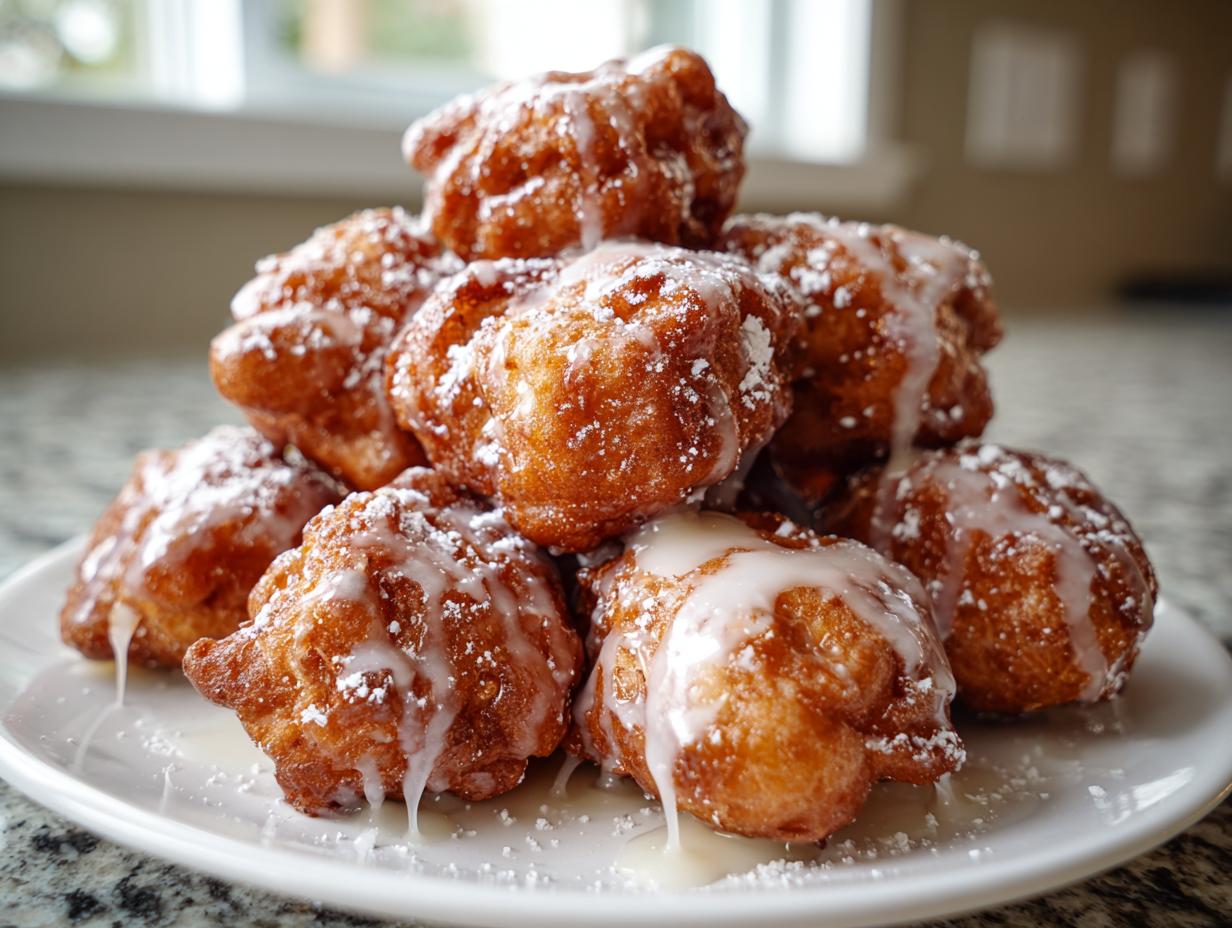
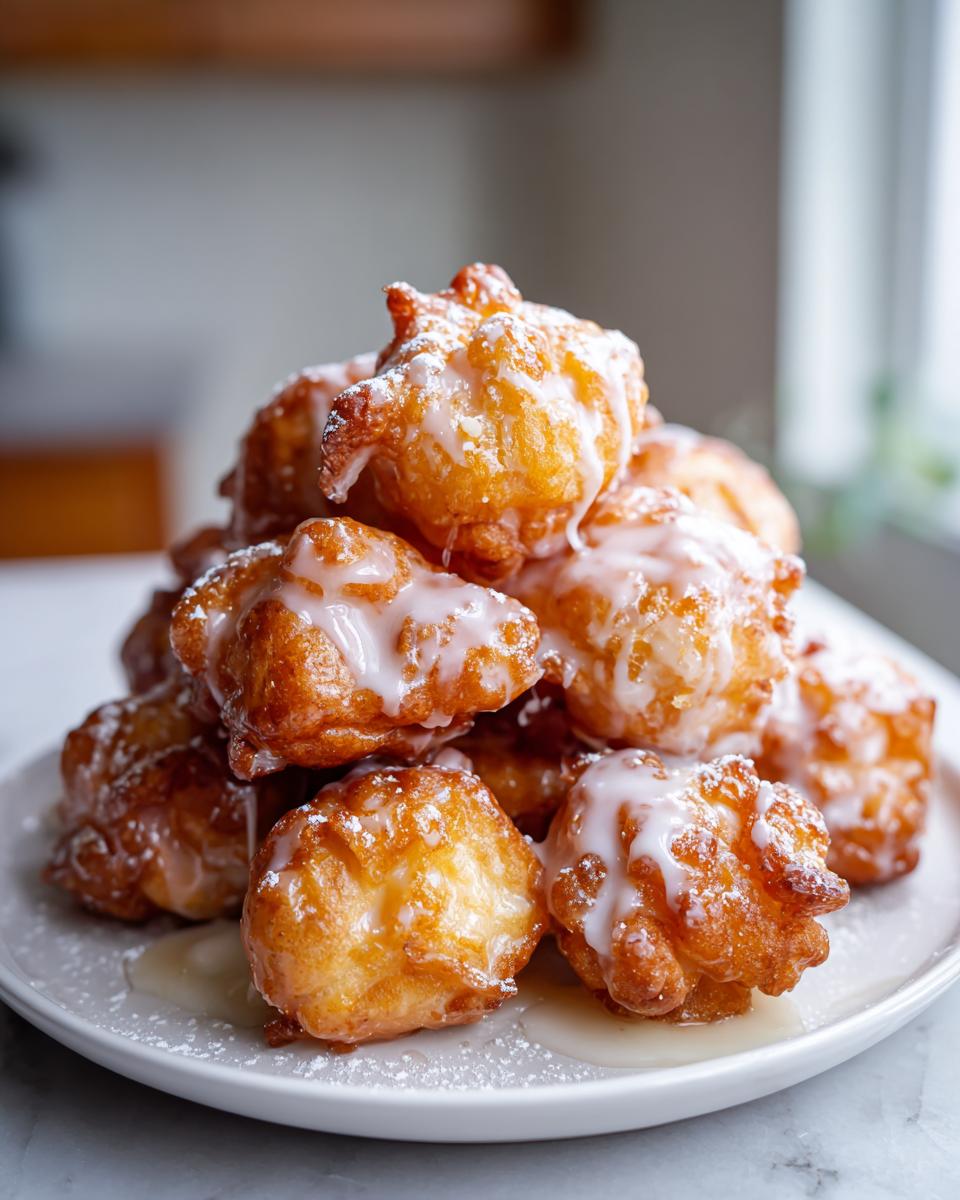
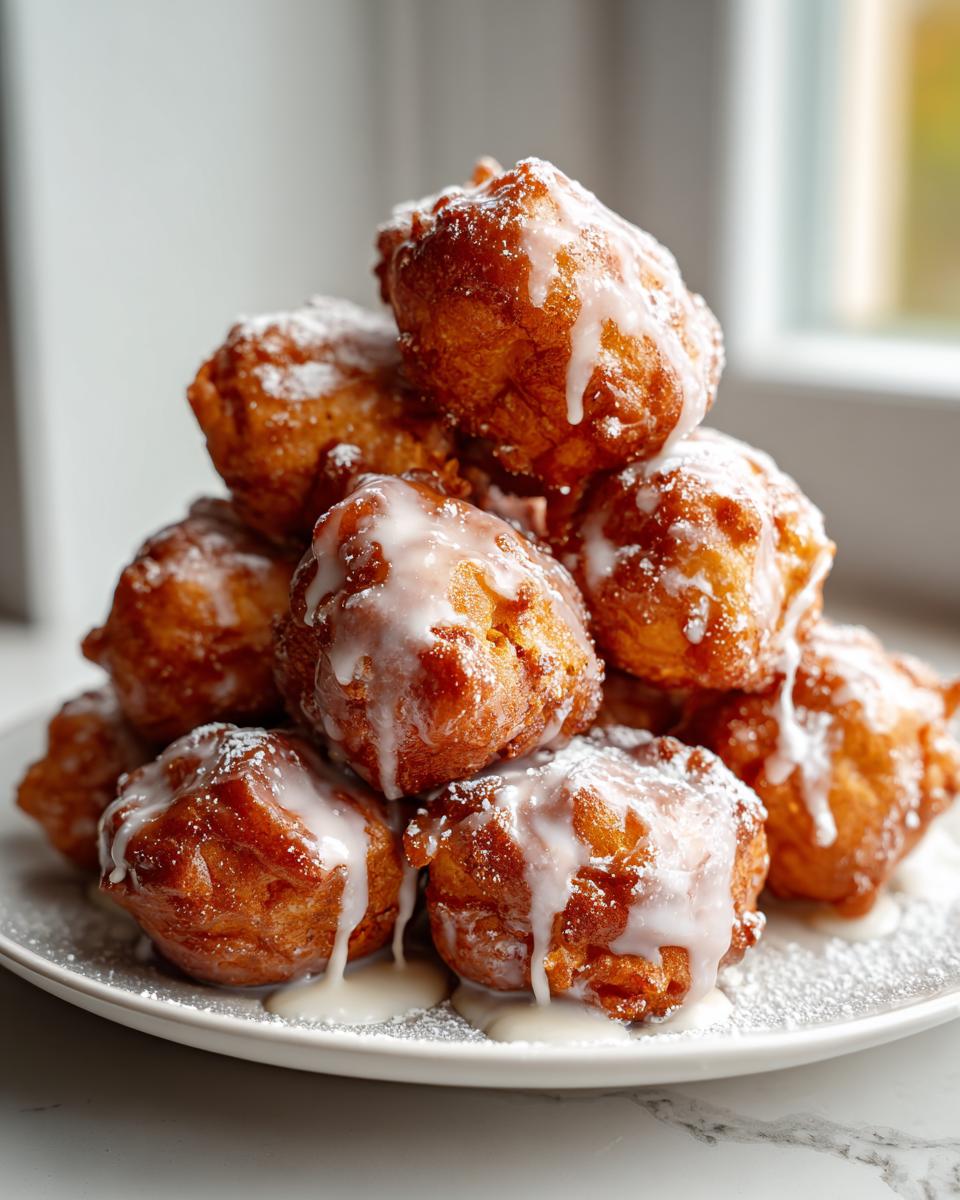
You know those mornings when you just NEED that warm, bakery-style flavor, but you definitely don’t have two hours to wait for yeast to cooperate? Me too! That’s why I am absolutely thrilled to share this recipe for no-yeast apple fritter bites. Seriously, these are the crispiest, fluffiest little guys you can whip up faster than it takes to brew a pot of coffee. Following the philosophy I learned from my own kitchen heritage, this recipe cuts out the fuss while locking in that incredible, comforting apple and cinnamon flavor. These reliable, quick fried apple treats bring that bakery magic right to your counter!
- Why You Will Love These Quick Apple Fritter Bites
- Essential Ingredients for Perfect Apple Fritter Bites
- Step-by-Step Guide to Making Glazed Apple Fritter Bites
- Expert Tips for Perfect Apple Fritter Bites Every Time
- Ingredient Notes and Substitutions for Apple Fritter Bites
- Serving Suggestions for Your Mini Apple Fritters
- Storing and Reheating Your Apple Fritter Bites
- Frequently Asked Questions About Apple Fritter Bites
- Estimated Nutritional Information for Apple Fritter Bites
- Share Your Homemade Apple Fritter Bites Experience
Why You Will Love These Quick Apple Fritter Bites
If you’re looking for a winner, you’ve found it. These little bites are perfect because:
- They come together in about 30 minutes total, keeping clean-up quick!
- There is absolutely no yeast needed— we use baking powder for that quick lift.
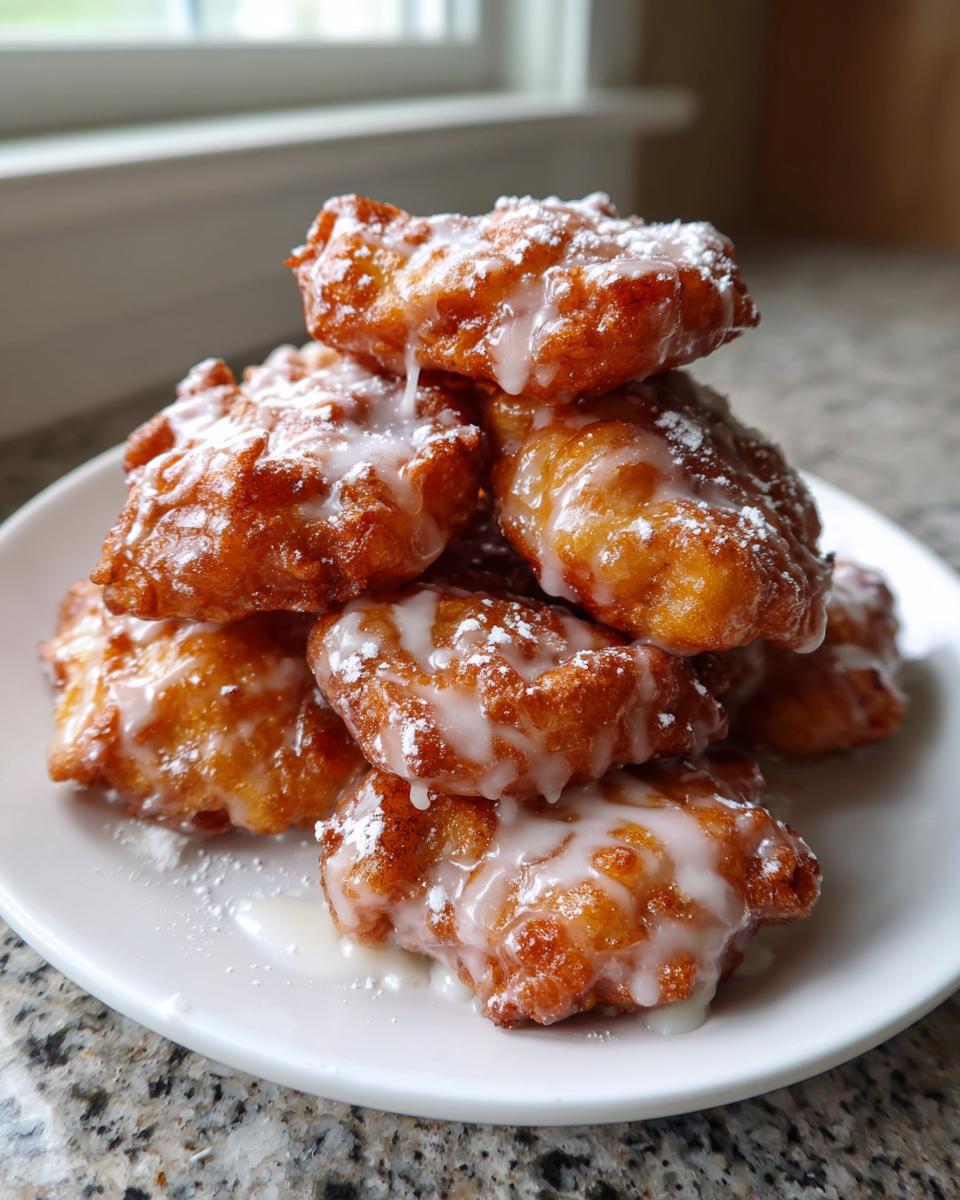
- You get that fantastic crispy apple snacks exterior while staying super fluffy inside.
- That silky (Glazed fritter bites recipe style) vanilla glaze hardens just perfectly on top.
Essential Ingredients for Perfect Apple Fritter Bites
The secret to making these easy apple cinnamon treats taste like they came from a local doughnut shop is using real, fresh apples and respecting the dry/wet balance. Whenever I make these small batch apple fritters, I make sure everything is measured out before the oil even starts heating up.
Here is what you’ll need:
- Two large apples, peeled, cored, and finely diced (this is critical for even cooking!)
- One and a half cups of all-purpose flour
- Two teaspoons of baking powder (this is our lift since we skip the yeast!)
- Half a teaspoon of ground cinnamon and a pinch of nutmeg
- A quarter teaspoon of salt and a quarter cup of granulated sugar
- One large egg, lightly beaten
- Half a cup of milk
- One teaspoon of vanilla extract
- Enough vegetable oil for frying (make sure you have about 2 inches deep in your pot)
- For the glaze: one cup of powdered sugar, two tablespoons of milk or water, and a little extra vanilla.
Step-by-Step Guide to Making Glazed Apple Fritter Bites
We are moving fast here, so get your biggest skillet ready! Making these quick fried apple treats is straightforward if you stick to the mixing order. Remember, frying is all about temperature control, which is why these taste so much better than a baked version!
Preparing the Apple Fritter Bites Batter
First things first, mix all your dry stuff—flour, baking powder, spices, salt, and sugar—in a medium bowl. Give it a good whisk so that baking powder is evenly distributed. In a separate little bowl, mix your wet ingredients: the egg, milk, and vanilla. Now, pour the wet into the dry! Mix it until you *just* see everything come together. Trust me—a few lumps are totally fine. If you overmix, those little bites won’t be light and fluffy, they’ll be tough little dough balls. Fold in those finely diced apples gently right at the end.
Frying Your Apple Fritter Bites to Golden Perfection
This is where we get that amazing crunch! Heat about two inches of vegetable oil in a Dutch oven or heavy pot until it hits 350°F. If you don’t have a thermometer (though I highly suggest getting one for homemade granola recipes too!), you need to test it. Drop a tiny bit of batter in; if it sizzles immediately and turns golden brown in about 45 seconds, you’re good. Scoop batter by the tablespoonful into the oil, but don’t overcrowd the pot, or your oil temperature will crash, and you’ll get oily fritters! Fry them for just about 2 to 3 minutes per side until they are beautifully golden all over. Scoop them out with a slotted spoon and let them drain on paper towels immediately.
Creating the Warm Apple Vanilla Glaze
While those delicious little morsels are cooling down just a touch—we want them warm, not piping hot—whip up the glaze. Whisk that powdered sugar with just a splash of milk and the vanilla extract. You want this glaze to be nice and silky, not runny. If it looks too thick, add more milk, one tiny teaspoon at a time until it drips slowly off your whisk. When the **apple fritter bites** are cool enough to handle but still warm, just dip the tops right into the glaze or drizzle it over liberally. They set up fast, giving you that perfect sweet coating!
Why Temperature Control is Non-Negotiable
I learned this the hard way experimenting when I first started making these—if the oil isn’t hot enough, these fritter bites soak it up like sponges! That’s the absolute killer for any fried snack. You want that quick, hard sear on the outside so the inside steams fluffily, meaning you need that consistent 350°F. Keep that thermometer handy!
Expert Tips for Perfect Apple Fritter Bites Every Time
These might be easy, but a few tricks take them from good to OMG, that’s bakery quality! The primary concern, just like in my own kitchen when adapting family recipes, is texture. You want that crispy exterior without the grease factor.
First tip: Dice those apples small! If you have big chunks, they won’t cook through before the batter burns, leaving you with hard apple pieces inside your lovely fried apple treats. I aim for pieces no bigger than a pinky nail.
Second, and this is my personal ritual: As soon as the fritters come out of the oil, they go straight onto a wire rack lined with paper towels, just like you’d see when making pumpkin banana bread. Don’t let them sit in a bowl of paper towels, or the steam gets trapped and softens that gorgeous crisp exterior we worked so hard for!
I remember the first time I made these for a weekend brunch; my oil was way too cool, and they looked pale and sad. I panicked and turned the heat up way too high, and the next batch immediately burned on the outside! After a few practice drops, I figured out the sweet spot where they puffed up beautifully and turned golden in under three minutes total. It’s a learning process, but totally worth mastering for these amazing **apple fritter bites**.
Ingredient Notes and Substitutions for Apple Fritter Bites
Since we skip the yeast, the baking powder does all the heavy lifting to make these fritter bites for breakfast light. Don’t try to swap it for baking soda unless you adjust your liquids, or things will go wonky.
What about the apples? My mom always used Granny Smith because they hold their shape and give a nice tart counterpoint to the sweet glaze. But if you love a sweeter bite, try Honeycrisp or Fuji! Either way, make sure they are peeled; the skin can sometimes get a little tough when deep-fried quickly.
If you want to amp up that cinnamon flavor in these **easy apple cinnamon treats**, feel free to add an extra pinch to the dry mix. It’s one of those wonderful ingredients where more is usually better!
Serving Suggestions for Your Mini Apple Fritters
These **mini apple fritters** are so fun because they truly work for any meal! Honestly, I usually make a double batch if I know the kids are home from school. They are the perfect grab-and-go sweet apple snacks for kids.
For a proper weekend brunch spread, alongside something savory like bacon or my cinnamon roll casserole, they sit perfectly on a tiered platter dusted with a little extra powdered sugar for contrast. If you’re serving them after dinner, a small scoop of good quality vanilla ice cream melting slowly over the warm, glazed bites is just heavenly.
They smell amazing while they are frying, filling your whole house with that cozy apple snacking vibe—perfect for a fall day!
Storing and Reheating Your Apple Fritter Bites
Here’s the tough truth about anything fried: these **apple fritter bites** are 100% best eaten the minute they come out of the glaze. That crispness starts to soften quickly, which is why they are considered a short-term treat.
If you do have leftovers (which is rare in my house!), store them in a single layer in an airtight container at room temperature. Don’t put them in the fridge; that makes them taste stale faster!
To bring back some of that glory: Skip the microwave! Microwaving makes them soggy. Instead, spread them on a baking sheet and pop them into a toaster oven or standard oven at about 300°F for maybe five minutes until they feel warm and slightly crispy again. If you have an air fryer, that works like a charm too, just a few minutes at 325°F works miracles!
Frequently Asked Questions About Apple Fritter Bites
Can I bake these instead of frying?
You absolutely *can* bake them, but I have to be honest: they will be more like dense cake balls than crispy apple fritter bites. Frying is what gives you that signature airy, crisp texture that makes a fritter a fritter! If you want to bake, you’ll need to significantly thin out the batter and maybe hit them with extra butter so they don’t dry out.
How do I prevent them from getting greasy or oily?
Greasy bites mean your oil temperature wasn’t high enough when they went in, or you crowded the pot! Keep that oil steady at 350°F. Work in small batches—seriously, only drop in 5 or 6 at a time—so the oil temperature doesn’t drop when you add the cold batter. They should cook fast, meaning they absorb less oil!
Are these truly ‘no yeast’ apple fritter bites?
Yes, they are! We rely completely on two teaspoons of baking powder for our leavening. This is what allows these fantastic **mini apple fritters** to come together in just 30 minutes. No waiting, no rising time required!
Can I make the glaze ahead of time?
You can definitely prepare the glaze ahead of time. Just mix it up and store it tightly covered on the counter. If it gets really thick after sitting for a few hours, just whisk in a tiny drop of milk or water to bring back that perfect drizzling consistency.
Estimated Nutritional Information for Apple Fritter Bites
Just a quick heads-up that these numbers are my best *estimate* based on the recipe ingredients; frying always adds variability depending on how much oil your fritters decide to soak up! Since these are a treat and not part of my everyday healthy lunch recipes rotation, I don’t sweat the small stuff, but it’s good to know!
- Calories: About 350 per serving (4 bites)
- Fat: Roughly 18g
- Carbohydrates: Around 45g
- Sugar: About 25g (watch out for that glaze!)
- Protein: About 4g
Remember, these values are estimates! If you use lighter oil or drizzle less glaze, those numbers will shift.
Share Your Homemade Apple Fritter Bites Experience
I genuinely hope this recipe brings a little burst of cozy, sweet joy to your day! If you try whipping up this batch of bite sized apple desserts, I always love hearing about it. Did your glaze set perfectly? Did you add extra nutmeg?
Please leave me a comment below with your rating, and certainly share a photo if you post one on social media—tag me so I can see your beautiful, crispy, finished **apple fritter bites**! Don’t forget to save this recipe so you can easily find it next time you’re craving the best fall easy baking snack!
- Why You Will Love These Quick Apple Fritter Bites
- Essential Ingredients for Perfect Apple Fritter Bites
- Step-by-Step Guide to Making Glazed Apple Fritter Bites
- Expert Tips for Perfect Apple Fritter Bites Every Time
- Ingredient Notes and Substitutions for Apple Fritter Bites
- Serving Suggestions for Your Mini Apple Fritters
- Storing and Reheating Your Apple Fritter Bites
- Frequently Asked Questions About Apple Fritter Bites
- Estimated Nutritional Information for Apple Fritter Bites
- Share Your Homemade Apple Fritter Bites Experience
Why You Will Love These Quick Apple Fritter Bites
If you’re looking for a winner, you’ve found it. These little bites are perfect because:
- They come together in about 30 minutes total, keeping clean-up quick!
- There is absolutely no yeast needed— we use baking powder for that quick lift.
- You get that fantastic crispy apple snacks exterior while staying super fluffy inside.
- That silky (Glazed fritter bites recipe style) vanilla glaze hardens just perfectly on top.
Essential Ingredients for Perfect Apple Fritter Bites
The secret to making these easy apple cinnamon treats taste like they came from a local doughnut shop is using real, fresh apples and respecting the dry/wet balance. Whenever I make these small batch apple fritters, I make sure everything is measured out before the oil even starts heating up.
Here is what you’ll need:
- Two large apples, peeled, cored, and finely diced (this is critical for even cooking!)
- One and a half cups of all-purpose flour
- Two teaspoons of baking powder (this is our lift since we skip the yeast!)
- Half a teaspoon of ground cinnamon and a pinch of nutmeg
- A quarter teaspoon of salt and a quarter cup of granulated sugar
- One large egg, lightly beaten
- Half a cup of milk
- One teaspoon of vanilla extract
- Enough vegetable oil for frying (make sure you have about 2 inches deep in your pot)
- For the glaze: one cup of powdered sugar, two tablespoons of milk or water, and a little extra vanilla.
Seriously, monitoring that oil temperature is just as important as the flour amount for getting those crispy apple snacks. Don’t just guess!
Step-by-Step Guide to Making Glazed Apple Fritter Bites
We are moving fast here, so get your biggest skillet ready! Making these quick fried apple treats is straightforward if you stick to the mixing order. Remember, frying is all about temperature control, which is why these taste so much better than a baked version! Follow these steps exactly, and you’ll have perfect **apple fritter bites** in no time.
Preparing the Apple Fritter Bites Batter
First things first, mix all your dry stuff—flour, baking powder, spices, salt, and sugar—in a medium bowl. Give it a good whisk so that baking powder is evenly distributed. In a separate little bowl, mix your wet ingredients: the egg, milk, and vanilla. Now, pour the wet into the dry! Mix it until you *just* see everything come together. Trust me—a few lumps are totally fine. If you overmix, those little bites won’t be light and fluffy, they’ll be tough little dough balls. Fold in those finely diced apples gently right at the end.
Frying Your Apple Fritter Bites to Golden Perfection
This is where we get that amazing crunch! Heat about two inches of vegetable oil in a Dutch oven or heavy pot until it hits 350°F. If you don’t have a thermometer (though I highly suggest getting one for apple cinnamon muffins too!), you need to test it. Drop a tiny bit of batter in; if it sizzles immediately and turns golden brown in about 45 seconds, you’re good. Scoop batter by the tablespoonful into the oil, but don’t overcrowd the pot, or your oil temperature will crash, and you’ll get oily fritters! Fry them for just about 2 to 3 minutes per side until they are beautifully golden all over. Scoop them out with a slotted spoon and let them drain on paper towels immediately.
Why Temperature Control is Non-Negotiable
I learned this the hard way experimenting when I first started making these—if the oil isn’t hot enough, these fritter bites absorb it like sponges! That’s the absolute killer for any fried snack. You want that quick, hard sear on the outside so the inside steams fluffily, meaning you need that consistent 350°F. Keep that thermometer handy!
Creating the Warm Apple Vanilla Glaze
While those delicious little morsels are cooling down just a touch—we want them warm, not piping hot—whip up the glaze. Whisk that powdered sugar with just a splash of milk and the vanilla extract. You want this glaze to be nice and silky, not runny. If it looks too thick, add more liquid, one tiny teaspoon at a time until it drips slowly off your whisk. When the **apple fritter bites** are cool enough to handle but still warm, just dip the tops right into the glaze or drizzle it over liberally. They set up fast, giving you that perfect sweet coating!
Expert Tips for Perfect Apple Fritter Bites Every Time
These might be easy, but a few tricks take them from good to OMG, that’s bakery quality! The primary concern, just like in my own kitchen when adapting family recipes, is texture. You want that crispy exterior without the grease factor. Seriously, taking just an extra minute to nail these steps makes all the difference in your apple fritter bites.
First tip: Dice those apples small! If you have big chunks, they won’t cook through before the batter burns, leaving you with hard apple pieces inside your lovely fried apple treats. I aim for pieces no bigger than a pinky nail. That fine dice ensures you get fresh apple flavor in every single bite.
Second, and this is my personal ritual: As soon as the fritters come out of the oil, they go straight onto a wire rack lined with paper towels. Don’t let them sit in a bowl of paper towels, or the steam gets trapped and softens that gorgeous crisp exterior we worked so hard for! We want that wonderful snap!
I remember the first time I made these for a weekend brunch; my oil was way too cool, and they looked pale and sad. I panicked and turned the heat up way too high, and the next batch immediately burned on the outside, smelling awful! After a few practice drops, I figured out the sweet spot where they puffed up beautifully and turned golden in under three minutes total. It’s a learning process, but totally worth mastering for these amazing **apple fritter bites**.
Also, don’t skip letting the oil rest between batches! If you drop a second scoop of batter in right away, the temperature plummets. Let it climb back up to 350°F before adding more, or you’ll end up with greasy nightmares instead of crispy apple snacks.
Ingredient Notes and Substitutions for Apple Fritter Bites
Okay, let’s talk ingredients because this is where we nail down fantastic flavor in these **apple fritter bites**. Since we skipped the whole yeast routine, we are totally relying on baking powder to get our lift. Think of it as our speedy secret weapon! It reacts instantly when it hits the wet ingredients and the heat, giving us that instant puff we need for light, fluffy interiors. Don’t try to substitute this one out, or you’ll end up with dense little hockey pucks instead of perfect easy apple cinnamon treats.
Now, the apples! We finely diced them, but which kind? I almost always reach for Granny Smith. They hold their shape really well when fried and give a lovely little tart zing that cuts through the sweetness of the glaze. If you prefer things milder and sweeter, Honeycrisp or Fuji are amazing, too. Just make absolutely sure they are peeled first; the skins can get chewy when fried quickly like this.
If you want to get fancy, you can swap out half of that all-purpose flour for whole wheat, but I only usually do that if I’m making them for breakfast, because it changes the texture just a tiny bit. For that decadent, bakery-style crunch, stick to the white flour mix we used in the main ingredient list. It’s just unbeatable for frying!
Serving Suggestions for Your Mini Apple Fritters
Honestly, the best part about having these tiny, perfect apple fritter bites is figuring out when to eat them, because they work for *everything*! I usually make a double batch, because my kids see them and immediately declare them required fritter bites for breakfast fuel.
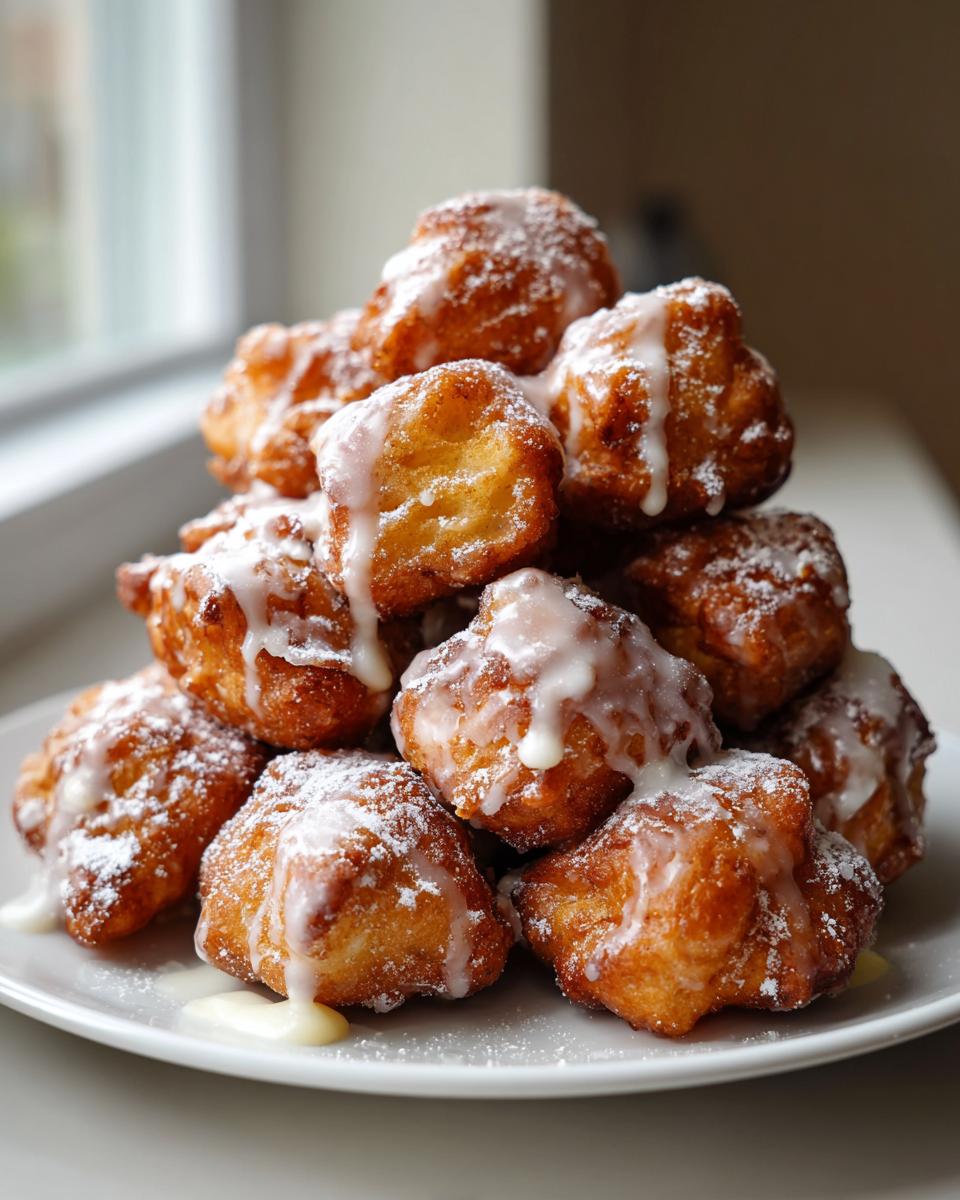
If you’re putting together a big spread, especially for a cozy fall morning, these are phenomenal next to something savory. Think of them as the star sweet element on your weekend brunch apple recipes table! They look so cute piled high on a little platter, especially if you give them an extra little dusting of powdered sugar right before serving.
But let’s be real, dessert time is my favorite time for these easy apple cinnamon treats. Try serving two or three warm bites right alongside a scoop of good quality vanilla bean ice cream. The warm glaze melts slightly into the cold ice cream, and it is just pure magic. You can’t beat that warm apple vanilla glaze with something cold!
And if you’re just looking for that perfect afternoon pick-me-up? Just one of these little guys with a strong cup of coffee or a steaming mug of spiced cider—that’s my definition of perfect cozy apple snacking right there. They are just so satisfying and easy to eat!
Storing and Reheating Your Apple Fritter Bites
Okay, this is the part where I have to be a little firm with you, because while these **apple fritter bites** are pure happiness when fresh, they definitely have a shelf life for that perfect crunch.
Listen, I’m going to level with you: there is simply no way to keep these fried beauties perfectly crispy beyond about three hours. I’ve tried! The steam from the apples inside, combined with the glaze on the outside, means they are best eaten the day you make them. They are so quick to make anyway—since they are a no-yeast recipe—that making a fresh batch is always worth it if you aren’t eating them right away.
But okay, what if you made too many for your fritter bites for breakfast scramble? Don’t fret! Store any leftovers loosely covered at room temperature. I mean that loosely—don’t seal them tightly in plastic. If you trap that warm moisture, they turn soft and gummy really fast. A slightly open container on the counter is your friend here.
Now, for reheating. This is crucial if you want to bring back some life to them. AVOID THE MICROWAVE AT ALL COSTS! The microwave is the death of fried food. It heats the moisture trapped inside, guaranteeing a soggy mess. You want to bring back that crispy exterior for your sweet apple snacks.
Instead, grab a baking sheet. Set your oven to a low 300°F. Lay the fritter bites out single-layer—don’t pile them up!—and warm them for about 5 to 7 minutes. If you have an air fryer, that’s even better; just hit them with 325°F for about 3 minutes. That gentle dry heat will crisp up the edges without burning the glaze. They come out feeling warm, slightly crunchy, and almost as good as the first batch!
Frequently Asked Questions About Apple Fritter Bites
I totally get that when you’re trying something new, especially frying, you’re going to have questions! These **apple fritter bites** are simple, but frying can sometimes feel intimidating. Here are a few things I hear all the time when readers try out this recipe for the first time.
Can I bake these instead of frying them, please?
Oh, this is the big one! Short answer: Yes, you *can*, but I have to be honest here, they won’t be the same. If you bake these, they turn into something closer to a fluffy muffin top or a steamed cake ball. Frying is non-negotiable if you want that signature shatteringly crispy exterior. Baking won’t give you that instant crust that locks in the flavor, which is key for these cinnamon apple finger food treats. If you must bake, reduce the milk by half and bake at 375°F until golden, but don’t be mad when they aren’t true fritters!
How do I stop my apple fritter bites from getting greasy?
Grease is the absolute enemy of any good mini apple fritters recipe! This almost always comes down to two things, and you need to check both before you start dipping the batter. First, you absolutely must have your oil temperature at 350°F before anything goes in. If it’s too low, the batter soaks up oil instead of crisping instantly. Second, never, ever overcrowd your pot! Those little bites need space to cook evenly. Work in small batches as the recipe suggests, giving the oil time to rebound its heat between dips. That’s how you get the lightest, crispiest finished product!
Are these truly ‘no yeast’ apple fritter bites? I really need quick apple desserts!
Yes, they are 100% yeast-free, I promise! I know how much we hate waiting for dough to rise, especially when you’re craving a sweet treat right now. We are using two teaspoons of baking powder, which gives us all the quick puff we need when the batter hits the hot oil. You get that lovely lift and fluffy interior without any of the rising time, making these perfect for when you need a quick apple dessert fix!
Can I substitute the vanilla extract in the batter?
You can, but why mess with perfection? Vanilla is such a wonderful background flavor that just enhances the cinnamon and the apple, it ties the whole thing together beautifully. If you’re out of vanilla, a splash of good quality almond extract works in a pinch, but use about half the amount because almond is much stronger. Mostly, though, I love that little hit of vanilla in the glaze—it makes the glaze taste so much richer!
How small should the apples be diced for these fritter bites?
I stress finely diced for a reason! If the apple chunks are too big, the batter might cook around them before the apple softens properly. You want tiny pieces—think pea-sized or slightly smaller—so when you bite into one of your apple fritter bites, you get soft apple texture right alongside the crisp dough, not a raw chunk of fruit. It makes for the best mouthfeel!
Estimated Nutritional Information for Apple Fritter Bites
Just a quick heads-up that these numbers are my best estimate based on the recipe ingredients; frying always adds variability depending on how much oil your fritters decide to soak up! Since these are a treat and not part of my everyday apple fritter bites rotation, I don’t sweat the small stuff, but it’s good to have a general idea!
This estimate is based on four bites being one serving size. If you eat six, well, you know what that means!
- Calories: About 350 per serving (4 bites)
- Fat: Roughly 18g
- Carbohydrates: Around 45g
- Sugar: About 25g (watch out for that sweet glaze!)
- Protein: About 4g
Remember, these values are estimates! If you use lighter oil or drizzle less of that amazing vanilla glaze, those numbers will naturally shift down a bit. Enjoy them because they taste incredible!
Share Your Homemade Apple Fritter Bites Experience
Okay, we made it! That means you are officially staring down a pile of perfect, crispy, glazed **apple fritter bites**! I hope the process was just as fun as eating them. If you followed along, you know we nailed that balance of spice, apple chunks, and crispiness in just about 30 minutes, which just goes to show you don’t need hours in the kitchen to make something truly special.
Now I absolutely need to see what you created! Here at the blog, we thrive on hearing about your kitchen adventures. Did you manage to keep your oil at exactly 350°F? Did the vanilla glaze set up nice and firm?
Please, please, please let me know how these turned out! Drop a quick rating right down below the recipe card—it helps other home cooks decide if this is the simple apple dessert idea they need next. And if you’re feeling flashy, take a picture! Tagging me on social media with your beautiful fresh batch of cinnamon apple finger food lets me celebrate your success with you.
This recipe is a keeper, meant for those times you need a quick, comforting, homemade delight. Do yourself a favor and save this post right now so these amazing **mini apple fritters** are always just a click away when that craving hits for some proper cozy apple snacking. Happy baking (and frying)!
PrintEasy No-Yeast Glazed Apple Fritter Bites
Make crispy, fluffy apple fritter bites quickly without yeast. These small treats feature fresh apples, cinnamon spice, and a simple vanilla glaze, perfect for breakfast or dessert.
- Prep Time: 15 min
- Cook Time: 15 min
- Total Time: 30 min
- Yield: About 20 bites 1x
- Category: Dessert
- Method: Frying
- Cuisine: American
- Diet: Vegetarian
Ingredients
- 2 large apples, peeled, cored, and finely diced
- 1 1/2 cups all-purpose flour
- 2 teaspoons baking powder
- 1/2 teaspoon ground cinnamon
- 1/4 teaspoon ground nutmeg
- 1/4 teaspoon salt
- 1/4 cup granulated sugar
- 1 large egg, lightly beaten
- 1/2 cup milk
- 1 teaspoon vanilla extract
- Vegetable oil, for frying
- 1 cup powdered sugar (for glaze)
- 2 tablespoons milk or water (for glaze)
- 1/2 teaspoon vanilla extract (for glaze)
Instructions
- Prepare the apples: Dice the apples finely. Set aside.
- Mix dry ingredients: In a medium bowl, whisk together the flour, baking powder, cinnamon, nutmeg, salt, and granulated sugar.
- Mix wet ingredients: In a separate small bowl, whisk the egg, milk, and vanilla extract.
- Combine batter: Pour the wet ingredients into the dry ingredients. Mix until just combined; do not overmix. A few lumps are fine.
- Fold in apples: Gently fold the diced apples into the batter.
- Heat oil: Pour about 2 inches of vegetable oil into a deep, heavy-bottomed pot or Dutch oven. Heat the oil to 350°F (175°C). Use a thermometer to monitor the temperature.
- Fry the bites: Carefully drop spoonfuls of batter (about 1 tablespoon each) into the hot oil, working in small batches to avoid overcrowding the pot.
- Cook until golden: Fry for 2 to 3 minutes per side, turning them gently until they are golden brown and cooked through.
- Drain: Remove the fritter bites with a slotted spoon and place them on a wire rack lined with paper towels to drain excess oil.
- Make the glaze: While the fritters cool slightly, whisk together the powdered sugar, 2 tablespoons of milk or water, and 1/2 teaspoon of vanilla extract until smooth. Add more liquid, one teaspoon at a time, if the glaze is too thick.
- Glaze and serve: Dip or drizzle the warm fritter bites with the vanilla glaze. Let the glaze set slightly before serving.
Notes
- For crispier bites, ensure your oil temperature stays steady at 350°F. If the oil is too cool, the fritters will absorb too much oil and become greasy.
- You can substitute half of the all-purpose flour with whole wheat flour for a slightly different texture.
- These are best eaten the day they are made while the exterior is still crispy.
Nutrition
- Serving Size: 4 bites
- Calories: 350
- Sugar: 25g
- Sodium: 250mg
- Fat: 18g
- Saturated Fat: 4g
- Unsaturated Fat: 14g
- Trans Fat: 0g
- Carbohydrates: 45g
- Fiber: 2g
- Protein: 4g
- Cholesterol: 45mg