
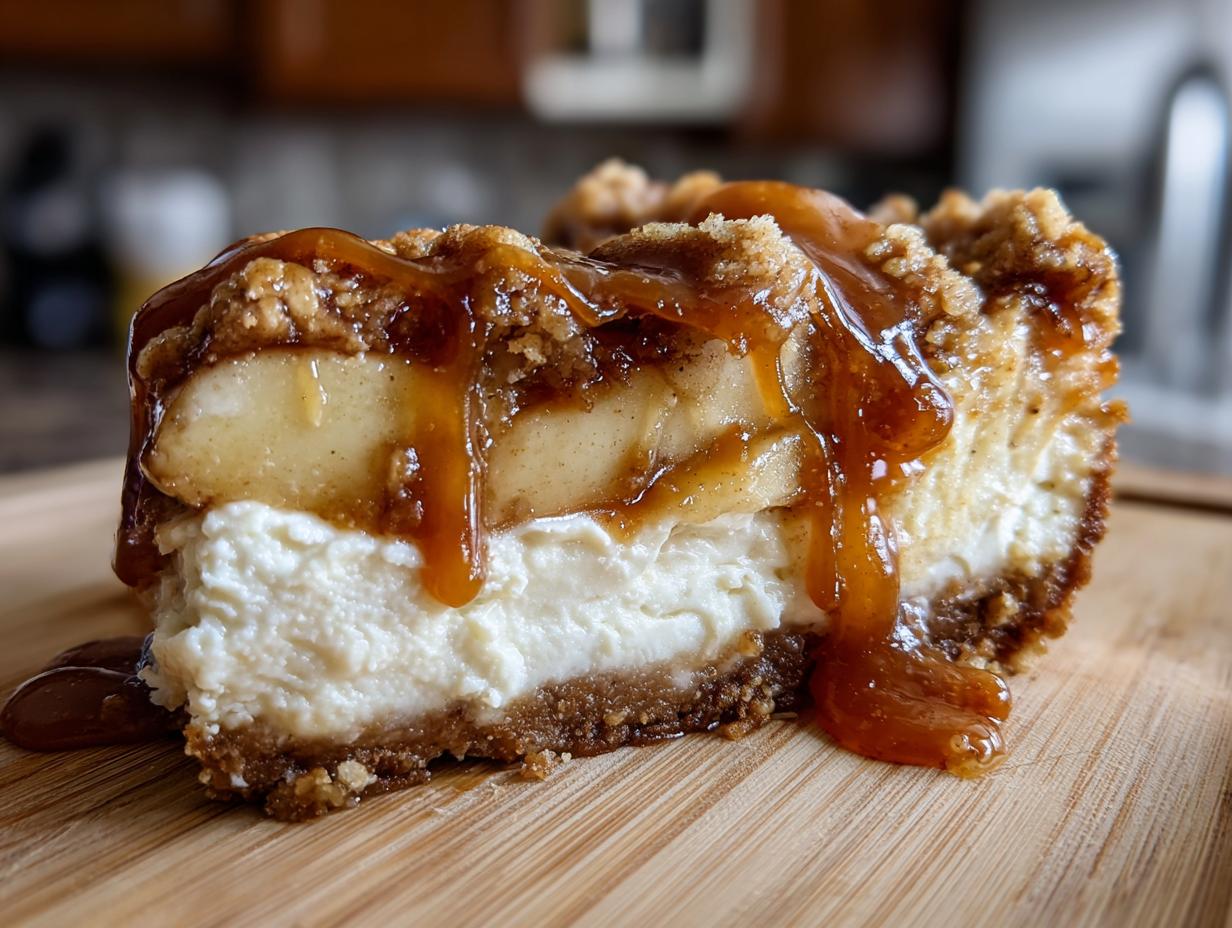
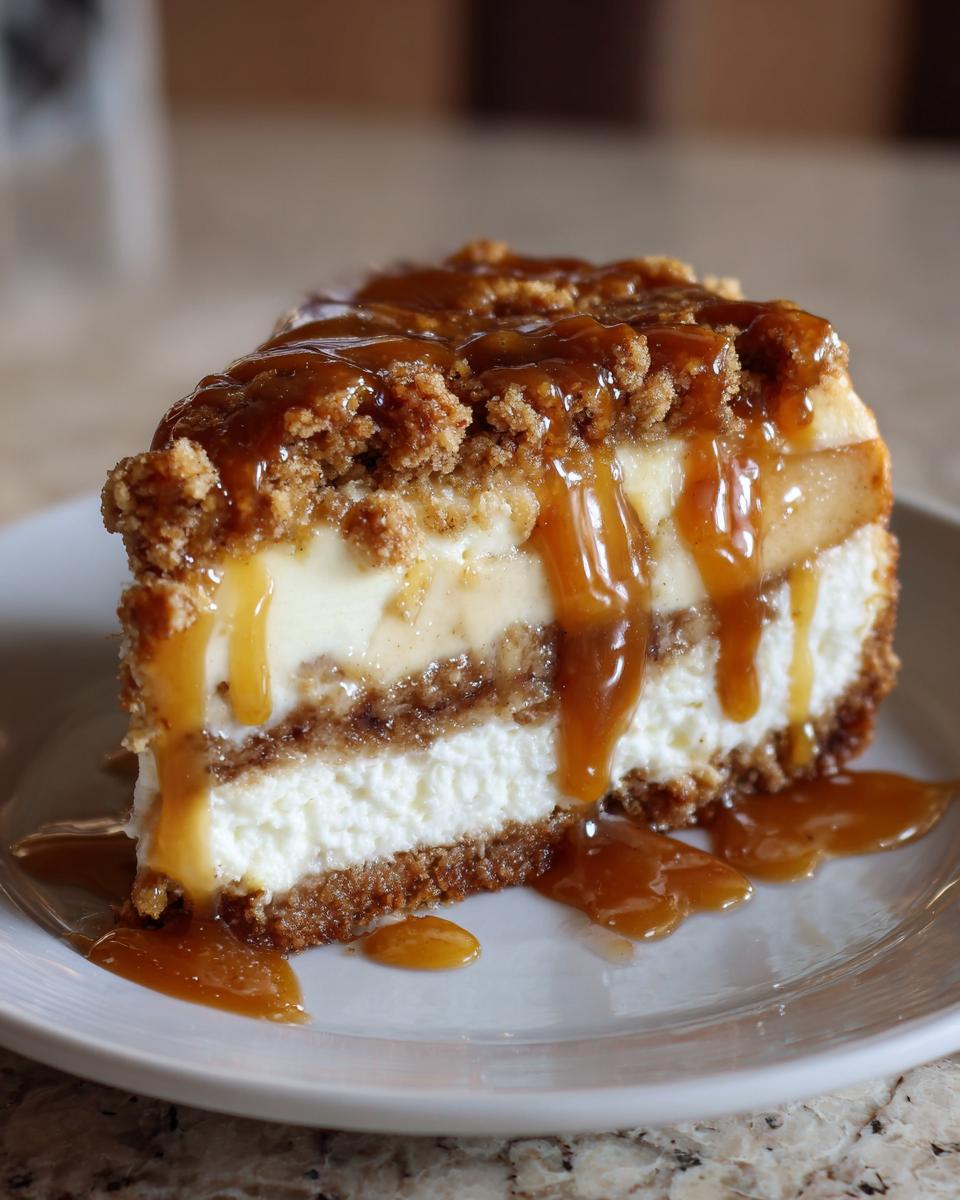
If you’ve ever looked at a creamy, dreamy cheesecake and thought, “You know what this needs? A warm fruit filling and a buttery crumble topping!” then you are my kind of person! Seriously, who can choose sides when you have two incredible desserts staring you down? With this **apple pie cheesecake** recipe, you don’t have to choose! We’re taking everything you love—that velvety smooth texture, the bright, spiced apples, and that amazing crunchy top—and fusing them into one show-stopping bite.
Maddie built this entire recipe site on the idea that heritage cooking should be accessible, not intimidating. So trust me when I say this layered dessert works every single time. It’s rich, it’s comforting, and it’s surprisingly straightforward to make, even for a baking weekend where you don’t want endless complexity. You’re going to love the results!
We are finishing this masterpiece with a generous drizzle of salted caramel, just to push it completely over the edge. If you’re looking for more amazing treats, you can check out all of our delicious dessert recipes here!
- Why This Salted Caramel Apple Pie Cheesecake Recipe Works (EEAT)
- Gathering Ingredients for Your Apple Pie Cheesecake
- Step-by-Step Instructions for the Best Apple Cheesecake
- Expert Tips for a Flawless Apple Pie Cheesecake
- Variations on the Classic Apple Pie Cheesecake
- Serving Suggestions for Your Apple Pie Cheesecake
- Storage and Reheating for Your Creamy Spiced Apple Dessert
- Frequently Asked Questions About Apple Pie Cheesecake Recipe
- Estimated Nutritional Data for This Apple Pie Cheesecake
- Share Your Apple Pie Cheesecake Creation
Why This Salted Caramel Apple Pie Cheesecake Recipe Works (EEAT)
This isn’t just another dessert; it’s designed to be a show-stopper! People flock to this recipe because it delivers that intense flavor fusion without needing a culinary degree. We focus on reliability here at the site, which is why we insist on techniques like the water bath. Trust me, using that water bath guarantees you a smooth, crack-free surface. It’s the secret Maddie insists upon to deliver the **Best Apple Cheesecake** possible, ensuring your creation looks professional every time, which is exactly what you want when serving these kinds of **show stopping desserts**.
Perfect Texture: Creamy Spiced Apple Dessert Fusion
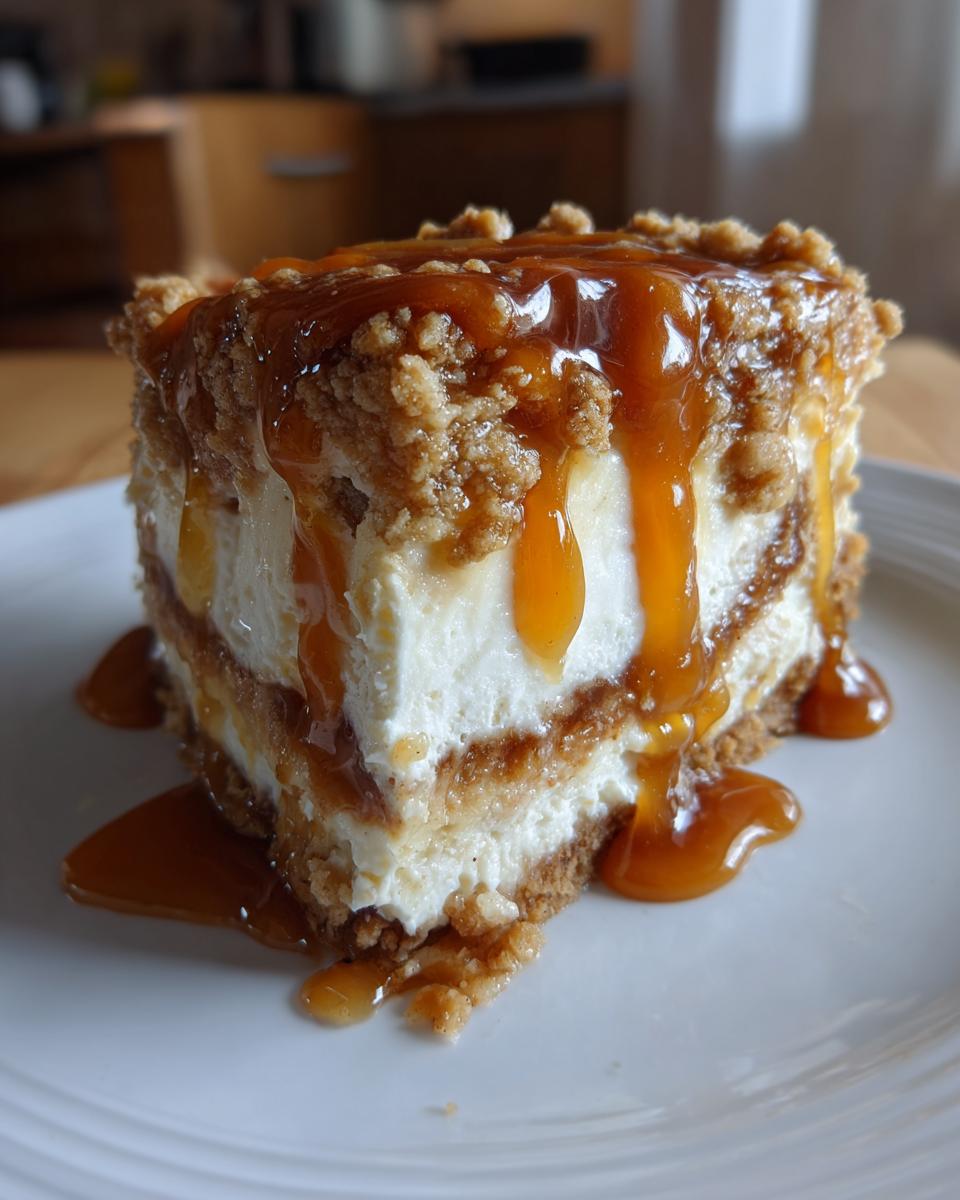
What I love most is the interplay of textures. You get that lovely, slightly tangy cheesecake layer, which cuts right through the richness of the sweet, warm, cinnamon-spiced apples. It’s not too heavy, thanks to the careful mixing we do later on. Every spoonful offers creamy smoothness followed by a soft, tender apple bite. It’s incredibly satisfying, truly a perfect example of a **creamy spiced apple dessert**.
Ideal for Fall Baking Recipes and Holidays
If you’re planning menus for gatherings, this recipe is your answer. It keeps beautifully in the fridge, meaning you can bake it the day before your big event. This makes it truly ideal for your busy schedule. For me, this is automatically on the table whenever Thanksgiving rolls around—it’s become a required **Thanksgiving Desserts Cheesecake** staple because everyone prefers it over plain pumpkin pie!
Gathering Ingredients for Your Apple Pie Cheesecake
Okay, let’s talk supplies! The great thing about this **apple pie cheesecake** is that it doesn’t require anything too crazy or hard to find. We are aiming for that perfect texture in your **buttery crust cheesecake**, so sticking to the ingredient list is key. When you’re ready to shop, here is what you’ll need to grab for this show-stopper. Planning ahead means fewer trips out, which I love!
For the Buttery Graham Cracker Crust
The crust is the foundation here, so be sure you measure correctly! We need something solid to hold all that deliciousness:
- 1 1/2 cups graham cracker crumbs
- 1/4 cup granulated sugar (for crust)
- 6 tablespoons unsalted butter, melted
For the Creamy Cheesecake Filling
Remember, the cream cheese has to be room temperature—I usually set mine out about an hour before I plan to start mixing. It makes all the difference for a lump-free filling:
- 3 (8 ounce) packages cream cheese, softened (this is crucial!)
- 1 1/2 cups granulated sugar (for filling)
- 1 teaspoon vanilla extract
- 1/4 cup sour cream
- 3 large eggs
For the Apple Layers and Topping
These are the bits that give us that incredible apple pie flavor! If you make your own spiced apples, that’s wonderful, but store-bought filling is my secret weapon when time runs short. Don’t forget the pumpkin banana bread for another easy dessert option next week!
- 2 cups spiced apple pie filling (store-bought or homemade)
- 1/2 cup oat crumble topping mix
- 1/4 cup salted caramel sauce (for drizzling)
Step-by-Step Instructions for the Best Apple Cheesecake
Alright, buckle up, because now we get into the good stuff—actually making this incredible creation! Remember what Maddie always says? Follow the tried-and-true methods, and you get reliability. This layered dessert looks way fancier than it is, I promise. If you can mix, you can conquer this bake. Let’s look at the process, paying close attention to the timing, because that’s where the magic happens.
Preparing the Crust and Preheating
First things first, get that oven warming up to 350°F (175°C). While it heats, you need to prep your 9-inch springform pan. This is the most important anti-leak step: wrap the entire outside bottom and sides tightly with heavy-duty aluminum foil. We are using a water bath later, and we absolutely do not want any seepage! Mix your graham cracker crumbs, the crust sugar, and melted butter together until it looks like wet sand, then press it firmly into the bottom of the pan. Pop that into the oven for 10 minutes to set up perfectly. Then, take it out while you mix the filling.
Mixing the Apple Pie Cheesecake Filling
Now for the filling! Grab your softened cream cheese and beat it first until it is completely smooth. No lumps allowed! Only once it’s creamy do you slowly add the filling sugar. After that’s mixed in, gently incorporate the vanilla and sour cream. The eggs are the last things in, and this is where you need a light touch. Beat in the eggs strictly one at a time, waiting until the previous egg is just incorporated before adding the next one. Stop mixing as soon as they disappear. Seriously, don’t overmix, or you’ll introduce air bubbles that cause cracks later!
Assembling and Baking the Layered Cheesecake Dessert
Time for assembly! Pour about half of that gorgeous batter right over your cooled crust. Then, take one cup of your spiced apple pie filling and spoon it evenly over the batter layer—don’t let it touch the edges too much. Next, pour on the rest of your cheesecake batter, smoothing the top lightly. Finally, spoon the remaining apple filling over this top layer. Set the foil-wrapped pan inside a larger roasting pan. Carefully pour hot water into the roasting pan until it comes about halfway up the sides of your springform. Bake this setup for about 55 to 65 minutes. You want the edges set, but the very center should still have a tiny, gentle jiggle if you nudge the pan.
Cooling and Chilling for the Perfect Apple Pie Cheesecake
This is the part that requires patience, but it’s essential for that smooth finish. Once baked, *do not* take it out yet! Turn the oven off, prop the door open just a crack—use a wooden spoon as a doorstop if you need to—and let that cheesecake sit in the warm oven for a full hour. This slow cool-down prevents sudden temperature shock. After the hour, take it out, remove the foil, and let it cool completely on a wire rack. Once it’s room temperature, cover it loosely and move it to the fridge for at least 6 hours, but honestly, that overnight chill is best for the texture. You can find more tips on baking pies over here at my friend’s pecan cream pie guide!
Expert Tips for a Flawless Apple Pie Cheesecake
Even the best recipes can go sideways without a little expert finesse! Because we put so much care into perfecting these recipes here, I want to pass along a couple of crucial pointers so your apple pie cheesecake turns out picture-perfect. This dessert is built on subtle techniques, but they make a huge difference, turning a good bake into a truly fantastic Easy Apple Dessert.
Water Bath Technique for Moisture
The water bath (the roasting pan filled with hot water) is non-negotiable for me. Why? Well, cheesecake batter is mostly eggs and cream cheese, and it bakes up dense and sensitive to dry heat. That water creates a steamy environment around the pan, which helps the cheesecake cook slowly and evenly. This heat consistency is what keeps the edges from cooking too fast and shrinking away from the center, which is what causes those awful cracks! Make sure that heavy-duty foil wrap is tight—we don’t want any water making its way into your crust!
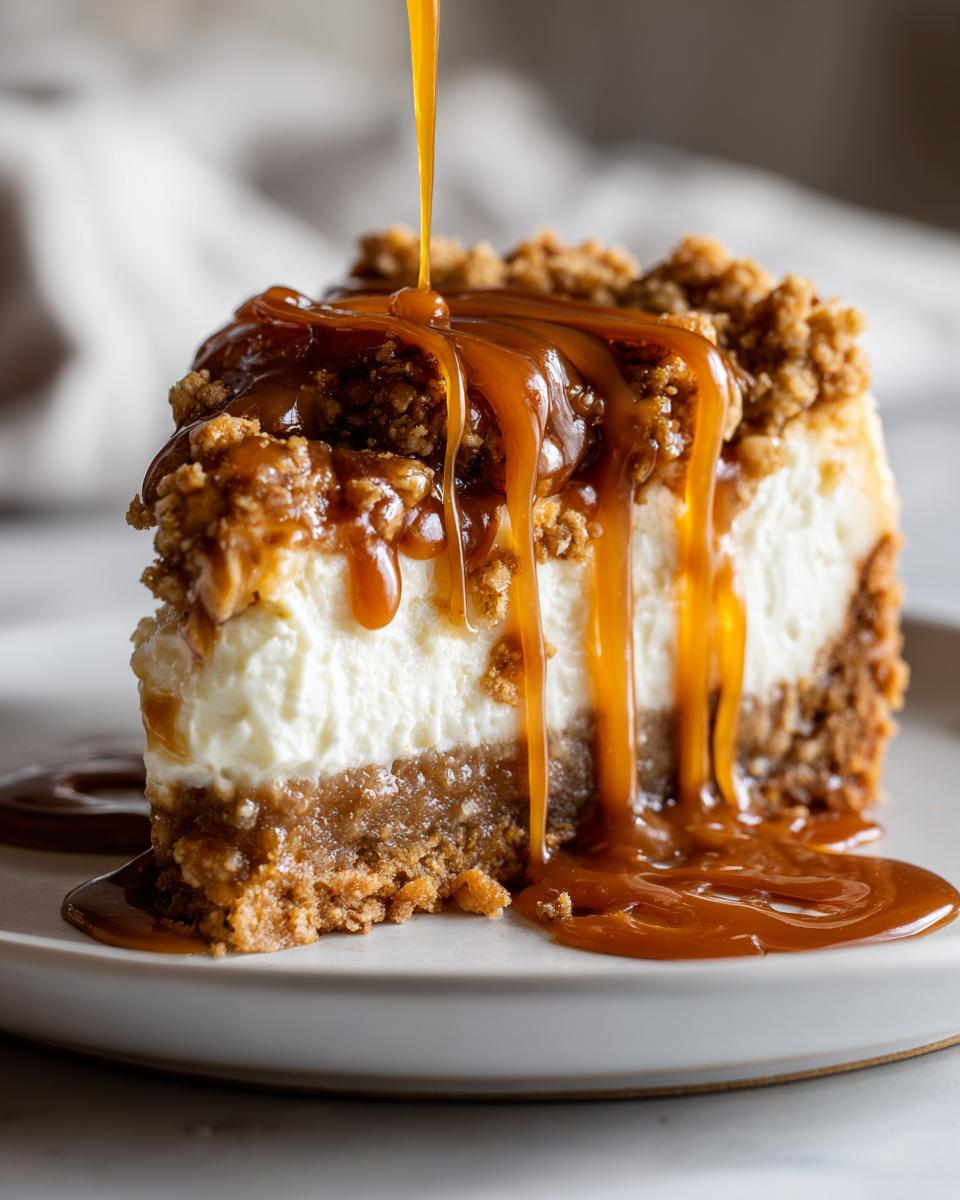
Achieving the Ultimate Salted Caramel Cheesecake Filling Drizzle
When it comes time to garnish, don’t just grab that jar of caramel straight from the fridge! Cold caramel is way too thick and heavy; it just sits there in a solid lump. For that beautiful, flowing, show-stopping drizzle you see in pictures, just warm your salted caramel sauce for about 15 to 20 seconds in the microwave. It loosens right up and drizzling becomes super easy. If you’re relying on store-bought sauce for an amazing treat, warming it makes it behave! Always add this right before serving for the best look, okay? For more quick baking wins, check out my tips for apple cinnamon muffins.
Variations on the Classic Apple Pie Cheesecake
I absolutely love that you want to tinker with this recipe! While this baked version is my gold standard, sometimes you need a different format or just want to skip the oven entirely. This layered cheesecake dessert is so adaptable, which is why I think it stays popular year after year. If you’re hosting a potluck or just don’t want to stand over a hot oven, we have some great swaps for you!
Making a No Bake Apple Pie Cheesecake Version
Oh yes, the no-bake option is perfect for those scorching summer days or when your Thanksgiving oven is already packed full of turkey! The process is simple: you skip the oven for the crust, and you skip the entire baking step for the filling. You just mix up those creamy ingredients, pour them over the crust, and then you increase that chilling time. Aim for at least 6 to 8 hours, or until it’s perfectly firm. Make sure your apple filling is fully cooled before spooning it on top for the best results.
Trying Apple Crumble Cheesecake Bars
If you prefer something you can grab easily without worrying about slicing a perfect wedge, bars are the way to go! Swap out your 9-inch springform pan for a 9×13 inch baking dish—you can still line it with parchment for an easy lift. You’ll bake this version for slightly less time since it’s shallower. Once it chills completely, you just slice it right up into squares. These bars are so fun for parties, and they are just as delicious as the round version!
For other easy fall treats that are a little less fussy, you can always check out my favorite apple cranberry cobbler recipe as well!
Serving Suggestions for Your Apple Pie Cheesecake
Now that you’ve made this incredible dessert, the final step is showing it off! Since this is peak **comfort food desserts** territory, you have to serve it cold, straight from that long chill. We usually use big, flat dessert plates to let the layers really show off. My absolute favorite way to serve this creamy spiced apple dessert is with a big dollop of good vanilla bean ice cream melting slowly beside the slice.
If you aren’t feeling the ice cream, a simple cup of strong, hot coffee works perfectly to cut through the richness. I sometimes set out a little bowl of extra salted caramel sauce on the side, too, just in case someone wants to go totally overboard—and who can blame them? For other great pairings that are easy for weekends, try making my coffee cake muffins!
Storage and Reheating for Your Creamy Spiced Apple Dessert
Sadly, these glorious slices might not last long, but if you’re lucky enough to have leftovers of this creamy spiced apple dessert, storage is simple. You absolutely must keep any remaining **apple pie cheesecake** tightly covered in the refrigerator. It’s a dairy-heavy bake, so room temperature is a no-go!
Here’s the key thing: If you already drizzled the salted caramel on top, it will start to weep and get messy after a day in the fridge. For the best texture, I always recommend storing the plain cheesecake slices and then adding any extra caramel or crumble right before you serve the next piece. It stays fresh and delicious for up to four days this way!
Frequently Asked Questions About Apple Pie Cheesecake Recipe
I always wind up with a ton of questions after I bake something this decadent, and I bet you do too when trying a new **apple pie cheesecake recipe**! Don’t worry about those tricky spots; we’ve got you covered. We tested all the common pitfalls so you don’t have to stress about your baking day. These tips make sure your dessert is successful, even if you are new to layering things!
Can I make the apple pie cheesecake ahead of time?
Oh, totally! In fact, I strongly recommend it. For the very best texture—that firm, creamy, sliceable dream—you need a full overnight chill. Make the whole thing, bake it, cool it slowly, and cover it up tightly in the fridge. The only thing you shouldn’t do ahead of time is add the toppings! Wait until you are ready to serve before you add the crumble and that beautiful salted caramel drizzle.
What if my cheesecake cracks during baking?
Listen, it happens to the best of us, even when you use that water bath! A tiny crack is not the end of the world, trust me. Remember, the whole top of this **Fall Cheesecake** is covered in crunchy oat crumble and gooey caramel drizzle. If you do get a crack, just be generous with the toppings, and nobody will ever know the difference. The slow cooling process we use minimizes cracks, but perfection isn’t required when it tastes this good!
Can I use fresh apples instead of pie filling for this **Fall Cheesecake**?
You absolutely can, and using fresh apples can be so much fun! If you go that route, you can’t just toss raw slices in there, though; they need a little head start. You’ll need to sauté those fresh apples with some sugar, cinnamon, and a spoonful of cornstarch until they soften up nicely and the juices thicken a bit. Once they are cooled down, *then* you can layer them into the cheesecake just like you would the store-bought filling!
If you want to see my favorite way to make frosting—which is completely unrelated but delicious—check out my guide for carrot cake cream cheese frosting!
Estimated Nutritional Data for This Apple Pie Cheesecake
Now, I’m not a nutritionist or anything—I’m just here to bake comfort food—but I know some of you are curious about the details! Based on our ingredient list here for one slice of this amazing **apple pie cheesecake**, here are the estimates. Just remember, these numbers can jump around depending on your specific brand of apples or caramel!
Here’s the breakdown per slice:
- Calories: 450
- Fat: 28g
- Carbohydrates: 45g
- Protein: 7g
Since we’re using rich cream cheese and that buttery crust, it tips the scales a bit, but honestly, that’s what makes it such a great **comfort food dessert**! Eat it slowly and savor every bite!
Share Your Apple Pie Cheesecake Creation
Whew! Now that you’ve got the full guide to making this incredible **layered cheesecake dessert**, I really, really want to see what you came up with! This is the part I love the most—seeing all your bakes pop up online.
When you share your photos, please tag us! And if you tried out the recipe, please scroll back up and give it a rating using the five-star system right below the title. Those ratings are so important because they help me know if the instructions are clear and if the recipe is truly reliable—that’s how we keep building our community of trusted home cooks here together.
If you had any tweaks that just made your **apple pie cheesecake** extra special, feel free to leave a comment or reach out through the contact link! Also, if you made the recipe and shared it on Pinterest, you might find your beautiful creation featured next to this original recipe, like the one over at this amazing post!
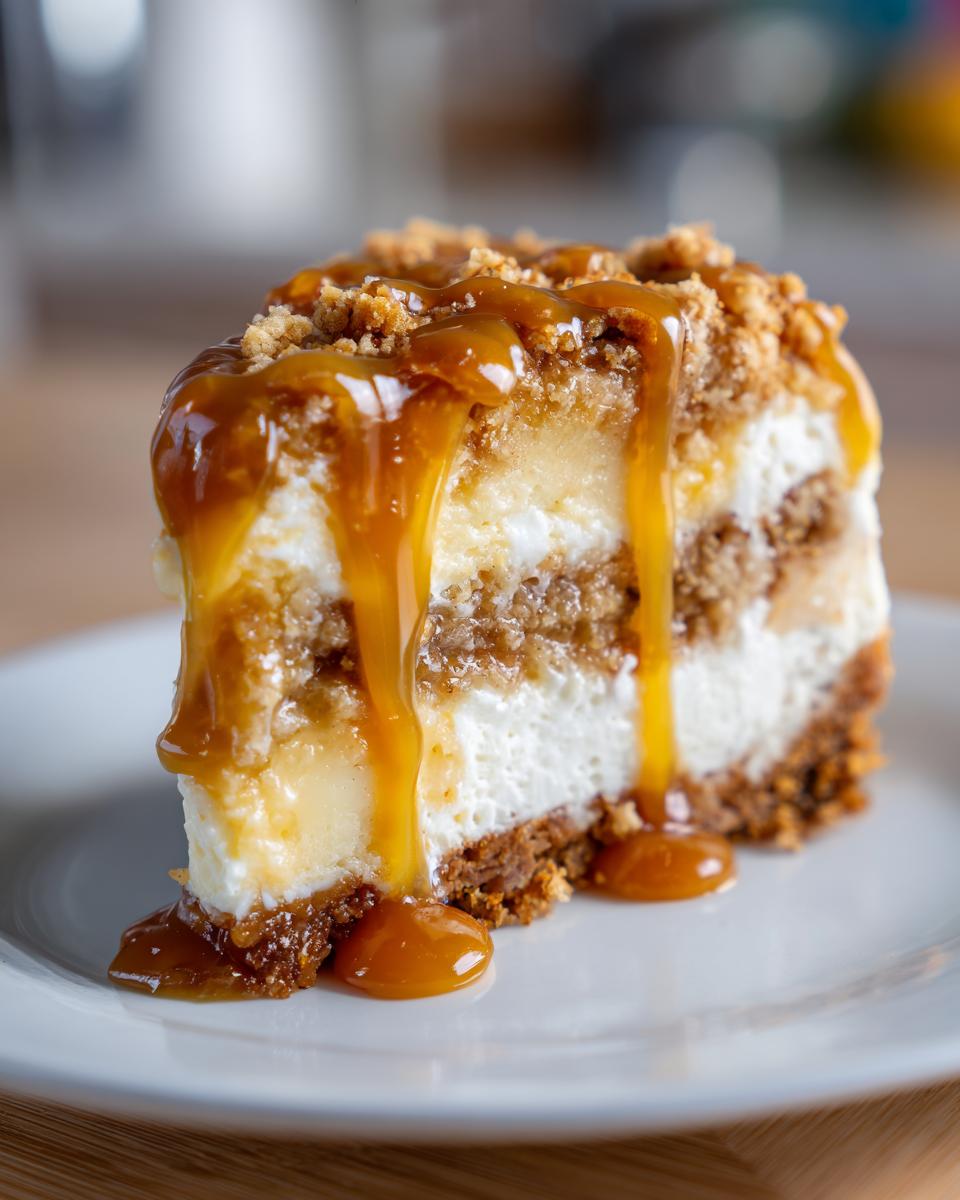
PrintSalted Caramel Apple Pie Cheesecake with Crumble Topping
You get a layered dessert combining creamy cheesecake, spiced apples, and a buttery crumble, finished with salted caramel. This recipe delivers a show-stopping treat perfect for fall gatherings.
- Prep Time: 30 min
- Cook Time: 65 min
- Total Time: 8 hours 35 min
- Yield: 12 servings 1x
- Category: Dessert
- Method: Baking
- Cuisine: American
- Diet: Vegetarian
Ingredients
- 1 1/2 cups graham cracker crumbs
- 1/4 cup granulated sugar (for crust)
- 6 tablespoons unsalted butter, melted
- 3 (8 ounce) packages cream cheese, softened
- 1 1/2 cups granulated sugar (for filling)
- 1 teaspoon vanilla extract
- 1/4 cup sour cream
- 3 large eggs
- 2 cups spiced apple pie filling (store-bought or homemade)
- 1/2 cup oat crumble topping mix
- 1/4 cup salted caramel sauce (for drizzling)
Instructions
- Preheat your oven to 350°F (175°C). Wrap the outside of a 9-inch springform pan tightly with heavy-duty aluminum foil.
- Prepare the crust: Mix graham cracker crumbs, 1/4 cup sugar, and melted butter. Press the mixture firmly into the bottom of the prepared springform pan. Bake for 10 minutes. Let cool slightly.
- Prepare the cheesecake filling: In a large bowl, beat the softened cream cheese until smooth. Gradually beat in 1 1/2 cups sugar until combined. Mix in vanilla extract and sour cream. Beat in eggs one at a time, mixing just until incorporated after each addition. Do not overmix.
- Assemble the layers: Pour half of the cheesecake batter over the cooled crust. Spoon 1 cup of the apple pie filling evenly over the batter. Top with the remaining cheesecake batter. Spoon the remaining 1 cup of apple filling over the top layer.
- Bake in a water bath: Place the foil-wrapped springform pan into a larger roasting pan. Carefully pour hot water into the roasting pan until it reaches about halfway up the sides of the springform pan.
- Bake for 55 to 65 minutes, or until the edges are set and the center has a slight jiggle.
- Cool the cheesecake: Turn off the oven, crack the door open slightly, and let the cheesecake cool in the oven for 1 hour. Remove from the water bath, remove the foil, and let it cool completely on a wire rack.
- Chill: Refrigerate the cheesecake for at least 6 hours, or preferably overnight, before serving.
- Finish before serving: Before slicing, top the chilled cheesecake with the oat crumble topping and drizzle generously with salted caramel sauce.
Notes
- For the best texture, bake the cheesecake in a water bath to maintain moisture and prevent cracking.
- If you prefer a no-bake version, chill the cheesecake base for 4 hours, then layer with cooled apple filling and top with crumble and caramel. Do not bake.
- You can substitute the oat crumble with a simple streusel topping made from flour, brown sugar, and butter.
Nutrition
- Serving Size: 1 slice
- Calories: 450
- Sugar: 45g
- Sodium: 350mg
- Fat: 28g
- Saturated Fat: 17g
- Unsaturated Fat: 11g
- Trans Fat: 0.5g
- Carbohydrates: 45g
- Fiber: 1g
- Protein: 7g
- Cholesterol: 110mg