
Oh, don’t even get me started on those sad little, pre-packaged English muffins where the insides are just this uniform, spongy layer. We deserve better for our weekend brunch! That’s why I’m sharing my absolute favorite recipe for **homemade English muffins**. Seriously, this is the easiest no-knead method you’ll ever find, and it delivers those glorious, beautiful, buttery pockets—the famous nooks and crannies—that make a perfect breakfast sandwich base. Here at MDLATDMM, Maddie Thompson believes the best things come from your own kitchen, and these completely change the game compared to anything store-bought. Trust me, you’ll never go back!
- Why This No-Knead Recipe Makes the Best Homemade English Muffins
- Simple Ingredients for Classic Homemade English Muffins
- Step-by-Step Instructions for Making English Muffins at Home
- Tips for Perfect Homemade English Muffins Every Time
- Serving Suggestions for Your From Scratch Muffins
- Storage and Reheating Instructions for Homemade English Muffins
- Frequently Asked Questions About Making English Muffins at Home
- Estimated Nutritional Information for Homemade English Muffins
- Share Your Homemade English Muffins Success
Why This No-Knead Recipe Makes the Best Homemade English Muffins
Look, I know you see ‘bread’ and immediately think you need to spend twenty minutes elbow-deep in flour, kneading away until your arms ache. Not here! That’s the magic of this no-knead dough; it does all the heavy lifting while it rests. Since we skip the kneading, the gluten structure develops gently and evenly during that long first rise. This results in such a tender crumb that’s just begging to be slathered in butter later.
The other big secret to why these **homemade English muffins** beat the store brand every single time is how we cook them. We’re using a low-and-slow, dry-skillet method. You have to treat them gently on the heat! It takes longer, sure, but that slow cook time allows the inside to steam and puff up perfectly before the outside sets. If you want the real deal, you need that patience.
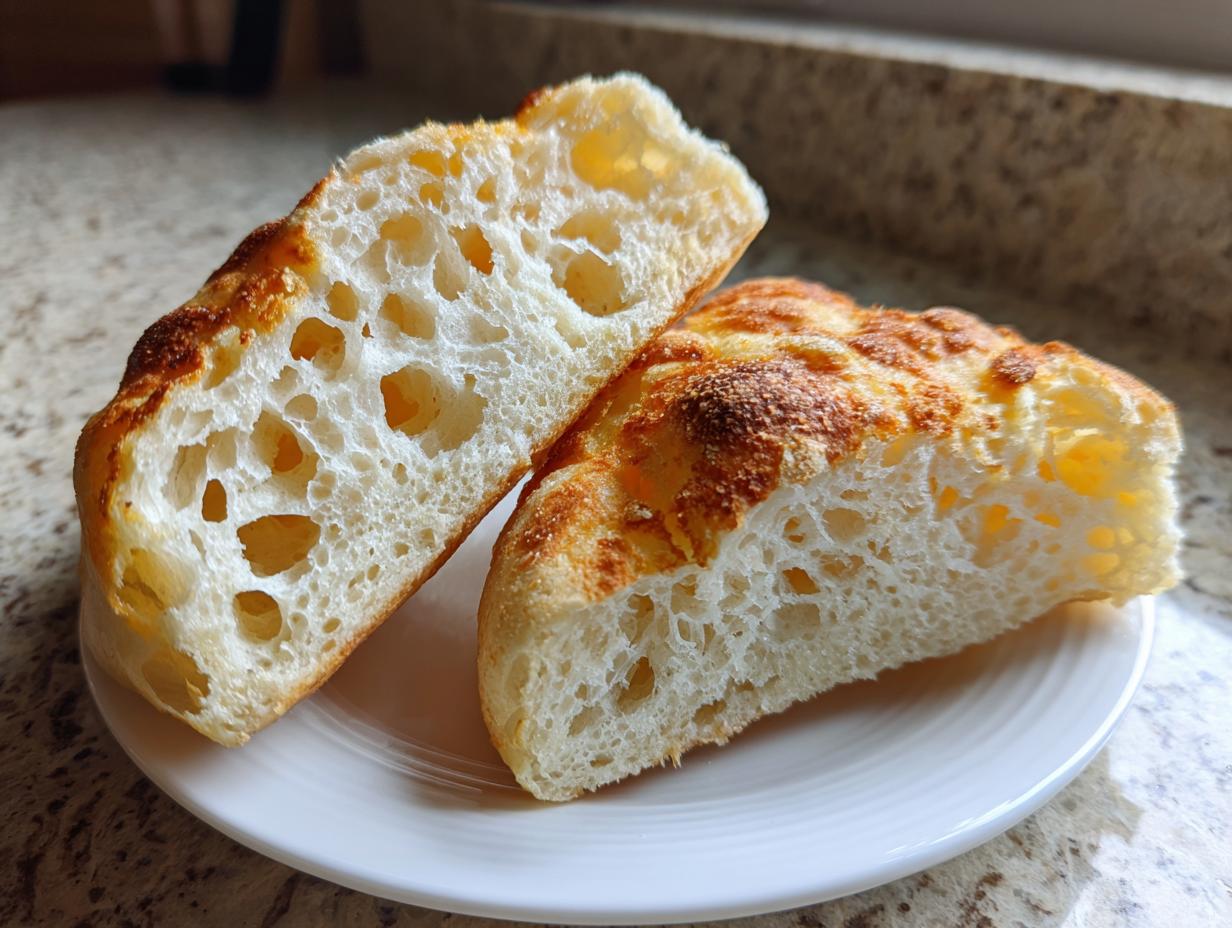
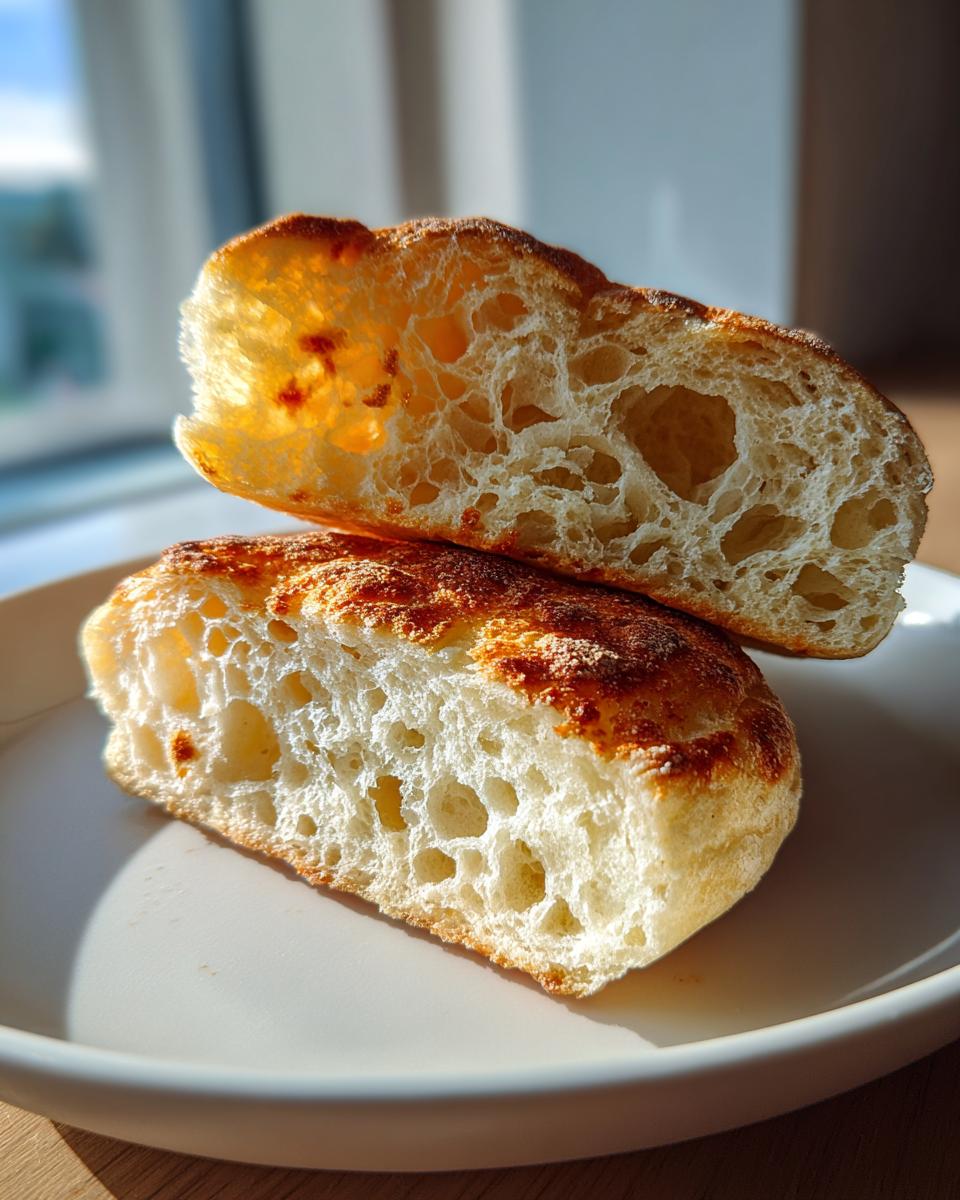
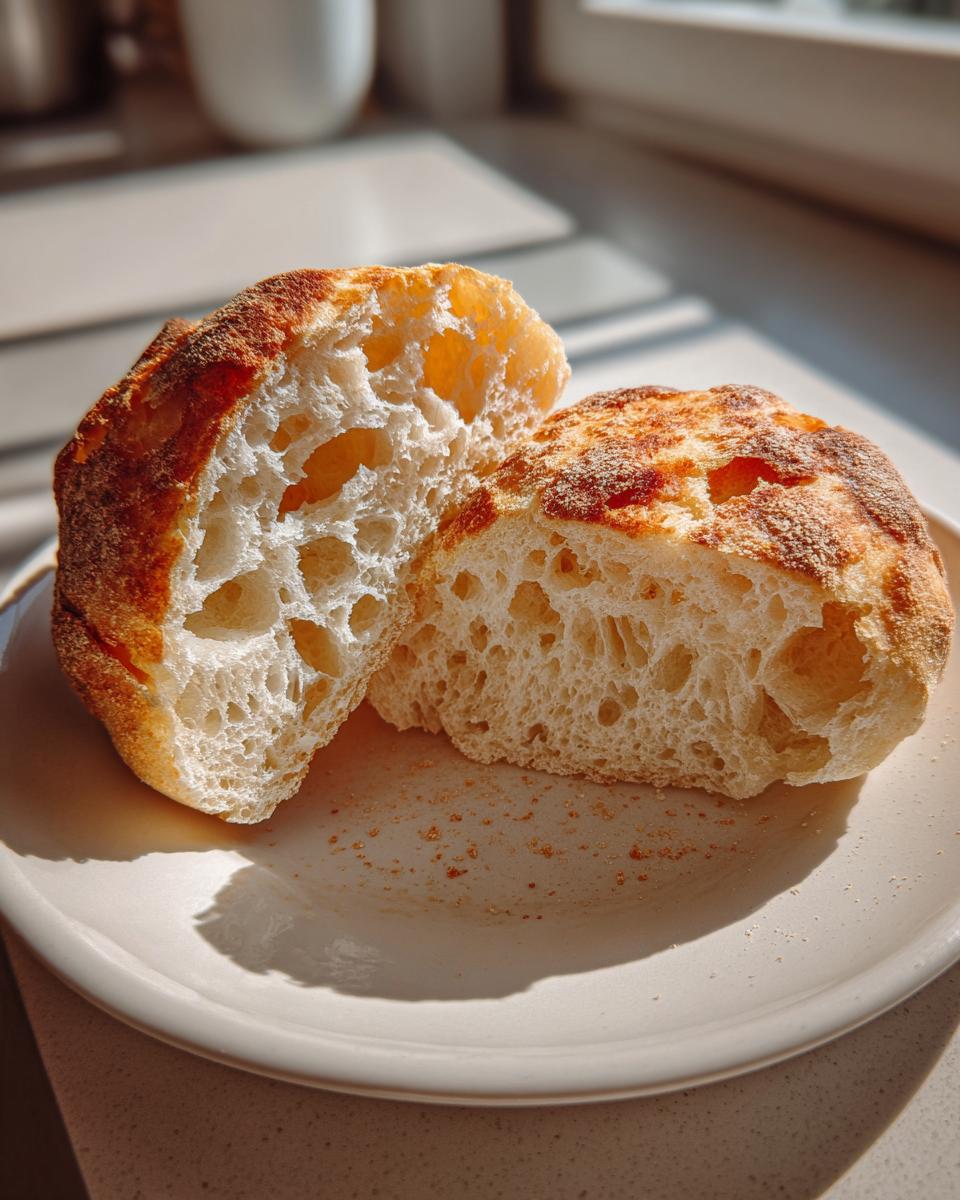
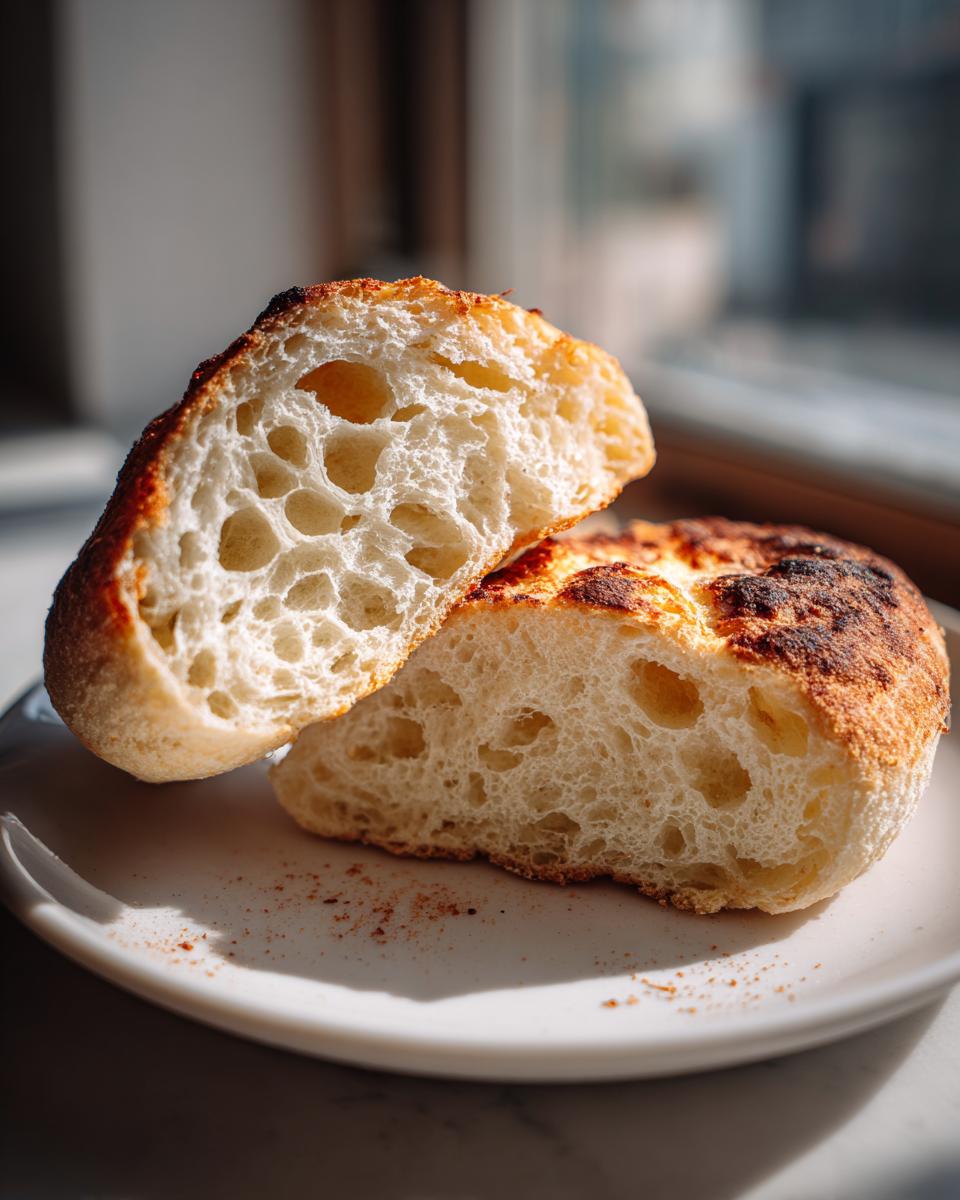
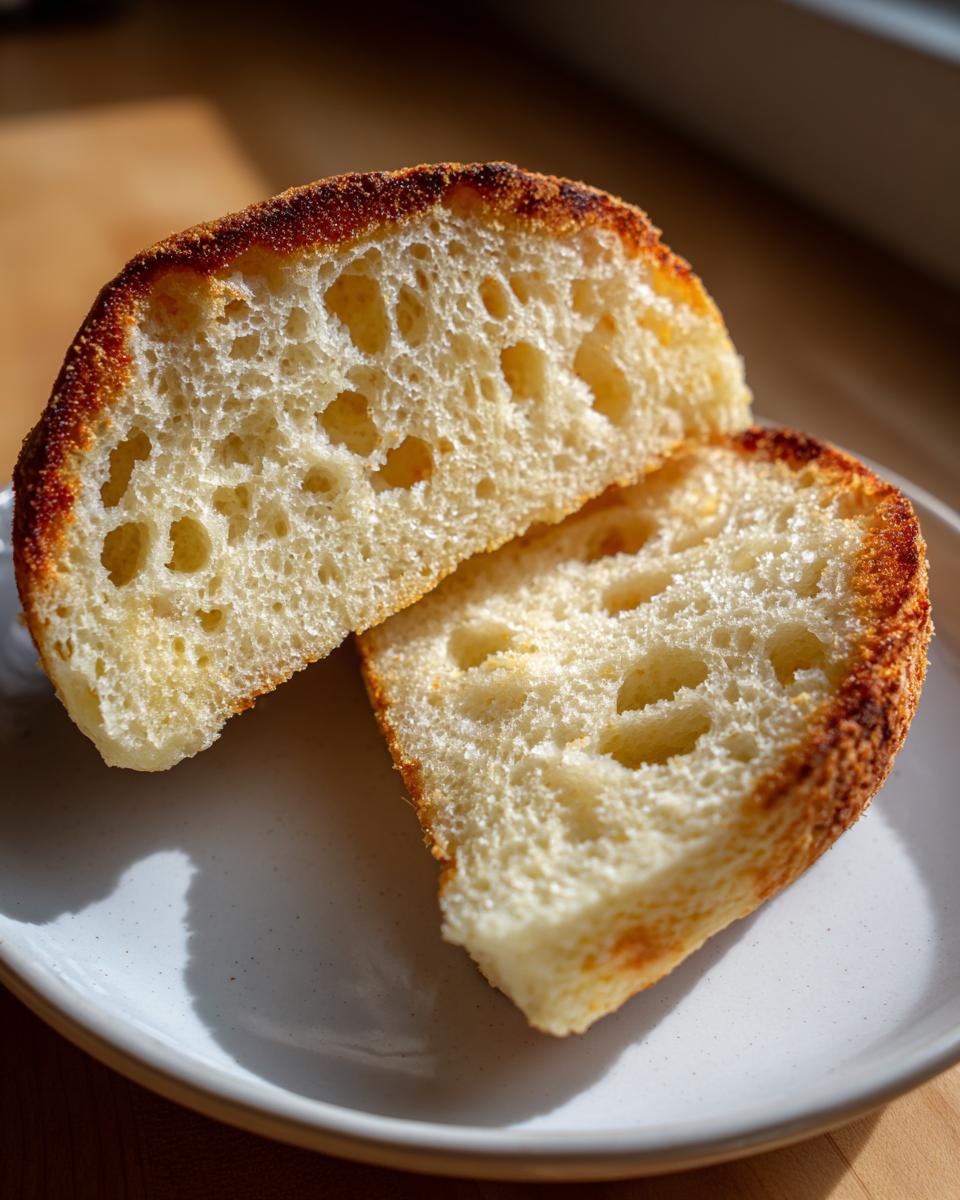
Achieving the Signature Nooks and Crannies Texture
This is what everyone wants, right? Those little caves that melt butter right down to the bottom? The secret to the amazing **Nooks and Crannies Texture** happens in two spots. First, that second, short 30-minute proof lets the yeast create just enough gas bubbles without over-proofing. When those slightly gassy dough rounds hit the warm skillet, the gas tries to escape.
If you cook them too hot, the outside seals up instantly, trapping that air inside in a solid block. But cooking them low and slow on a dry skillet—yes, dry!—lets the heat penetrate slowly. The gas has time to create all those little air channels before the protein sets. It’s just simple physics, but it creates bakery-style perfection right in your kitchen. You can check out some of my other favorite easy breakfast ideas while your dough is sleeping!
Simple Ingredients for Classic Homemade English Muffins
When I say this is simple, I mean it! You likely have everything you need sitting in your pantry right now. We aren’t messing around with fancy flours or dozens of complicated steps here. Making these **from scratch muffins** is all about using basic, honest ingredients that work together beautifully. I’ve listed out exactly what you need below so you can gather everything easily before you start mixing up that shaggy dough.
Ingredient Notes and Substitutions
Let’s talk quick tips for those ingredients. That ‘Warm Water’ measurement isn’t just thrown in there for decoration; it needs to hit that sweet spot between 105°F and 115°F. Too hot, and you kill the yeast dead—no rise, no puff! Too cold, and it just sleeps.
Also, don’t skip the dusting ingredient! You absolutely need cornmeal or semolina for the baking sheet and the tops of the muffins. That gritty texture is what lifts them slightly off the pan while cooking and gives them that classic, slight exterior crunch we love. It matters way more than you might think!
Step-by-Step Instructions for Making English Muffins at Home
Okay, let’s get messy! Now that our dough has had its long nap—at least an hour, maybe more depending on your kitchen temperature—it’s time to turn that sticky blob into perfect breakfast rounds. Remember, we’re aiming for easy, delicious **homemade English muffins**, and the process is surprisingly simple once you get past the first rise. Just follow these steps, and you’ll have that classic texture ready for the griddle!
Mixing the No Knead Bread Dough
Grab your biggest bowl because this is where the magic starts, even though we stop working almost immediately! Add the yeast to your warm water and let it sit for about five minutes until it gets nice and foamy—that foam tells you it’s alive and ready to go to work. Then, you just pour that liquid right into your flour, sugar, and salt. With a sturdy wooden spoon, mix it all up until you absolutely cannot see any dry flour pockets left. Seriously, stop stirring right there! No kneading allowed; we want that shaggy, sticky dough for easy breakfast baking.
The Crucial Low-Heat Skillet Cooking for Homemade English Muffins
This next part dictates whether you get flat hockey pucks or fluffy treasures. After your 30-minute rest for the cut rounds, you preheat your cast-iron skillet. And I mean *low* heat. I like to set mine to just above the absolute lowest setting. You must cook these **homemade English muffins** dry—no butter or oil in the pan! Lay them gently on the warm surface, spacing them out, and let them cook slowly for a good 8 to 12 minutes per side. If they get too dark too quickly, your heat is too high, and you’ll burn the exterior before the inside puffs up into those glorious air pockets. You can see some great visual guides over at Simply Savory Kitchen if you need an extra look while you wait for the rise!
Once they are nicely golden, take them off the heat. If you’re curious about other slow-rise bread projects, check out how I handle my sourdough starter, which also rewards patience!
Tips for Perfect Homemade English Muffins Every Time
You’ve cooked your **homemade English muffins**, and they look golden brown—amazing! But wait, don’t reach for the chef’s knife yet! That’s the biggest mistake people make when they want those airy pockets to shine. You absolutely must split these open with a fork, pricking gently around the edges.
Slicing with a knife squishes those delicate air channels closed. Using a fork keeps the surface delightfully ragged and open, maximizing the surface area so that melted butter just plunges right in. It’s a small technique, but it makes a huge difference in the final experience.
Here’s my little piece of advice from my time playing around in the kitchen: when you’re cutting out the rounds, try not to press down too hard when using your cutter. If you push too firmly, you compress the sides of the dough, sealing off those crucial edges, which hinders the beautiful rise in the skillet. I try just to press straight down and lift right up. We want fluffy **homemade English muffins**, not dense discs! If you are looking for something fast later in the week, I have some great quick weeknight dinners up on the site too!
Serving Suggestions for Your From Scratch Muffins
Now that you’ve done the rewarding work of **making English muffins at home**—and I bet they smell incredible—the best part is deciding how to eat them! The beauty of a great breakfast base like this is its versatility. They are naturally a little savory from the salt and cornmeal, which means they pair perfectly with sweet things, or you can turn them into the star of a savory brunch!
Since they are so wonderfully open with all those air channels, they are truly designed to soak up everything you put on them. Forget those thin store-bought versions that just get soggy; these are sturdy enough for even the heaviest breakfast sandwich fillings. These options are perfect for any elevated weekend morning or anytime you need some great **Brunch Ideas Homemade**!
Best Toast Toppings Favorites
If you ask me, the first round of muffins should always be split, lightly toasted so the edges crisp up, and then drowned in butter. Once the butter melts into those gorgeous pockets, you can go in any direction! Here are a few of my go-to favorites for serving up these skillet breads:
- Classic Jam & Butter: You can’t beat strawberry preserves or homemade tart raspberry jam. The sweetness pools in those nooks perfectly.
- Cream Cheese & Chives: Whisk cream cheese with a drizzle of olive oil, salt, and fresh chopped chives for a savory, tangy treat.
- Avocado Mash: Top with smashed avocado, flaky sea salt, and a few red pepper flakes. Excellent for starting your day right.
- Honey Butter: Mix softened butter with a drizzle of local honey until slightly fluffy. It’s simple decadence!
If you’re looking for a hearty companion dish for your brunch spread, check out my recipe for Jiffy Corn Casserole—it uses simple ingredients too and makes a perfect side!
Storage and Reheating Instructions for Homemade English Muffins
So, you made a giant batch of glorious **homemade English muffins**—and good for you! They are just too good to eat all in one morning, I know the struggle. The great news is that these skillet breads store really well, but you have to treat them right, especially if you want to keep that fantastic texture.
If you think you’ll eat them within two or three days, keeping them at room temperature in a sealed plastic bag is totally fine. They stay soft enough to split easily. But honestly, if I know I won’t get through them that fast, I go straight to the freezer. Freezing is your best friend for any bread you make from scratch!
When freezing your **homemade English muffins**, make sure they are completely cool first, or the moisture will turn to ice crystals inside the bag. If you want to reheat one later, don’t bother with the microwave; that will just make them tough and rubbery right away. The real trick is to skip right to toasting. Split the muffin, put it straight into the toaster, or even crisp it up face-down in a dry, warm skillet for just a minute or two. That gentle, dry heat re-crisps the edges and warms the interior perfectly, waking up all those beautiful little air channels again.
Frequently Asked Questions About Making English Muffins at Home
Whenever I get questions about this recipe, they usually boil down to texture or equipment. I completely get it! Baking bread from scratch can feel intimidating, but these **easy breakfast baking** muffins are super forgiving if you know a few little tricks. Here are the most common things folks worry about when trying these **from scratch muffins** for the first time!
Can I use a regular pan instead of a cast-iron skillet for these homemade english muffins?
You absolutely can! I love my cast iron because it holds a steady temperature like nothing else, but if you don’t have one, don’t panic. What you *really* need is a pan with a heavy bottom. Thin pans heat up unevenly and can create hot spots that will scorch your muffins before the inside is cooked. If you use a stainless steel pan or a good quality griddle, just keep that heat dial as low as you can manage while still getting that gorgeous golden color. That low, even heat is what guarantees that incredible **Nooks and Crannies Texture** we are aiming for!
Why are my homemade bread recipes not rising well?
Ah, the dreaded flat bread! Ninety percent of the time, this is a yeast drama situation. Remember that warm water needs to be between 105°F and 115°F. If your water is too hot—say, boiling hot—you’ve accidentally bleached the yeast, and it dies on the spot. If it’s lukewarm or cold, the yeast just wakes up grumpy and slow. If you check your yeast foam, and it’s thin or non-existent after five minutes, dump that batch and start over with properly warmed water.
The other thing is temperature. Yeast likes to be cozy, around 70°F or warmer. If your kitchen is drafty or cold, the dough might take twice as long to double, or worse, it stalls out. Try setting your bowl in a barely warm, turned-off oven with the light on while it rises. That tiny bit of warmth goes a long way for these **quick morning bakes**.
How long do the homemade english muffins need for the second proof?
This second rest period, which happens *after* you’ve cut out the rounds and dusted them with cornmeal, is short and sweet. You don’t want them to double again like they did the first time. We are just letting the cut edges relax a little bit before they hit the heat. I usually let them sit on the counter, loosely covered, for about 30 minutes. You’re looking for them to look a little puffy and soft—not dramatically larger. If you let them go way too long here, they can deflate when they hit the skillet. If you are looking for more ideas on easy breakfast options, don’t forget to look through my easy breakfast ideas!
Estimated Nutritional Information for Homemade English Muffins
I’m happy to share the numbers, but I have to give you the standard home cook disclaimer first! Since I am not a professional lab, these figures are just my best estimate based on dividing the ingredients listed for about 11 muffins. If you use a little more butter for greasing, or if your flour scoops differently than mine, the final results will change a bit. Treat this guide as just that—a friendly estimate for enjoying your **from scratch muffins**!
These values are calculated per single muffin serving:
- Calories: Around 180
- Total Fat: About 3 grams (mostly the 2 tablespoons of butter we added to the dough)
- Carbohydrates: Roughly 34 grams
- Sugar: A small amount, just 2 grams, coming mainly from the teaspoon of granulated sugar we added to feed the yeast.
- Protein: Approximately 5 grams
- Fiber: About 1 gram
See? Not bad for a completely cozy, buttery breakfast item! Knowing these simple ingredient recipes are so straightforward means you can easily adjust things if you want to swap out any white flour for whole wheat in the future, too. It’s all about taking control of what goes into your brunch!
Share Your Homemade English Muffins Success
Well, my friend, if you’ve made it this far, you’ve successfully conquered the grocery store and produced a batch of truly fantastic **homemade English muffins**! Doesn’t that smell amazing? I really, truly hope you loved making these—since I developed this recipe based on my own kitchen experiments, I’m always so excited (and slightly nervous!) to hear how they turn out for you.
I’d absolutely love it if you took a moment to come back here and leave a rating. Five stars if you achieved full nooks and crannies, and maybe four if you had a slight issue with browning! Your feedback really helps me, Maddie, keep refining these recipes to be as easy and reliable as possible for everyone who stops by MDLATDMM. Every comment you leave about your experience **making English muffins at home** helps another busy home cook feel confident enough to try them next weekend.
And please, if you snap a photo of those beautiful, buttery creations split open, tag us on social media! Seeing your golden perfection makes my whole week. There’s just nothing better than connecting with our community over a simple, perfect breakfast made with love.
If you ever have a question about this recipe, or just want to share a victory, please don’t hesitate to reach out through our contact page. Happy baking, and enjoy every single toasted, jam-covered bite from the MDLATDMM team!
PrintThe Easiest No-Knead Homemade English Muffins with Perfect Nooks and Crannies
Make classic, soft English muffins from scratch using a simple, one-bowl, no-knead method. These skillet-cooked muffins develop the signature nooks and crannies that hold melted butter perfectly.
- Prep Time: 20 min
- Cook Time: 25 min
- Total Time: 2 hours 15 min
- Yield: 10-12 muffins 1x
- Category: Breakfast
- Method: Skillet Cooking
- Cuisine: American
- Diet: Vegetarian
Ingredients
- 3 cups All-Purpose Flour
- 1 tablespoon Granulated Sugar
- 1 teaspoon Salt
- 1 packet Active Dry Yeast (2 1/4 teaspoons)
- 1 1/2 cups Warm Water (about 105-115°F)
- 2 tablespoons Unsalted Butter, melted, plus more for greasing
- Cornmeal or Semolina, for dusting
Instructions
- In a large bowl, whisk together the flour, sugar, and salt.
- In a separate small bowl, dissolve the yeast in the warm water. Let it sit for 5 minutes until foamy.
- Pour the yeast mixture and the melted butter into the dry ingredients. Mix with a wooden spoon until just combined into a shaggy, sticky dough. Do not knead.
- Cover the bowl with plastic wrap and let the dough rise in a warm place for 1 to 1.5 hours, or until doubled in size. This is your no-knead bread dough.
- Lightly dust a clean surface with flour. Gently scrape the dough out and pat it into a rough rectangle about 3/4 inch thick.
- Use a 3-inch round cutter (or a glass rim) to cut out the muffins. Reroll scraps once if needed.
- Generously dust a baking sheet or pizza peel with cornmeal or semolina. Place the cut dough rounds on the prepared surface, leaving space between them.
- Cover the rounds loosely with plastic wrap and let them rest for a second proof for 30 minutes.
- Heat a large, dry cast-iron skillet or griddle over low heat. The temperature must remain low to cook the inside thoroughly without burning the outside.
- Carefully place the muffins onto the warm skillet, ensuring they do not touch. Cook for 8 to 12 minutes per side, until golden brown. If they brown too fast, reduce the heat.
- Once cooked, remove the muffins from the skillet. For the best nooks and crannies texture, split them open using a fork rather than slicing with a knife.
- Toast before serving with your favorite toppings.
Notes
- Use low heat when cooking on the skillet; slow cooking is key to developing the internal structure and those famous crannies.
- Do not use oil or butter in the skillet for cooking; cook them dry.
- Split the muffins with a fork to maximize the surface area for butter absorption.
Nutrition
- Serving Size: 1 muffin
- Calories: 180
- Sugar: 2
- Sodium: 250
- Fat: 3
- Saturated Fat: 1
- Unsaturated Fat: 2
- Trans Fat: 0
- Carbohydrates: 34
- Fiber: 1
- Protein: 5
- Cholesterol: 0