
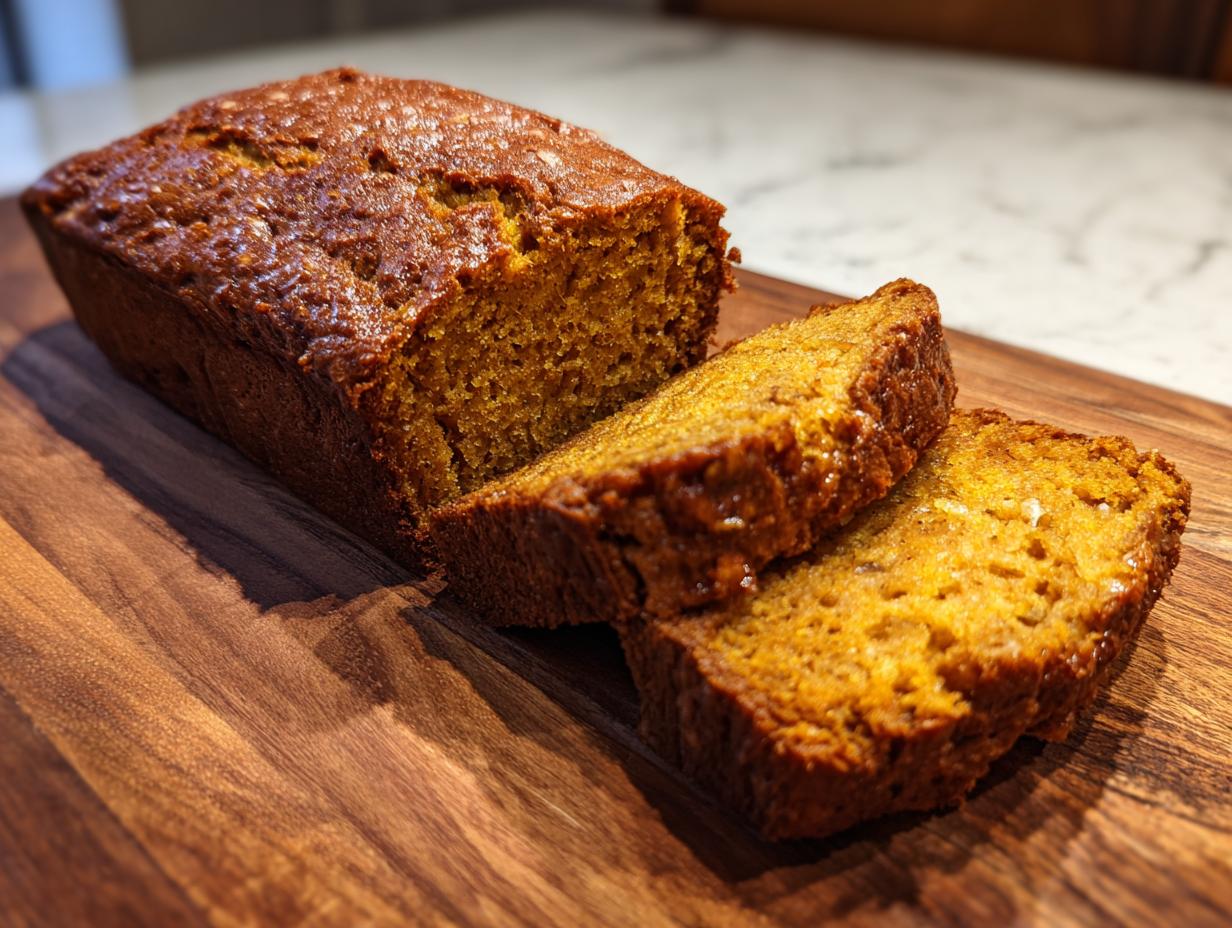
Oh, that smell! You know the one. That warm, comforting haze that fills the air when fall baking season officially kicks off? It just feels like home, doesn’t it? It reminds me so much of my own kitchen, just like it reminds Maddie Thompson, the heart behind MDLATDMM Recipes. She learned from her own grandma that the best food comes from simple ingredients and lots of love – a philosophy I totally live by! That’s why I’m so excited to share this absolute gem of a recipe with you today: a super-moist, one-bowl pumpkin banana bread. Seriously, it’s the perfect blend of sweet bananas and cozy fall spices, and guess what? You can whip it up without a sink full of dishes. It’s exactly the kind of reliable, delicious comfort food we’re all about here, made with that home-cook-to-home-cook care you can trust. You can read more about our story and philosophy right here!

- Why You'll Love This Moist Pumpkin Banana Bread
- Ingredients for Your Perfect Banana Pumpkin Loaf
- Equipment Needed for One Bowl Baking
- Step-by-Step Guide to Making Your Pumpkin Banana Bread
- Tips for Success with Your Fall Baking Recipe
- Ingredient Notes and Substitutions for Banana Pumpkin Loaf
- Make-Ahead and Freezer Friendly Bread Tips
- Frequently Asked Questions About Pumpkin Banana Bread
- Estimated Nutritional Information
- Share Your Fall Baking Creations!
Why You’ll Love This Moist Pumpkin Banana Bread
Honestly, what’s not to love about this banana pumpkin loaf? It’s a total win-win-win in my kitchen, and I think you’ll totally agree!
- It’s ridiculously easy! Seriously, it’s a true one-bowl wonder. Mix your dry stuff, dump in your wet stuff, stir, and bake. Done. Less mess, more deliciousness!
- Super-moist texture, guaranteed. Thanks to those ripe bananas and creamy pumpkin, this quick bread stays perfectly tender and won’t dry out, even after a day or two.
- Hello, fall flavor! That cozy blend of cinnamon, nutmeg, and cloves with the sweet banana and earthy pumpkin is just pure autumn bliss in every single bite.
- So versatile! Grab a slice for a quick breakfast on the go, pair it with your afternoon coffee, or slice it up for a lovely edible gift. It fits any occasion!
- Perfect for busy days. When you need a little homemade goodness but don’t have hours to spare, this recipe is your best friend. Easy, quick, and always a crowd-pleaser.
Ingredients for Your Perfect Banana Pumpkin Loaf
Alright, let’s get our ingredients ready for this amazing pumpkin banana bread! Trust me, having everything prepped makes the whole process so much smoother. It’s all about getting those perfect ratios for that super-moist texture we’re aiming for!
- 1 ½ cups all-purpose flour: This is our main structure builder. Just spoon it into your measuring cup and level it off!
- 1 teaspoon baking soda: This little guy gives our bread its rise. Make sure it’s fresh!
- ½ teaspoon salt: Don’t skip this! It really wakes up all the other flavors.
- 1 teaspoon ground cinnamon: Hello, cozy fall vibes! Cinnamon is key here.
- ½ teaspoon ground nutmeg: Just a hint of warmth that pairs perfectly with cinnamon and pumpkin.
- ¼ teaspoon ground cloves: This one’s potent, so a little goes a long way to add that classic spice blend.
- 2 ripe bananas, mashed: The riper, the better, folks! Look for those brown spots – they’re packed with sweetness and moisture. Mash ’em up good with a fork.
- ½ cup granulated sugar: For that essential sweetness.
- ½ cup packed light brown sugar: This adds a lovely caramel note and extra moisture. Make sure to really pack it into the measuring cup!
- ½ cup pumpkin puree: Use the plain pumpkin puree, not pumpkin pie filling. It’s just pure pumpkin magic!
- 2 large eggs: These bind everything all together and give our bread richness.
- ½ cup vegetable oil: This is our secret weapon for that ultra-moist texture. Any neutral oil like canola or sunflower will work beautifully.
- 1 teaspoon vanilla extract: A little splash of vanilla always makes baked goods taste extra special.
Equipment Needed for One Bowl Baking
Okay, so to make this amazing pumpkin banana bread, you don’t need a whole fancy setup. The beauty of this recipe is its simplicity! Here’s what you’ll want to have ready to go:
- A 9×5 inch loaf pan: This is the classic size for a beautiful, tall loaf.
- A large mixing bowl: This is where all the magic happens – the actual “one bowl” part!
- A separate medium bowl: Just for mixing up those wet ingredients before they join the party in the big bowl.
- A whisk: For getting those dry ingredients nicely combined.
- A fork or potato masher: To get your bananas nice and smooth.
- A spatula or spoon: For gently stirring everything together.
- A wire rack: Crucial for letting your masterpiece cool down perfectly.
- A measuring cup set and spoon set: Because precision is still key, even in easy recipes!
Step-by-Step Guide to Making Your Pumpkin Banana Bread
Alright, let’s get this deliciousness in the oven! Making this pumpkin banana bread is honestly pretty straightforward, and that’s the beauty of it. Just follow these steps and you’ll have a warm, fragrant loaf ready in no time. Remember, the goal is moist perfection, not a complicated process! These steps are practically a recipe for the best breakfast any day, just like you’d find on our easy breakfast ideas page!
Mixing the Batter for Your Banana Pumpkin Loaf
First things first, get that oven preheating to 350°F (175°C) and make sure your loaf pan is greased and floured. Now, grab your big bowl! Whisk together the flour, baking soda, salt, and all those glorious spices – cinnamon, nutmeg, and cloves. In your separate medium bowl, mash those super ripe bananas really well, then stir in the sugars, pumpkin puree, eggs, oil, and vanilla until it’s all smooth and well combined. Now, pour that wet mixture right into the bowl with your dry ingredients. Gently fold it all together until you *just* don’t see any dry flour streaks. Seriously, stop stirring as soon as it’s combined. Overmixing is the enemy of a tender crumb, and we want this banana pumpkin loaf to be as soft as can be!
Baking Your Moist Quick Bread to Perfection
Once your batter is just mixed, pour it evenly into your prepped loaf pan. You want to pop it into that preheated oven right away so it starts to work its magic. It’ll need to bake for about 55 to 65 minutes. Mine usually takes closer to 60, but ovens can be sassy! The best way to know it’s done is the skewer test. Just carefully insert a wooden skewer or a thin knife right into the center of the bread. If it comes out clean, or with just a few moist crumbs attached (not gooey batter!), then it’s ready to go. Ooh, the smell at this stage is just divine!
Cooling and Slicing Your Cinnamon Spice Bread
Patience, my friends, patience! It’s tough, I know, but letting it cool properly is super important. Let that beautiful loaf hang out in the pan for about 10 minutes. This helps it set up a bit so it doesn’t fall apart when you turn it out. Then, carefully invert it onto a wire rack and let it cool *completely*. If you try to slice into it while it’s still warm, it’ll be gummy and just fall apart – trust me, I’ve been there! For those perfect, clean slices that show off all those lovely fall spices, use a good serrated knife. It makes all the difference for this cinnamon spice bread!
Tips for Success with Your Fall Baking Recipe
Okay, let’s talk about getting *your* pumpkin banana bread absolutely perfect, just like it comes out of my oven every single time! It’s all about a few little tricks that make a huge difference. When the weather turns crisp and cozy, there’s nothing better than a loaf that’s bursting with flavor and has that melt-in-your-mouth, super-moist texture. Think of this as your secret weapon for amazing fall baking, kind of like how we approach our awesome fall pasta salad – simple steps, big flavor!
- Bananas: The Blacker, The Better! Seriously, don’t shy away from those bananas that look past their prime. The more brown spots they have, the sweeter they are and the more moisture they’ll give your bread. It’s a game-changer for that amazing fruity depth.
- Don’t Overmix, I Beg You! This is probably the biggest tip for a tender, moist loaf. Mix until just combined, and then stop! Overmixing develops the gluten too much and can lead to a tough, dry bread. We want fluffy, not tough!
- Room Temperature Everything! Make sure your eggs and any other dairy (if you were to add milk or sour cream, which isn’t in this version but might be in others!) are at room temperature. This helps everything emulsify beautifully, creating a smoother batter and a more even bake.
- Measure Flour Smartly. Spoon your flour into the measuring cup and then level it off with a straight edge. Scooping directly from the bag can pack too much flour in, which can also make your bread a bit dry. We’re aiming for moist, remember?
Ingredient Notes and Substitutions for Banana Pumpkin Loaf
Let’s chat a little more about some of the ingredients in this fantastic pumpkin banana bread. Knowing *why* we use certain things can really boost your baking confidence, and if you’re missing something, no worries! We can totally figure out a swap.
First off, the pumpkin puree. You absolutely want to grab the plain canned pumpkin puree, not the pumpkin pie filling. The pie filling already has sugar and spices added, which would totally throw off the balance of flavors in our loaf. We want to control those spices ourselves! The pumpkin itself adds tons of moisture, which is key for that super-moist texture.
And speaking of moisture, let’s talk about that vegetable oil. While butter adds a lovely flavor, oil is king when it comes to keeping quick breads incredibly moist and tender for days. If you don’t have vegetable oil, any neutral-flavored oil like canola or sunflower oil will work like a charm. Just make sure it’s not olive oil or anything with a strong flavor!
If you wanted to get fancy with the sugars, you could swap out some of the granulated sugar for more brown sugar, or even use coconut sugar for a different flavor profile. And if you need a gluten-free option? You can usually get away with a good quality 1-to-1 gluten-free baking flour blend, just make sure it contains xanthan gum!
Make-Ahead and Freezer Friendly Bread Tips
Okay, so this pumpkin banana bread is so delicious, you’re probably going to want to make a double batch! Good news: it stores like a dream. For short-term storage, just wrap the completely cooled loaf tightly in plastic wrap, then tuck it into an airtight container or another layer of foil. It’ll stay wonderfully moist at room temperature for a good 2-3 days. But if you want to have this moist quick bread stashed away for future cravings or hostess gifts – and let me tell you, it makes the best gift! – freezing is your best friend.
To freeze this banana pumpkin loaf, make sure it’s completely cool. Wrap it super snug in a layer of plastic wrap, ensuring there are no air gaps, then add a second layer of heavy-duty foil. You can also pop the wrapped loaf into a freezer-safe bag for extra protection. It’ll keep beautifully in the freezer for up to 3 months. And when that craving hits? Just unwrap it and let it thaw overnight on the counter, or pop a slice in the microwave for a few seconds for a warm treat. Honestly, having a slice of this fall baking goodness ready to go is a total lifesaver, kind of like having those no-bake protein bars on hand!
Frequently Asked Questions About Pumpkin Banana Bread
Got questions about whipping up this amazing pumpkin banana bread? I’ve got you covered! It’s a pretty straightforward recipe, but sometimes a little clarification goes a long way when you’re baking. Let’s dive into some common things people ask!
Can I use pumpkin pie filling instead of puree?
Oh, that’s a common one! It’s really best to stick with plain pumpkin puree for this banana pumpkin loaf. Pumpkin pie filling already has added sugars and spices. If you used it here, your bread would likely be way too sweet and the spice balance would be all off. We want that pure pumpkin flavor to shine through, alongside our lovely spice blend, so stick to the plain stuff! If you love pumpkin, check out these yummy pumpkin snickerdoodle cookies or these amazing pumpkin bars!
How do I store leftover pumpkin banana bread?
Great question! This moist quick bread stays fantastic. Once it’s completely cooled, wrap it up snug in plastic wrap, then maybe an airtight container or a second layer of foil. It’ll stay super moist on the counter for about 2-3 days. If you want it to last longer, definitely pop it in the freezer (check out my tips on that in the make-ahead section!). It’s almost as good as fresh!
Can I make this recipe gluten-free?
You bet! While this recipe uses all-purpose flour, you can absolutely swap it out for a good quality gluten-free baking blend that’s made for 1-to-1 substitution. Just make sure your blend includes xanthan gum, as that helps give the bread the right structure. You might find the texture is slightly different, but it’ll still be wonderfully moist and delicious. Happy baking!
My bananas aren’t super ripe, can I still make this?
Honestly, you *can*, but it won’t be quite the same! Those really ripe, even blackened, bananas are your secret weapon for sweetness AND moisture. If yours are just yellow, they won’t contribute as much flavor or moisture. You could try mashing them and maybe letting them sit out for a day or two longer, or you might need to add a tiny bit more sugar or a splash of milk. But trust me, waiting for those super ripe ones is worth it for the best pumpkin banana bread flavor!
Estimated Nutritional Information
Alright, let’s talk numbers! While every batch of this delicious pumpkin banana bread can vary a little depending on the exact ripeness of your bananas or the brand of pumpkin puree you use, here’s a general idea of what you’re looking at per slice. These are estimates, of course, but they’ll give you a good ballpark for this wonderfully moist quick bread. If you’re looking for other satisfying options, maybe check out these banana protein muffins or these delightful pumpkin protein cups for a different treat!
- Serving Size: 1 slice
- Calories: Approximately 300
- Fat: Around 15g (with about 2g saturated fat)
- Carbohydrates: Roughly 40g
- Sugar: About 25g
- Fiber: Around 2g
- Protein: Approximately 4g
- Cholesterol: About 50mg

Share Your Fall Baking Creations!
I just absolutely *love* hearing from you and seeing what you whip up in your kitchens! Did you try this pumpkin banana bread? Did it turn out perfectly moist? Please, I’d be so thrilled if you’d leave a comment below and let me know how yours turned out, or even give it a star rating! And if you snapped a pic of your gorgeous loaf, please tag us on social media – I’d love to see your amazing fall baking creations!
PrintMoist Pumpkin Banana Bread
A simple one-bowl recipe for a super-moist fall quick bread that combines ripe bananas with pumpkin puree and warm spices. Perfect for breakfast or gifting.
- Prep Time: 15 min
- Cook Time: 60 min
- Total Time: 75 min
- Yield: 1 loaf (about 10 slices) 1x
- Category: Quick Bread
- Method: Baking
- Cuisine: American
- Diet: Vegetarian
Ingredients
- 1 ½ cups all-purpose flour
- 1 teaspoon baking soda
- ½ teaspoon salt
- 1 teaspoon ground cinnamon
- ½ teaspoon ground nutmeg
- ¼ teaspoon ground cloves
- 2 ripe bananas, mashed
- ½ cup granulated sugar
- ½ cup packed light brown sugar
- ½ cup pumpkin puree
- 2 large eggs
- ½ cup vegetable oil
- 1 teaspoon vanilla extract
Instructions
- Preheat your oven to 350°F (175°C). Grease and flour a 9×5 inch loaf pan.
- In a large bowl, whisk together the flour, baking soda, salt, cinnamon, nutmeg, and cloves.
- In a separate medium bowl, mash the ripe bananas. Stir in the granulated sugar, brown sugar, pumpkin puree, eggs, vegetable oil, and vanilla extract until well combined.
- Pour the wet ingredients into the dry ingredients and stir until just combined. Do not overmix.
- Pour the batter into the prepared loaf pan and spread evenly.
- Bake for 55-65 minutes, or until a wooden skewer inserted into the center comes out clean.
- Let the bread cool in the pan for 10 minutes before inverting it onto a wire rack to cool completely.
Notes
- For best results, use very ripe bananas.
- This bread freezes well. Wrap it tightly in plastic wrap and then in foil. It can be frozen for up to 3 months.
- To slice, allow the bread to cool completely. Use a serrated knife for clean cuts.
Nutrition
- Serving Size: 1 slice
- Calories: 300
- Sugar: 25g
- Sodium: 250mg
- Fat: 15g
- Saturated Fat: 2g
- Unsaturated Fat: 13g
- Trans Fat: 0g
- Carbohydrates: 40g
- Fiber: 2g
- Protein: 4g
- Cholesterol: 50mg